spaghetti squash
Cook Recipes

Deliciously Loaded Spaghetti Squash Boats for the Best Guilt-Free Dinner

This article may contain links from my partners. I may receive a small commission if you make a purchase through a link. Please read my disclosure and how I make money here.

Spaghetti squash boats are the perfect healthy, low-carb dinner idea that are packed with flavor.

The squash strands create a light, creamy spaghetti squash texture that pairs perfectly with melted cheese and a hearty sauce.

Spaghetti squash boats are also incredibly easy to make—just roast, fill, and bake!

spaghetti squash boats

How to tell if spaghetti squash is ripe?

To tell if a spaghetti squash is ripe, check for a deep yellow color and a firm, hard skin. It should feel heavy and have no soft spots or blemishes.

If the squash is still green or has a pale-yellow hue, it’s likely an unripe spaghetti squash. Unripe squash won’t have developed its full sweetness and may have a tougher, less desirable texture.

What does spaghetti squash taste like?

It’s slightly sweet flavor and has a texture similar to al dente pasta, making it perfect for absorbing the flavors of whatever it’s paired with.

When you make stuffed spaghetti squash, the squash itself takes on the savory richness of the fillings, whether it’s hearty ground turkey, marinara sauce, or roasted vegetables, while still maintaining a light, slightly nutty taste.

spaghetti squash boats

Spaghetti Squash Boats

Spaghetti squash boats are just as savory and make for great lazy Sunday ideas, just like my easy gluten free meatballs, poblano burritos, or crispy chaffle pizza.

Grilled spaghetti squash

Recipe for spaghetti squash boats:

Spaghetti squash: Their slightly sweet, mild flavor makes a perfect low-carb alternative to traditional pasta.

Ground beef: Ground beef adds a savory, satisfying base, and when cooked, it absorbs the seasoning for a balanced, meaty filling.

Marina sauce: A classic tomato-based sauce made with tomatoes, garlic, onions, and herbs. Marinara sauce brings a tangy, slightly sweet, and savory component that complements the squash and beef.

Mozzarella cheese: This soft, melty cheese is mild and creamy, perfect for topping the dish. As it melts, it creates a gooey, golden layer that ties all the ingredients together.

Garlic: Enhances the flavor of the beef and sauce, creating a more robust, savory flavor.

Olive oil: Adds richness and prevents sticking.

Salt and pepper: Helps with flavoring and spice.

Parsley: Fresh flavor to balance the rich, savory elements of the dish

spaghetti squash

Loaded Spaghetti Squash Boats

Spaghetti squash boats are so easy to make, perfect for a busy mom meal planning, gluten free fall recipes and fall recipes kids will love!
Prep Time 10 minutes
Cook Time 40 minutes
Total Time 50 minutes
Course Dinner, Main Course
Cuisine Italian
Servings 2 people

Ingredients
  

  • 2 medium spaghetti squash
  • 1 lb ground beef
  • 1 ½ cups marina sauce
  • 1 cup mozzarella cheese shredded
  • 2 cloves garlic
  • 1 tbsp olive oil
  • salt and pepper to taste
  • fresh parsley

Instructions
 

  • Preheat the oven to 400℉
  • Drizzle the cut sides of the spaghetti squash with olive oil, and sprinkle with salt and pepper.
  • Place the squash halves cut-side down on a baking sheet. Roast for 35-40 minutes or until the flesh is tender and easily scraped with a fork to form "spaghetti-like" strands.

Cook the ground beef.

  • While the squash is roasting, heat olive oil in a skillet over medium heat.
    Add minced garlic and sauté for 1-2 minutes.
  • Add the beef and cook until browned, breaking it up as it cooks.
  • Season with salt and pepper.
  • Stir in the marinara sauce and let it simmer for 5-7 minutes until heated through.
  • Fill each spaghetti squash half with the beef marinara mixture.
  • Sprinkle with mozzarella and Parmesan cheese.
  • Return the filled squash boats to the oven and bake for an additional 10 minutes, or until the cheese is melted and bubbly.
  • Remove from the oven and garnish with chopped parsley if desired.
Keyword butternut squash spaghetti, spaghetti squash boats, spaghetti squash ground turkey

Roasted spaghetti squash boats instructions:

Preheat the oven to 400℉

Drizzle the cut sides of the spaghetti squash with olive oil, and sprinkle with salt and pepper.

Place the spaghetti squash boats with halves cut-side down on a baking sheet. Roast for 35-40 minutes or until the flesh is tender and easily scraped with a fork to form “spaghetti-like” strands.

Cook the ground beef.

spaghetti squash boats

While the squash is roasting, heat olive oil in a skillet over medium heat.

Add minced garlic and sauté for 1-2 minutes.

Add the ground beef and cook until browned, breaking it up as it cooks.

Season with salt and pepper.

Stir in the marinara sauce and let it simmer for 5-7 minutes until heated through.

Fill each spaghetti squash half with the beef marinara mixture.

Sprinkle with mozzarella and Parmesan cheese.

Return the filled squash boats to the oven and bake for an additional 10 minutes, or until the cheese is melted and bubbly.

Remove from the oven and garnish with chopped parsley if desired.

Cutting spaghetti squash tips:

Cutting into these spaghetti squash boats can be tricky because of their tough skin, but these tips will help make it easier and safer:

creamy spaghetti squash

Soften it in the microwave:

  • Poke a few holes in the squash with a fork.
  • Microwave it for 3–5 minutes (depending on size) to slightly soften the skin, making it easier to cut.

Stabilize the squash:

  • Lay the squash on a stable cutting board with a damp towel underneath to prevent slipping.
  • If the squash is too round, trim off a small section of one end to create a flat surface to keep it stable.
spaghetti squash carbs

Use a sharp, sturdy knife:

  • A sharp chef’s knife will help cut through the hard skin more smoothly.
  • Carefully insert the tip of the knife into the squash first, then rock the knife back and forth to cut through.

Cut lengthwise

  • For long strands: Cut the squash lengthwise from stem to end to get longer spaghetti-like strands.
  • For shorter strands: Cut it crosswise into rings, which results in shorter strands.
spaghetti squash ground turkey

Oh, hey there!

Welcome! I’m an aspiring foodie who loves sharing adventures, hikes, local finds, and all things delicious. Wife to an incredible chef and mama to two adorable sous chefs, I’m always creating, sharing and enjoying every bite along the way!

Read more and subscribe to get my most tried and loved recipes delivered straight to your inbox!

imageedit 1 7887394045 1024x1024 2

Can you freeze cooked spaghetti squash?

Yes, you can freeze cooked spaghetti squash! Here’s how to do it properly to preserve its texture and flavor:

Steps to freezing spaghetti squash:

  • Cook the squash: Roast, bake, or microwave the spaghetti squash as usual. Once cooked, scrape the strands out of the shell using a fork.
  • Cool completely: Let the cooked squash cool to room temperature before freezing this helps prevent squishiness.
  • Portion it out: Divide the spaghetti squash into portion sizes that you will use later.
  • Drain excess moisture: If the squash is particularly watery, press it gently with a paper towel or drain it in a colander before freezing.
  • Store in airtight containers: Place the portions in airtight freezer-safe bags or containers. If using freezer bags, remove as much air as possible before sealing to prevent freezer burn.

How long does spaghetti squash last?

Frozen spaghetti squash can last up to 6-8 months in the freezer.

Thawing and reheating:

  • Thaw: Place the frozen squash in the fridge overnight or thaw it in the microwave.
  • Reheat: Warm it up on the stovetop or microwave, and it’s ready to use!

Freezing spaghetti squash is a great way to save time and enjoy it later without losing much of its texture or flavor.

spaghetti squash boats

If you’re looking for the best spaghetti squash recipe, these loaded spaghetti squash boats are a must-try.

Packed with savory ground beef, marinara sauce, and melty mozzarella cheese, they’re the perfect combination of healthy and delicious.

The spaghetti squash strands mimic pasta, but with fewer carbs, making this dish a guilt-free, satisfying meal.

pin
dinner keto recipes
Cook Recipes

Quick and Delicious Last Minute Dinner Recipes

This article may contain links from my partners. I may receive a small commission if you make a purchase through a link. Please read my disclosure and how I make money here.

Need some inspiration for last minute dinner recipes? You’re in the right place! Whether you’re craving a comforting bowl of creamy zucchini pasta, a perfectly cooked beef sirloin steak sous vide, a low-carb twist with crispy chaffle pizza, or flavorful poblano enchiladas, these quick and delicious meals are here to save your evening.

Really easy, last minute dinner recipes

Chicken Poblano Enchiladas

This chicken poblano enchiladas recipe is a favorite, it’s one of my best, quick last minute dinner ideas, very tasty and delicious!

1
chicken poblano enchiladas
Cheesy Chicken Poblano Enchiladas
This savory chicken poblano enchiladas with tender shredded chicken, smoky roasted poblano peppers and sweet bell peppers wrapped in soft tortillas and topped with rich, melty cheddar cheese, making every bite of these creamy poblano chicken enchiladas the best.
Check out this recipe

Spaghetti Squash Boats

Try out this easy spaghetti squash ground turkey recipe for an easy last minute dinner recipe.

2
spaghetti squash
Deliciously Loaded Spaghetti Squash Boats for the Best Guilt-Free Dinner
Check out this recipe
last minute dinner recipes

Beef burritos are a favorite last minute dinner idea, you can really add ingredients in and make it tasty to any one’s preference.

3
poblano avocado burrito
Cheesy Poblanos Burritos
Cheesy, spicy beef poblano avocado burrito featuring crispy tortillas filled with salsa, yogurt, beef, avocado, poblanos, and cheese.
Check out this recipe

Oh, hey there!

Welcome! I’m an aspiring foodie who loves sharing adventures, hikes, local finds, and all things delicious. Wife to an incredible chef and mama to two adorable sous chefs, I’m always creating, sharing and enjoying every bite along the way!

Read more and subscribe to get my most tried and loved recipes delivered straight to your inbox!

imageedit 1 7887394045 1024x1024 2

I was featured in

4
cheesy lemon chicken pasta
Creamy Lemon Chicken Pasta
The best creamy lemon chicken pasta marinated in zesty lemon, sweet zucchini and squash with a slight nutty flavor paired with al dente pasta and tossed in a lemon-infused creamy sauce.
Check out this recipe
5
beef tacos healthy
Cheddar Cheese Shell Tacos
Delicious and satisfying easy healthy tacos that are keto-friendly and mouthwatering.
Made with crispy, chedar cheesy taco shells, these tacos are filled with seasoned ground beef, topped with fresh salsa, and garnished with cilantro.⅗⅗
Check out this recipe
pin
creamy almond butter
Breakfast

Ridiculously Easy and Creamy Vitamix Almond Butter

This article may contain links from my partners. I may receive a small commission if you make a purchase through a link. Please read my disclosure and how I make money here.

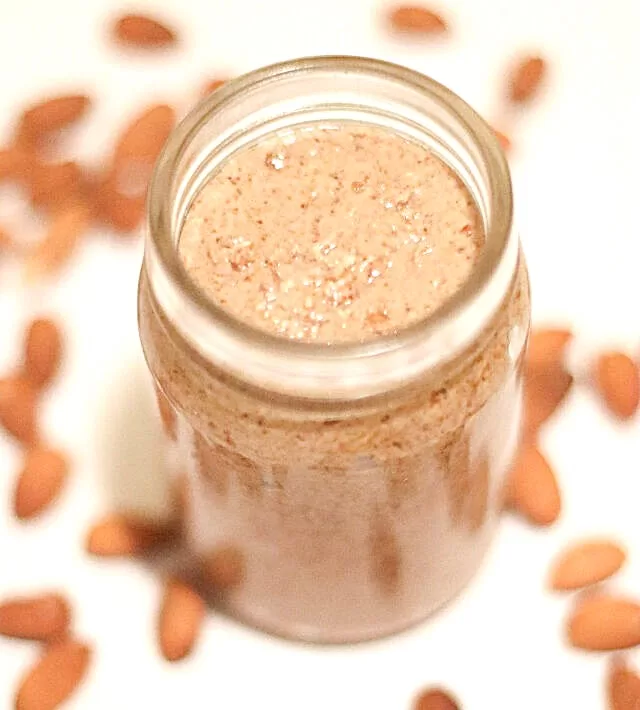
This incredibly smooth and creamy vitamix almond butter is a favorite in our kitchen.

If you’re whipping up this batch of this easy homemade honey almond butter or enjoying the deep, nutty flavor of toasted almond butter, it’s sure to become a staple in your pantry.

Sit back and enjoy the simple pleasure of this easily-made, creamy Vitamix almond butter—it’s a treat you’ll love every time!

creamy almond butter

What is almond butter?

If you haven’t tried almond butter yet, I hate to say it, but you’re missing out! While store-bought can be pricey, making it at home is so easy and much more affordable.

It’s a smooth, creamy spread made by simply blending almonds into a delicious paste.

When it comes to almond butter vs peanut butter, almond butter offers a milder, slightly sweeter flavor and is packed with more vitamins and minerals.

So, is almond butter better than peanut butter?

Well, it depends on what you’re looking for!

Almond butter has more vitamins, minerals, and healthy fats compared to peanut butter, making it a great option if you’re after a nutrient boost.

Peanut butter has a bit more protein but more sugars.

What does almond butter taste like?

Almond butter on its own has a rich, slightly nutty taste, but you can add natural sweeteners like honey or maple syrup.

A favorite- honey almond butter brings a balance of sweetness and nuttiness, making it perfect for spreading on toast or using in desserts.

If you prefer a different flavor, you can create maple almond butter by simply mixing in a bit of maple syrup, which adds a deep, caramel-like sweetness.

maple almond butter

Creamy Almond Butter Add Ins: Cinnamon, sea salt, cocoa or expresso powder, chia or flax seeds, crushed pecans, sunflower seeds, dried fruits like chopped dates.

What to do with almond butter

Make these delicious brownie protein balls, blend into chocolate almond butter smoothies, fruit dips or overnight oats.

honey almond butter

How to make almond butter

Roast the Almonds: Preheat your oven to 350°F (175°C). Spread the almonds on a baking sheet and roast them for 10-12 minutes until lightly golden. Allow them to cool for a few minutes.

organic almond butter
almond butter cinnamon

Blend the Almonds: Place the almonds in a high-speed blender or food processor. Blend for about 5-10 minutes, stopping occasionally to scrape down the sides. At first, the almonds will turn into a coarse meal, then a thick paste, and eventually smooth, creamy almond butter.

almond butter maple

Keep Blending: The oils will release from the almonds as they continue to break down, turning the mixture creamy. If it’s too thick, add a tablespoon of neutral oil (like coconut or avocado) to help with the texture.

cinnamon almond butter
maple almond butter
ALMOND

Creamy Vitamix Almond Butter

Creamy vitamix almond butter is so easy, delicious and quick to make. Spread onto bread, mix in with oats, yogurt or use it to make nutty flavored sauces!
Course Breakfast, Dessert
Cuisine American

Equipment

  • 1 Vitamix

Ingredients
  

  • 2 cups almonds unsalted
Keyword almond butter with cinnamon, creamy almond butter

Store: Transfer the almond butter to an airtight container and store at room temperature for up to a week or refrigerate for up to a month.

vitamix almond butter

Follow me on Pinterest

imageedit 1 7887394045 1024x1024 2
@hikecookshare

A place where adventure meets flavor! Here, I share my love for the outdoors, delicious recipes, and all the hidden gems I find along the way. Whether you’re looking for healthy, easy-to-make meals, discovering new hikes, or finding tips for cooking while exploring nature, you’ll find it here.

Is almond butter good for you?

Yes, honey almond butter is high in protein, loaded with essential vitamins and minerals, rich in fiber, and low in carbs!

How much protein is in almond butter?

A 2-tablespoon serving of almond butter contains around 6-7 grams of protein.

Does almond butter need refrigeration?

Yes, this creamy vitamix almond butter needs refrigerated to maintain the freshness.

creamy almond butter

Enjoy your homemade Vitamix almond butter or add a touch of sweetness with this delicious almond honey butter.

It’s perfect for spreading on toast, adding to smoothies, or using in your favorite recipes.

Don’t forget to subscribe for the most loved recipes delivered straight to your inbox!

pin
chicken poblano enchiladas
Cook Recipes

Cheesy Chicken Poblano Enchiladas

This article may contain links from my partners. I may receive a small commission if you make a purchase through a link. Please read my disclosure and how I make money here.

Biting into these warm, cheesy chicken poblano enchiladas that are bursting with flavors of tender shredded chicken, roasted poblano peppers and bell peppers brings a fresh crunch and delicious flavor to any low carb chicken enchiladas dish.
 
Creamy poblano chicken enchiladas are baked creating a golden crust of cheese on top and using Greek yogurt as sour cream substitute makes this creamy chicken enchiladas recipe the best poblano enchiladas.
 
This post is all about the best, creamy flavorful chicken poblano enchiladas, you have discovered the best recipe.
 
 
chicken poblano enchiladas

Chicken and Poblano Enchiladas Ingredients:

  • Cooked chicken breast (shredded): Provides a lean source of protein and a satisfying texture that absorbs all the rich flavors.
  • Flour or corn tortillas: Soft and pliable, these tortilla wraps create the crispiest low carb chicken enchiladas.
  • Poblano Peppers: Smoky and slightly spicy, these peppers add a depth of flavor and heat that complements the cheesy flavor.
  • Cheddar cheese: Rich and melty cheddar cheese binds all of the fillings and adds a creamy tangy flavor to every bite.
  • Red and orange bell pepper: Adds a crunch of sweetness, balancing the smokiness of the poblano peppers
chicken enchiladas keto

Just like my Spicy Cheesy Avocado Poblano Burritos or my Cheddar Cheese Shell Tacos that are healthy and bursting with flavor that will be sure to satisfy your cravings.

chicken poblano enchiladas

Cheesy Chicken Poblano Enchiladas

This savory chicken poblano enchiladas with tender shredded chicken, smoky roasted poblano peppers and sweet bell peppers wrapped in soft tortillas and topped with rich, melty cheddar cheese, making every bite of these creamy poblano chicken enchiladas the best.
Prep Time 20 minutes
Cook Time 35 minutes
Total Time 55 minutes
Course Dinner
Cuisine Mexican
Servings 4 people

Equipment

  • 1 pan

Ingredients
  

  • 4 flour tortillas
  • 2 chicken breast cooked, shredded
  • 2 poblano peppers roasted, chopped
  • 1 red bell pepper diced
  • 1 orange bell pepper diced
  • 2 cups cheddar cheese shredded
  • 1 cup Greek yogurt

Instructions
 

Roast poblano peppers

  • Preheat oven to 450℉
    Place poblano peppers on a baking sheet and roast for about 15 minutes.
    Remove from oven and place in a bowl, cover with lid. Let them steam for 19 minutes.
    Peel off skins, remove seeds and stems and chop finely.

Cook the chicken

  • In a large skillet, heat oil over medium and add chicken breasts to skillet.
    Sear chicken for about 5-7 minutes, each side.
    Once cooked, transfer to cutting board and pull apart with two forks.

Prepare the filling

  • In a large skillet, heat oil over medium heat.
    Add diced red and orange bell peppers.
    Sauté until soft.
    Stir in the shredded chicken, roasted poblano peppers and cheddar cheese.
    Mix well and cook until everything is heated.

Assemble the enchiladas

  • Preheat oven to 350℉
    Warm tortillas to make them pliable.
    Spoon some of the filling into tortilla and roll them up.
    Next, place them in oven.
    Sprinkle cheddar cheese over top

Bake

  • Cover with foil and bake for 20 minutes.
    Remove foil and bake for additional 10 minutes.

Serve

  • Serve with a side of sweet potato fries or rice.
    Garnish with fresh lime.
Keyword chicken poblano enchiladas, easy creamy chicken enchiladas, gluten free chicken enchiladas, poblano enchiladas

How to make chicken enchiladas

  1. Roast poblano peppers:
    Preheat oven to 450℉
    Place poblano peppers on a baking sheet and roast for about 15 minutes.
    Remove from oven and place in a bowl, cover with lid. Let them steam for 19 minutes.
    Peel off skins, remove seeds and stems and chop finely.
  2. Cook the chicken:
    In a large skillet, heat oil over medium and add chicken breasts to skillet.
    Sear chicken for about 5-7 minutes, each side.
    Once cooked, transfer to cutting board and pull apart with two forks.
  3. Prepare the filling:
    In a large skillet, heat oil over medium heat.
    Add diced red and orange bell peppers.
    Sauté until soft.
    Stir in the shredded chicken, roasted poblano peppers and cheddar cheese.
    Mix well and cook until everything is heated.
  4. Assemble the enchiladas:
    Preheat oven to 350℉
    Warm tortillas to make them pliable.
    Spoon some of the filling into tortilla and roll them up.
  5. Next, place them in oven:
    Sprinkle cheddar cheese over top and cover with foil.
  6. Bake:
    Bake for 20 minutes.
    Remove foil and bake for additional 10 minutes.
  7. Serve:
    Serve with a side of sweet potato fries or rice.
    Garnish with fresh lime.
gluten free chicken enchiladas


What to serve with chicken enchiladas:

  • You can serve rice, sweet potato fries or a side salad for a healthy sides for enchiladas.
chicken poblano enchiladas

Top with cheddar cheese on your poblano enchiladas to add a rich, melty layer of flavor that brings everything together.

keto green chili chicken enchiladas

Add your favorite salsa to the poblano cream sauce for an extra kick of flavor.

creamy poblano chicken enchiladas

Can you freeze enchiladas?

  • Yes, this easy creamy chicken enchiladas are perfect for meal planning!
    Stop before baking. Its best to use flour tortillas. Place in a freezer safe dish and cover with plastic or aluminum foil to prevent freezer burn. When time remove and bake at 350°F at 30 minutes.
low carb chicken enchiladas

Chicken poblano enchiladas most asked questions:

How to make shredded chicken for enchiladas?


  • In a large skillet, heat oil over medium and add chicken breasts to skillet.  Sear chicken for about 5-7 minutes, each side.


  • Once cooked, transfer to cutting board and pull apart with two forks.


What’s in chicken enchiladas?

  • This creamy chicken enchiladas recipe is unbeatable! All you need for enchiladas are tortilla wraps, shredded chicken, peppers, onions, spices, cheese, and your favorite sauce.
chicken poblano enchiladas

How to store chicken poblano enchiladas?

  • Refrigerate in an airtight container or cover baking dish with aluminum foil. Store up to 3-4 days.

Tips for chicken poblano enchiladas:

  • When cooking the chicken, If the chicken breasts are thick, add 1 cup of chicken broth or water to the skillet, cover it with a lid, and let it simmer for another 5-10 minutes until fully cooked.
These Chicken and Poblano Enchiladas are sure to become a favorite in your meal rotation, offering a combination of smoky, cheesy, and hearty flavors.
 
Whether you’re prepping for a busy week or hosting a gathering, this recipe for enchiladas poblanos is both comforting and easy to make. With options to refrigerate or freeze leftovers, you’ll always have a delicious meal ready to go.
pin
best protein overnight oats
Breakfast

Happy Mornings with Peanut Butter and Jelly Overnight Oats

This article may contain links from my partners. I may receive a small commission if you make a purchase through a link. Please read my disclosure and how I make money here.

Peanut butter and jelly overnight oats always start my mornings off happy, just like enjoying PB&J as a snack after school growing up. Those nostalgic moments bring a smile to my face, and this tasty breakfast brings the same happiness and comfort, making every day feel like a trip down memory lane.

This peanut butter and jelly overnight oats recipe combine the creamy richness of peanut butter with the sweet and tangy flavor of jelly, all combined in a hearty base of oats.

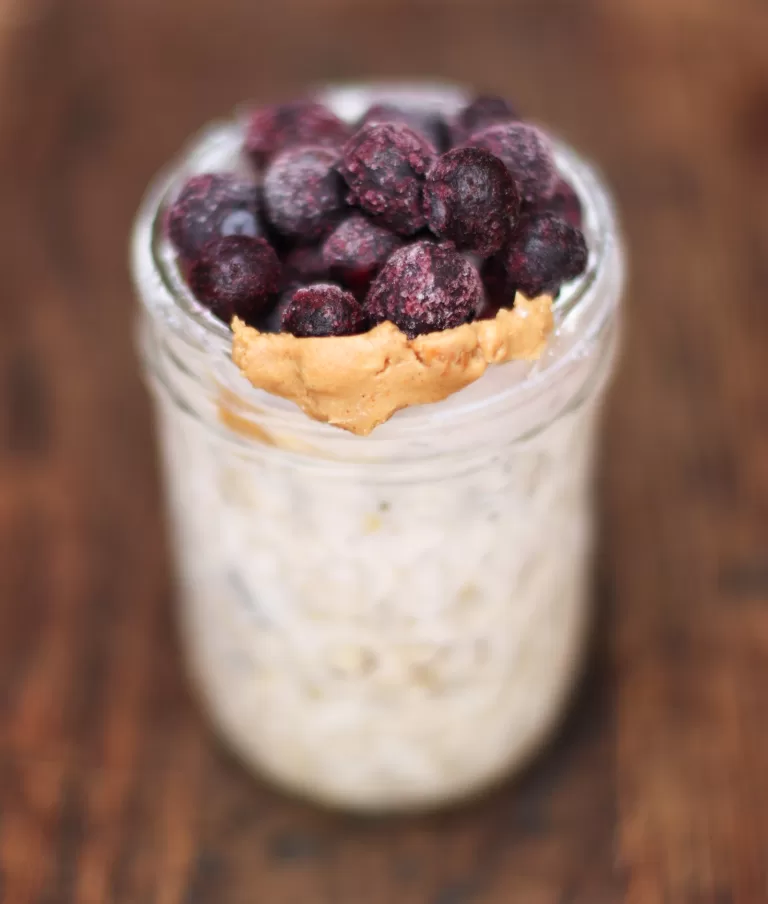
Frozen fruit in overnight oats will become your favorite morning go-to! The juices in the overnight oats frozen berries make the oats so flavorful. This post is all about a nostalgic twist on a classic favorite peanut butter and jelly overnight oats.

best protein overnight oats


What Are Overnight Oats?

Overnight oats are so easy to make – combine oats with milk or water, their usually sweetened with maple syrup, honey, fruits and nuts.

Overnight Oats VS Cooked Oats?

Overnight oats are slightly chewier compared to soft creamier texture that cooked oats are. Soaking your oats helps preserve nutrients such as carbohydrates, fiber and many more nutrients.

Are Overnight Oats Healthy?

Oats contain phytic acid which can reduce the absorption of certain minerals. 

Purchase sprouted oats, ferment the oats by soaking in water and a bit of yogurt or making frozen berry overnight oats with citrus fruits can improve mineral absorption.best easy overnight oats

What types of oats are best for overnight oats?

Rolled oats (old-fashioned oats) are most commonly used for overnight oats because they soften nicely overnight. Quick oats and steel-cut oats can also be used, but they have slightly different textures.

So, Can you make overnight oats with instant oatmeal?

Yes, use the same ratio of liquid to oats as you would with regular rolled oats.

pb and j overnight oats

Can you heat overnight oats?

Yes, you can heat overnight oats if you prefer them warm. Transfer them to a microwave-safe bowl and heat them in short intervals, stirring in between, until heated to your liking.

Ingredients Needed

Rolled oats and milk form the base of this recipe – Add yogurt, chia seeds and maple syrup to this simple overnight oats recipe. 

These ingredients make this easy oats recipe even more satisfying and fulfilling.

  • Rolled Oats: Old-fashioned rolled oats are a must for overnight oats, using quick cooking or steel cut do not have the same creamy texture as rolled oats does.
  • Milk: Hydrates the oats making them soft and creamy texture. I like using whole milk because of the nutrients it provides – protein, calcium and vitamins.
  • Yogurt: Creates the tangy flavor which complements the sweet ingredients that I add. Added bonus for probiotics and calcium/potassium and protein!
  • Chia Seeds: Absorbs the liquid and create a creamy texture. Also contains fiber and omega 3s!
  • Extras: In my recipe, I added a simple peanut butter, jelly and blueberries – you can come up with so many variations!

basic oats recipe

Simple Overnight Oats Ratio

A 1:1 ratio of rolled oats to milk to achieve the perfect consistency. 1/2 cup of oats then you’ll want to use 1/2 cup of milk and 1/4 cup of yogurt to achieve the creaminess and to avoid over soupy oats.

Can You Make Overnight Oats with Water?

Making overnight oats with water is a simple and dairy-free option.

oats simple

best protein overnight oats

Best Overnight Oats

Creamy, protein-packed breakfast with this peanut butter blueberry overnight oats. This effortless recipe combines the nutty goodness of peanut butter with the sweet burst of blueberries, creating a nutritious and delicious way to start your day. Just mix the ingredients, let them sit overnight, and wake up to a ready-to-eat, wholesome meal. Perfect for busy mornings.
Prep Time 10 minutes
Course Breakfast
Cuisine American
Servings 1 people
Calories 561 kcal

Equipment

  • 1 jar

Ingredients
  

  • ½ cup rolled oats
  • 1 tbsp chia seeds
  • ½ cup greek yogurt
  • ½ cup almond milk
  • 2 tbsp peanut butter
  • 1 tbsp honey
  • ½ cup blueberries
  • ½ tsp vanilla extract

Instructions
 

Prepare the base.

  • In a mason jar, combine rolled oats, chia seeds, Greek yogurt, and almond milk. Stir well.

Add the peanut butter.

  • Add the peanut butter, stir to distribute.

Add the sweetener, blueberries and vanilla.

  • Add honey, blueberries and vanilla into the oats, stir.

Mix and refrigerate.

  • Cover and refrigerate for 4-6 hours overnight.

Serve.

    Keyword basic oats recipe, overnight oats

    How To Make Peanut Butter and Jelly Overnight Oats:

    Simply add all of your ingredients in a jar (with a lid on) store overnight in the refrigerator.

    When you’re ready to eat the oats, give them a stir, add your favorite toppings and enjoy!

    You can add the oats to a bowl also and top with your favorite add ons like banana, mango and crunchy homemade granola!

    Try almond butter overnight oats.

    overnight oats jar

    Can you freeze overnight oats?

    Yes, in airtight containers they can be stored in freezer up to 3 months.

    Overnight Oat Add Ins

    This recipe is so versatile, you can add any toppings to take your oats to the next level and satisfy your taste buds! It’s all about preference here.

    Matcha Overnight Oats:

    • Stir in matcha powder for a vibrant green color and earthy flavor, and top with sliced kiwi as a refresher. healthiest overnight oats

    Lemon Overnight Oats

    • Add 1-2tbsp of lemon juice, fresh berries and some honey – tangy with a hint of sweetness!

    basic oats recipe

    How to store:

    In an airtight jar or container, overnight for at least 6-8 hours.

    How long are overnight oats good for?

    Usually 4-5 nights when stored in an airtight container.

    What containers are good for overnight oats and what size mason jar for overnight oats?

    A pint sized jar like these simple mason jars are perfect although anything with an airtight lid will do!

    overnight oats jar


    pin
    Poblanos burritos
    Cook Recipes

    Spicy Cheesy Avocado Poblanos Burritos

    This article may contain links from my partners. I may receive a small commission if you make a purchase through a link. Please read my disclosure and how I make money here.

    If you are looking for the most flavorful beef poblanos burritos with cheesy, crispy tortillas, salsa, yogurt, beef, poblanos and avocado you will find yourself craving this easy beef burritos recipe.

    This burrito recipe is versatile and can easily be a low carb breakfast burritos that you can make ahead breakfast burrito. Just add ground beef and eggs if you enjoy starting your day with a bit of spice.

    poblano avocado burrito

    Why you’ll love this poblano avocado burrito recipe:

    This poblano burrito recipe includes roasted poblano pepper, which adds a smoky and slight spice compared to the traditional burrito. Combined with tender beef, creamy avocado, and melted cheese, this poblano burrito is a flavor packed meal that’s both satisfying and easy to make.

    easy beef burritos recipe

    Poblanos Burritos Ingredients:

    Poblano Peppers: These peppers are mildly spicy with a deep, smoky flavor.

    Ground Beef: Savory and hearty protein.

    Shredded Cheese: Cheddar creates a creamy, melty richness to the cheesy burritos.

    Avocado: Buttery, creamy texture with a subtle, nutty flavor. Helps balance the spiciness of the poblano peppers

    Salsa: Fresh and tangy with a perfect blend of tomatoes, onions, and spice.

    Yogurt: Trust me, Greek yogurt is the best substitute for sour cream! It adds a tangy creaminess.

    Flour Tortillas: Holding all of the ingredients together.

    mexican burritos

    poblano avocado burrito

    Cheesy Poblanos Burritos

    Cheesy, spicy beef poblano avocado burrito featuring crispy tortillas filled with salsa, yogurt, beef, avocado, poblanos, and cheese.
    Prep Time 20 minutes
    Cook Time 25 minutes
    Total Time 45 minutes
    Course Dinner
    Cuisine Mexican
    Calories 450 kcal

    Equipment

    • 1 Baking Sheet
    • 1 large skillet
    • 1 mixing bowl
    • 1 spatula
    • 1 Knife
    • 1 cutting board

    Ingredients
      

    • 2 large poblano peppers
    • 1 lb ground beef
    • 1 avocado sliced
    • 1 cup salsa
    • ½ cup yogurt or sour cream
    • 4 large flour tortillas
    • 1 cup cheddar cheese

    Instructions
     

    • Roast poblano peppers
      2 large poblano peppers
    • On broil until skins are blackened about 8-10 minutes. Set aside in a bowl and cover with a lid for 10 minutes. Then peel off skins, remove seeds and chop the peppers.
    • Cook the beef
    • In a large skillet, cook until browned and cooked through, about 8-10 minutes.
    • Heat up the tortillas 
    • In a pan or microwave, to make them become pliable then add shredded cheese, avocado, salsa, peppers and beef in the center of tortilla.
    • Fold your burrito 
    • Be mindful not to overfill, as this can make folding difficult and can cause the tortilla to tear. As you fold, press the filling gently but firmly to compact it and make the burrito easier to handle.
    • Return to skillet 
    • To make burrito crisp up and hold together better.
    • Serve and Enjoy.
    Keyword crispy burritos, mexican burritos, poblano burrito, poblano burrito recipe, poblanos burritos, poblanos burritos, poblano avocado burrito* poblano burrito recipe crispy burritos Mexican burritos poblano burrito

    best poblano pepper recipes

    Poblano burrito recipe instructions:

    1. Roast poblano peppers on broil until skins are blackened about 8-10 minutes. Set aside in a bowl and cover with a lid for 10 minutes. Then peel off skins, remove seeds and chop the peppers.
    2. Cook the beef In a large skillet, cook until browned and cooked through, about 8-10 minutes.
    3. Heat up the tortillas in a pan or microwave, to make them become pliable then add shredded cheese, avocado, salsa, peppers and beef in the center of tortilla.
    4. Fold your burrito Be mindful not to overfill, as this can make folding difficult and can cause the tortilla to tear. As you fold, press the filling gently but firmly to compact it and make the burrito easier to handle.
    5. Return to skillet to make burrito crisp up and hold together better.
    6. Serve. 

    crispy burritos

    Beef poblano burrito Tip:

    Crisp up your ground beef burrito by placing it seam-side down in a hot skillet over medium heat. Cook for a few minutes on each side until the tortilla is golden brown and crispy. This helps the burrito hold together better and adds a crunch to each bite.

    shredded beef burrito

    And there you have it—your delicious Poblanos Burritos is ready to be enjoyed!

    These burritos are sure to satisfy with their rich flavors and crunch.

    Don’t forget to share your own variations and tips in the comments below—I’d love to hear how you make this recipe your own. If you enjoyed this post, be sure to subscribe for more tasty recipes and cooking tips.

    [mailpoet_form id=”3″]

    poblanos burritos

    6
    beef tacos healthy
    Cheese Shell Tacos
    These tacos boast a crispy, cheesy shell that perfectly complements a savory filling of seasoned beef, and zesty salsa. The cheddar cheese shells add a rich, tangy flavor and a satisfying crunch to every bite. This innovative take on tacos is not only delicious but also gluten-free, making it a perfect option for those with dietary restrictions.
    Cheese Shell Tacos

    pin
    beef tacos healthy
    Cook Recipes

    Cheddar Cheese Shell Tacos

    This article may contain links from my partners. I may receive a small commission if you make a purchase through a link. Please read my disclosure and how I make money here.

    Create the most delicious and satisfying cheddar cheese shell taocs that are easy healthy tacos. These keto-friendly and mouthwatering tacos are made with crispy, cheesy taco shells, filled with seasoned ground beef, topped with fresh salsa, and garnished with cilantro.

    If you’re looking for a way to enjoy a low carb, yet delicious and satisfying meal, these cheddar cheese shell tacos are the best carb free taco shells. 

    Your taco Tuesday with these beef tacos will leave everyone asking for more.

    healthy tacos

    Our family has always had a deep love for tacos, passed down through generations. However, with adopting low-carb lifestyle, we were seeking a way to preserve the beloved tradition without compromising on taste. The idea of using cheese as a shell was a modern twist that allowed us to enjoy tacos in a new, exciting, and healthier way.

    Low Carb Taco Shells

    The key to these keto tacos is high-quality, sharp cheddar cheese. Using fresh, seasonal toppings like ripe tomatoes, crisp cilantro, and creamy avocados enhances the taste and nutritional value of each taco, making this taco recipes healthy!

    carb free taco shells

    We love this easy healthy recipe because it perfectly marries the flavor of cheddar cheese with the fresh ingredients of traditional tacos.

    Are these taco shells gluten free?

    Yes, these cheddar shells add a satisfying crunch, low-carb alternative that doesn’t sacrifice taste. Their a savory shell making it difficult to resist!

    beef tacos healthy

    Creating these easy healthy tacos was a labor of love. It began with experimenting in our kitchen, trying different types of cheese and techniques to achieve the perfect shell.

    We tested various methods – baking, frying and molding until we found the ideal balance of texture and flavor.

    Along the way, we refined our toppings to complement the rich, cheesy base.

    After many delicious trials and taste tests with family and friends, we perfected this easy healthy taco recipe that we can now proudly share with you.

    easy healthy tacos

    Healthy Dinner Tacos Ingredients:

    Cheddar Cheese: The star of the show! Rich in fat and protein while being low in carbohydrates, making it satisfy and flavorful.

    Beef: Not only are these beef tacos delicious and nutritious, but the fat content also creates moisture balancing the crispy texture of the cheddar cheese shell and preventing the dish from feeling dry.

    Tomato: Brings moisture, flavor and balances the richness of cheddar cheese and ground beef.

    Onion: Adds a sharp tangy flavor and a satisfying crunch.

    Cilantro: Enhances the flavor to a citrusy refreshing aroma.

    Lime: Citrusy flavor adds a burst of freshness for overall flavor.

    taco recipes healthy

    Keto Friendly Tacos Instructions:

    Preheat the oven:

        • Preheat your oven to 375°F (190°C).

        • Line a baking sheet with parchment paper to prevent sticking.

      Form the cheese circles:

          • Take 1/2 cup of shredded cheddar cheese and spread it into a thin, even circle on the parchment paper, about 4-5 inches in diameter.

          • Repeat to make additional circles, leaving some space between each one.

        Bake the cheese circles:

            • Place the baking sheet in the preheated oven and bake for 5-7 minutes, or until the cheese is fully melted and bubbly, with the edges starting to turn golden brown.

          Shape the healthy taco shells:

              • Carefully remove the baking sheet from the oven. Let the cheese cool for about 1-2 minutes until it’s still pliable but not too hot to handle.

              • Using a spatula, gently lift each cheese circle and drape it over the handle of a wooden spoon or a thick dowel to create the taco shell shape.

              • Let them cool completely and harden in this shape.

            carb free taco shells

            This taco rack is perfect for making these keto tacos shells.

            healthy sides with tacos

            Prepare the Fillings:

                • While the shells are cooling, prepare your beef and chop tomatoes, onions, cilantro and lime. Grill or cook your protein of choice and get your toppings ready.

              Assemble the Tacos:

                  • Once the cheddar shells are cooled and firm, fill them with your chosen ingredients. Start with a layer of beef, salsa then cilantro and lime – Add a dollop of Greek yogurt in place of sour cream.

                Serve and enjoy these easy healthy tacos!

                  easy healthy tacos


                  beef tacos healthy

                  Cheddar Cheese Shell Tacos

                  Delicious and satisfying easy healthy tacos that are keto-friendly and mouthwatering.
                  Made with crispy, chedar cheesy taco shells, these tacos are filled with seasoned ground beef, topped with fresh salsa, and garnished with cilantro.⅗⅗
                  Prep Time 10 minutes
                  Cook Time 20 minutes
                  Total Time 30 minutes
                  Course Dinner
                  Cuisine Mexican

                  Ingredients
                    

                  • 1 lb ground beef
                  • 2 cups cheddar cheese
                  • 1 cup tomatoes diced
                  • 1 avocado sliced
                  • ¼ cup cilantro chopped
                  • ½ cup Greek yogurt
                  • 1 onion diced

                  Instructions
                   

                  Cheese Shells

                  • Preheat oven to 375°
                  • Prepare the baking sheet
                  • Place about 1/4 cup of shredded cheddar cheese on the baking sheet and spread it into a thin circle, about 4-5 inches in diameter. Repeat with the remaining cheese, leaving space between each circle.
                  • Bake 5-7 minutes or until the cheese is melted
                  • Remove the baking sheet and let cheese cook. Making the circles firm enough to handle.
                  • Drape the cheese over a ladle.
                    carb free taco shells

                  Prepare the fillings.

                  • Dice onions, cilantro and tomatoes.
                  • Slice avacodos.
                  • Cook the meat.

                  Fill the shells.

                  • Add your meat in first.
                  • Top with tomatoes, onions, cilantro and avocado.
                  Keyword beef tacos healthy, easy healthy tacos, keto tacos, tacos healthy recipe

                  These easy healthy tacos will become your favorite with it being made with fresh, nutritious ingredients like lean protein, salsa and cheese. Keeping you satisfied and enjoying every bite.

                  pin
                  cheesy lemon chicken pasta
                  Cook Recipes

                  Chicken Lemon Zucchini Pasta

                  This article may contain links from my partners. I may receive a small commission if you make a purchase through a link. Please read my disclosure and how I make money here.

                  This zesty, creamy chicken lemon zucchini pasta will become a family favorite! It is easy and the leftovers are always delicious!

                  The flavors of lemon, tender slices of chicken, fresh zucchini and yellow squash mixed in with the creamy richness of heavy cream and parmesan cheese will make every forkful bursting with refreshing citrus flavor and creamy goodness.

                  This post is all about the best creamy lemon zucchini pasta recipe that will be perfect for meal prep throughout the week and will become a weekly dinner menu item! Keep reading to find the 10 tips for the perfect pasta every time!

                  cheesy lemon chicken pasta

                  One sunny afternoon, my husband and his grandma bonded over a shared love for cooking. With flour on their hands and laughter in the air, they concocted this simple chicken pasta recipes bursting with lemony goodness. As they cooked, the kitchen filled with the scent of citrus, and memories of Grandma’s kitchen flooded back.

                  Years later, he shared this cherished recipe with our own little family, passing down not just a dish, but love and tradition.

                  This simple yet delicious easy chicken pasta recipes pasta quickly became our go-to meal, perfect for weekly dinners and easy meal prepping.

                  With each bite, you will experience a satisfying dish that will become your favorite dinner recipe and an easy meal prep for lunches!

                  chicken lemon pepper pasta
                  You will need this grater for zesting your lemon and shredding your cheese!

                  Cheesy Lemon Chicken Pasta Ingredients:

                  Chicken Breasts- Lean protein.

                  Yellow Squash: Adds sweetness to the flavor.

                  Zucchini: Adds sweetness to flavor.

                  Heavy Cream: Creates a creamy sauce, adding richness and depth of flavor.

                  Lemon: Adding a refreshing and zesty taste.

                  Parmesan Cheese: Adds a salty and nutty flavor to the dish.

                  Noodle: Substitute with any noodle because this recipe is that good! Linguine is a favorite.

                  chicken fettuccine

                  Creamy lemon zucchini pasta instructions:

                  1. Cook noodles until al dente. Drain and set aside.
                  2. Season chicken breasts with salt and pepper.
                  3. In a large skillet, add chicken breasts and cook until golden brown – (about 4-5 minutes per side).
                  4. Add minced garlic.
                  5. Add sliced zucchini and yellow squash. Cook until tender.
                  6. Add lemon juice.
                  7. Pour heavy cream and parmesan cheese, stirring until well-combined.
                  8. Add the noodle into the creamy lemon sauce.
                  9. Serve and garnish with parsley.
                  cheesy lemon chicken pasta

                  10 Creamy Lemon Zucchini Pasta Tips:

                  1. Use pasta that holds sauce well, such as fettuccine, linguine, or penne. Cook it al dente so it doesn’t become mushy when mixed with the sauce.

                  2. Go for boneless, skinless chicken breasts or thighs. Pound them to an even thickness for uniform cooking.

                  3. Marinate the chicken in a mixture of olive oil, lemon zest, garlic, and herbs (like thyme or rosemary) for at least 30 minutes to infuse flavor.

                  4. Sear the chicken in a hot pan to create a golden-brown crust, which adds flavor and texture. Make sure not to overcrowd the pan.

                  5. Use fresh lemon juice and zest for a bright, tangy flavor. Avoid bottled lemon juice, which can taste artificial.

                  6. Start your sauce with a combination of butter and garlic for richness. Then add heavy cream or a mix of cream and milk for a balanced creaminess.

                  7. Incorporate grated Parmesan or Pecorino Romano cheese into the sauce. This not only adds a savory element but also helps to thicken the sauce.

                  8. Balance Flavors: Adjust the seasoning with salt, pepper, and a pinch of sugar to balance the acidity of the lemon. Add lemon zest for an extra burst of citrus flavor.

                  9. Reserve a cup of pasta water before draining. This starchy water can help loosen the sauce and make it cling to the pasta better.

                  10. Garnish the finished dish with fresh parsley or basil for color and a fresh, herby finish. A sprinkle of lemon zest on top can also enhance the lemony aroma.

                  cheesy lemon chicken pasta

                  Creamy Lemon Chicken Pasta

                  The best creamy lemon chicken pasta marinated in zesty lemon, sweet zucchini and squash with a slight nutty flavor paired with al dente pasta and tossed in a lemon-infused creamy sauce.
                  Prep Time 15 minutes
                  Cook Time 30 minutes
                  Total Time 40 minutes
                  Course Dinner
                  Cuisine Italian
                  Servings 4 people
                  Calories 650 kcal

                  Equipment

                  • 1 large pot for cooking pasta
                  • 1 large skillet
                  • 1 tongs
                  • 1 Knife
                  • 1 cutting board
                  • 1 grater
                  • 1 measuring cups and spoons
                  • 1 colander

                  Ingredients
                    

                  • 2 boneless chicken breast skinless
                  • 1 medium yellow squash sliced
                  • 1 medium zucchini sliced
                  • 1 cup heavy cream
                  • 1 large lemon
                  • 1 cup parmesan cheese
                  • 1 box linguine noodles
                  • 2 tbsp olive oil for cooking vegetables and chicken
                  • 2 tbsp butter for the sauce
                  • 3 cloves garlic minced
                  • salt to taste
                  • black pepper to taste
                  • 2 tbsp parsley chopped

                  Instructions
                   

                  Cook pasta

                  • Bring a large pot of salted water to a boil. Add noodle and cook according to package instructions until al dente. (Reserve 1 cup of pasta water) then drain the pasta.

                  Prepare the chicken

                  • While pasta is cooking, season chicken with salt and pepper. Add olive oil to pan over medium high heat, cook chicken breasts for 5-6 minutes per side. Remove and set aside.

                  Cook the vegetables

                  • In same skillet add the sliced squash and zucchini and sauté for about 5 minutes until tender. Remove and set aside.

                  Make the sauce

                  • In same skillet, melt butter, add garlic and sauté.
                    Pour in heavy cream and bring to a simmer. Cook for 2-3 minutes until cream begins to thicken.
                    Stir in lemon juice, parmesan cheese.
                    Cook for another 2-3 minutes, stirring frequently until cheese is melted and sauce is smooth.

                  Combine everything.

                  • Slice the chicken breasts into thin strips, add noodle, squash, zucchini to the sauce and toss. Add reserved pasta water to reach desired consistency.

                  Serve.

                    Keyword creamy chicken pasta


                    lemon zucchini pasta
                    How can I use my leftover chicken for this recipe with pasta?

                    Slice the leftover chicken and incorporate it into the dish during the final stages of cooking. The lemony zest and creamy sauce will complement the chicken perfectly.

                    How can I prepare ahead for a week’s worth of meals using this recipe?

                    Double the recipe – Once prepared, portion it into individual servings and store them in airtight containers in the refrigerator. This makes it a very easy weeknight dinners for family!

                    What can I pair with this creamy lemon zucchini pasta?

                    Steamed broccoli, green beans, a side salad, garlic bread, or some roasted vegetables.

                    pin
                    muffin pan
                    Breakfast

                    Kitchen Essentials Tools

                    This article may contain links from my partners. I may receive a small commission if you make a purchase through a link. Please read my disclosure and how I make money here.

                    Before sharing my kitchen essentials list that every chef must have there are some essential health and safety tips to keep in mind. 

                    Keep reading along to find out what kitchen tools are a necessity and tips to make your kitchen experience enjoyable!

                    After all – “Success in the kitchen comes from a blend of inspiration and preparation.” 

                    Kitchen Tips:

                    1. Gather and prepare all ingredients before you start cooking- you won’t want to discover you don’t have all the ingredients our recipes call for.
                    2. Always use the type of flour specified in a recipe – bread, all purpose or self-rising.
                    3. It’s a good rule of thumb to preheat your oven as soon as you begin prep to make sure it reaches desired temperature.

                    Kitchen Safety: 

                    • Exercise caution when working near hot ovens, by being aware and wearing oven mits to protect your hands.
                    • Avoid placing hot pans directly on work surfaces – use a heat mat, metal rack or heatproof board.
                    • Be extra careful when handling sharp objects and hot liquids, being mindful of potential spills and protecting your hands,
                    • Maintain a clean cooking area and wipe of any spills to prevent accidents.

                    Kitchen Hygiene:

                    1. Prioritize cleanliness – be sure to wash your hands, cutting boards, veggies and fruits thoroughly. 
                    2. Use separate cutting boards with meats and veggies.
                    3. Make sure your kitchen is equipped with essential tools for efficient cooking. 
                    4. Check expiration dates.
                    5. Invest in basic cookware sets and essential kitchen products to help enhance your experience cooking.

                    Must have kitchen essentials:

                    Here I have curated a collection of kitchen essentials, each recipe will have a kitchen tool checklist so you have all the necessary kitchen gadgets gathered before you begin cooking!

                    Peelers

                    essential kitchen tools
                    Remove the skin or rind of fruits and vegetables with ease.

                    Garlic Press

                    chef essentials

                    Quickly and efficiently mince garlic cloves with minimal effort.

                    Wooden Spoons

                    essential items for a kitchen

                    Wooden spoons are great kitchen tools for their versatility, durability, and gentle touch on cookware.

                    With smooth surfaces that prevent scratching, and the inability to conduct heat, they’re perfect for use with non-stick pans and delicate surfaces. 

                    And let’s not forget the heartwarming sight of a cute baby lending a hand with a wooden spoon—truly a timeless image that evokes joy and nostalgia in any kitchen setting.

                    Whisk

                    basic kitchen utensils

                    Blend ingredients, whip up eggs and create smooth textures in sauces in batters.

                    Basting Brush

                    small kitchen essentials

                    Apply marinades, sauces and glazes to food while cooking, grilling, roasting or baking and very easy to clean.

                    Kitchen Scissors

                    basic kitchen set

                    Effortlessly cut through poultry, seafood, herbs and packaging materials with ease.

                    Pizza Cutter

                    necessary kitchen items

                    With a sharp, rotating blade, it effortlessly cuts through thick or thin crusts, ensuring even slices every time.

                    Sharp Knifes 

                    new kitchen essentials

                    Having a sharp, good quality knife will make slicing, dicing and chopping easy.

                    Slotted Spoon

                    chef kitchen essentials

                    This kitchen tool is essential for straining, scooping and serving a variety of dishes.

                    Spatula 

                    minimalist kitchen essentials

                    Helps you with flipping, lifting and transferring foods with ease.

                    Spaghetti Claw 

                    essential kitchen items

                    This pasta server is great for lifting, portioning and serving spaghetti and other long pastas.

                    Silicone Spatula

                    must have baking tools

                    With its soft, flexible head it excels at scraping, stirring and folding ingredients.

                    Ice Cream Scoop

                    basic cookware set

                    Serve ice cream, gelato, sorbet and other frozen desserts with ease.

                    Wooden Ladel

                    essential cooking tools

                    Helps with serving soups and stirring hot liquids.

                    Measuring Cups & Spoons

                    essential cookware for small kitchen

                    precise and accurate ingredient measurements in cooking and baking

                    Pastry Cutters

                    essential kitchen products

                    Cutting butter or shortening into flour helps to ensure even distribution of fats.

                    Sieve

                    essential kitchen products

                    Effectively removes lumps, impurities, and excess liquid from foods, ensuring smooth textures and uniform consistency in soups, sauces, batters, and more.

                    Vitamix Blender

                    best kitchen essentials

                    This blender is the holy grail – can blend, puree, chop, grind and emulsify without trouble. The warranty is worth every penny too!

                    Food Processor

                    kitchen tools every chef needs

                    Makes chopping, slicing, shredding, and mixing ingredients so much easier.

                    In wrapping up this post on essential kitchen tools, it’s crucial to underscore the importance of maintaining a well-equipped and safe cooking environment. Incorporating essential items in your kitchen setup not only enhances efficiency but also ensures that you’re well-prepared to tackle any culinary challenge!

                    pin
                    healthy camping snacks
                    Lifestyle Cook Recipes

                    Camping Snacks

                    This article may contain links from my partners. I may receive a small commission if you make a purchase through a link. Please read my disclosure and how I make money here.

                    Here you’ll find the best camping snacks for all of your adventures! These snacks are a must for you and your toddler’s outdoor escapades!

                    Remember to stash a snack for your toddler on hikes because we all know how not enjoyable the tiny hiker meltdowns are when hunger strikes!

                    Be prepared, keep the smiles and pack a snack.

                    Campfire Quesadillas

                    good camping snacks

                    Easy camping snack over a campfire or portable stove –

                    Tortillas, cheese with beef or any toppings you prefer is all you’ll need for a great campsite snack.

                    Forest Twists: Fruit Roll-Up Delights

                    Fruit Rollups are the best camping snack!

                    Perfect for taking on long hikes to help boost energy. These rollups retain vitamins that are in fresh fruits like Vitamin C, A and various antioxidants.

                    camping fruit rollup

                    Campfire Cones

                    A fun treat you can get creative with. Fill waffle cones with mini marshmallows, chocolate chips and fruit. Wrap them in foil and heat near the fire.

                    campfire cones

                    Nature’s Crunch: Rice Cake with Nut Butter and Blueberries

                    Ricecake, nut butter, blueberries

                    Trail Mix Crunch: Granola Goodness, mess free camping snack

                    With a few basic ingredients you can create a delicious and nutritious granola that beats store bought versions.

                    Campfire Confections: Pumpkin Cream Cheese Muffin

                    Make ahead of time and store in a air tight container.

                    Easy camping snacks: Cucumber and Hummus Spears

                    Cucumber and Hummus Sticks: Slice cucumbers into sticks and serve with hummus for a refreshing snack

                    Cucumbers make for a refreshing snack a good balance of hydration while also providing a small amount of vitamins such as Vitamin K and C.

                    Hummus is rich in plant based protein and dietary fiber, also containing healthy fats, essential minerals like iron and magnesium.

                    camping snack of hummus and carrots
                    Yeti Backpack cooler
                    Very durable cooler, perfect for those short hikes!

                    Camer and Hiker snack Delight: Waffle Morsels

                    snacks to bring camping

                    Waffles are always a hit and easy to make ahead of time.

                    Outdoor Nibbles: Peanut Butter Cracker Bites

                    camping snacks to buy

                    Easy enough, peanut butter in between these delicious crackers.

                    Wilderness Wraps: Veggie Roll-Ups

                    Yum, Fill small tortillas with cream cheese and chopped veggies for a toddler friendly wrap.

                    keto camping snacks

                    Forest Fuel: Apple Slices with Nut Butter camping snack

                    This Homemade Almond Butter is the best – Provides a mix of carbs, healthy fats and protein making it a satisfying and nutritious snack.

                    Creamy Almond Butter


                    Homemade roasted creamy almond butter with a hint of sweetness and touch of salt will be sure to satisfy your taste buds and become a versatile companion in your culinary adventures!

                    • Food processer
                    • 1 bag Unsalted Almonds
                    • 1 tsp Salt
                    • 1 tbsp Maple Syrup (or honey)
                    • 1 tbsp Vanilla
                    • 1 tbsp Cinnamon
                    1. First roast your almonds.

                    2. Let them cool.

                    3. Place in food processor or blender and blend for about 10-15 minutes.

                    4. Store in a airtight container.


                    Camping Snacks: Woodland Delight: Apple Slice PB&J

                    easy camping snacks for family

                    And for those who crave a classic camping snack with a twist, why not try the timeless combination of peanut butter and jelly served alongside crisp apple slices?

                    As the sun sets on another day of adventure in the great outdoors, remember that the right snacks can make all the difference between a good camping trip and a great one.

                     Happy camping and happy snacking!

                    pin
                    easy chicken pot pie homemade crust
                    Cook Recipes

                    Easy Homemade Chicken Pot Pie

                    This article may contain links from my partners. I may receive a small commission if you make a purchase through a link. Please read my disclosure and how I make money here.

                    Enjoy my delicious easy homemade chicken pot pie recipe! With its flaky, golden crust and creamy, savory filling packed with tender chicken and vibrant vegetables, this easy chicken pot pie dish is guaranteed to warm your soul and become the best homemade chicken pot pie you have ever made! 

                    Recently my husband and I were on the discussion of how our favorite memory growing up was going to Bob Evans and enjoying dinner as a family. I reminisced about their Chicken Pot Pie recipe, so we had to recreate this staple. 

                    The crust was homemade, making it hands down, the best chicken pot pie crust recipe around!

                    easy chicken pot pie homemade crust


                    easy chicken pot pie

                    Chicken Pot Pie Crust Instructions:

                    Step 1: Combine salt and flour. 

                    Step 2. Add the cold, cubed butter to the flour. (Use your fingers to work the butter into the flour until the mixture resembles coarse crumbs with pea-sized pieces of butter)

                    3. Gradually add the ice water, one tablespoon at a time, mixing gently with a fork or your hands until the dough comes together. Be careful not to overwork the dough.

                    •   Divide the dough in half and shape each half into a disk. Wrap each disk tightly in plastic wrap and refrigerate for at least 1 hour before rolling out.

                    Pot Pie Fillings:

                    1. Preheat your oven to 375°F (190°C). 

                    • In a large skillet, heat the olive oil over medium heat. Add the diced chicken and cook until browned on all sides, about 5-7 minutes. Remove the chicken from the skillet and set aside.
                    • Then add in the chopped onion, carrots, and celery. Cook until the vegetables are softened, about 5 minutes.
                    • Add the minced garlic and cook for an additional minute.

                     2. Sprinkle the flour over the vegetables and stir to combine. Cook for 1-2 minutes, until the flour is well incorporated.

                    • Gradually pour in the chicken broth and whole milk (stirring constantly to prevent lumps from forming)
                    • Bring the mixture to a simmer and cook until it thickens, about 5-7 minutes.

                    3. Stir in the cooked chicken, frozen peas, salt, and pepper.

                    Allow the filling to cool slightly while you roll out the pie crust.

                    Assembling The Easy Chicken Pot Pie:

                    1. Roll out one disk of the chilled pie crust on a lightly floured surface to fit a 9-inch pie dish. Place the rolled-out crust into the bottom of the pie dish.

                    2. Pour the chicken filling over the crust in the pie dish.

                    3. Roll out the second disk of pie crust and place it over the filling. Trim any excess crust and crimp the edges to seal.

                    4. Cut a few slits in the top crust to allow steam to escape during baking.

                      Optional: Brush the top crust with beaten egg for a golden finish.

                    Baking:

                    1. Bake in the preheated oven for 45-50 minutes, or until the crust is golden brown and the filling is bubbly.

                    2. Allow the pot pie to cool for a few minutes before serving. Enjoy your homemade chicken pot pie with flaky crust!

                    the best recipe for chicken pot pie

                    Allow your home made pot pies to cool completely to let the flavors meld together.

                    Then, slice into generous portions and serve piping hot.

                    The smell alone will have everyone eagerly gathering around the table.

                    How long do you cook a homemade chicken pot pie for?

                    Bake at 375° for 45-50 minutes until the crust appears golden brown.

                    What makes a good chicken pot pie?

                    Tender chicken, flavorful veggies, creamy sauce and a flakey crust!

                    How to make homemade chicken pot pie healthy?

                    Use lean protein such as chicken breasts, load up on the veggies and instead of using heavy cream for the cause use unsweetened almond milk.

                    How to make gluten free chicken pot pie?

                    Use almond flour instead of regular flour for the crust.


                    pin
                    a recipe for pancakes
                    Breakfast

                    Homemade Pancakes

                    This article may contain links from my partners. I may receive a small commission if you make a purchase through a link. Please read my disclosure and how I make money here.

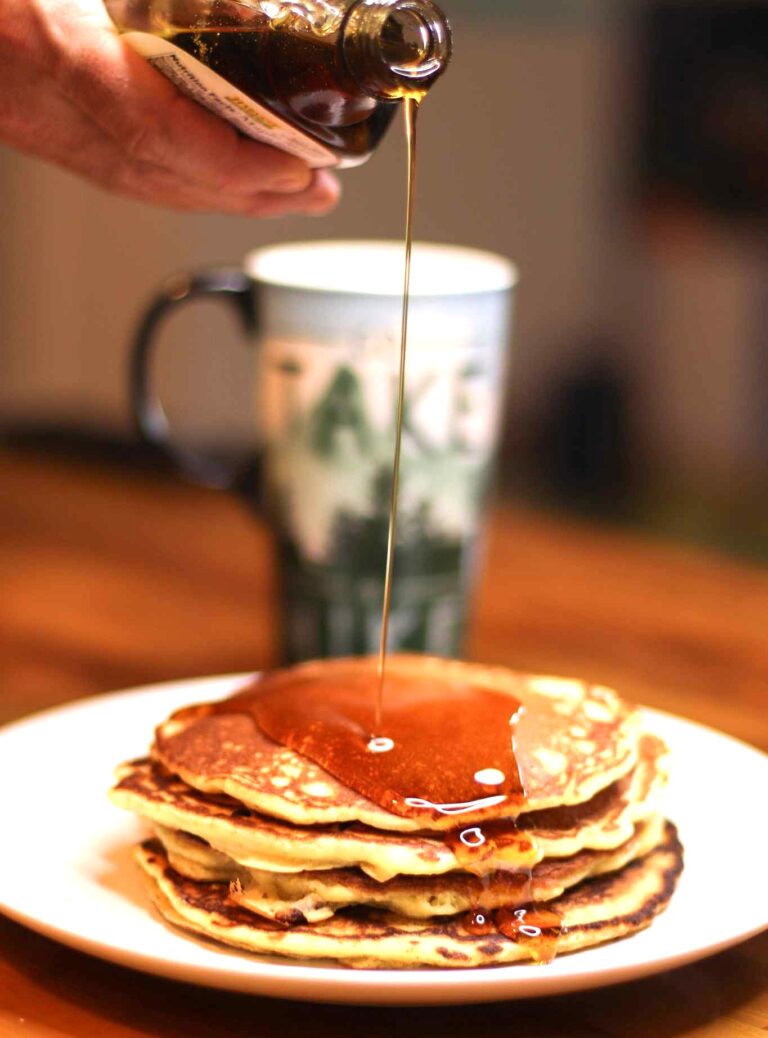
                    My easy homemade pancakes will promise stacks of golden perfection and will become the best homemade pancakes you’ve made! 

                    It all begins with the perfect batter – a blend of flour, sugar and milk to create this basic pancake recipe.

                    This simple pancake mix will make the fluffiest pancakes to enjoy with a cup of coffee!

                    at home pancake mix

                    In our cozy kitchen, the morning sun streams in as we gather around the stove, ready for our daily pancake ritual. It’s a simple recipe, perfected over countless mornings together.

                    But it’s not just about the pancakes; it’s about the moments we have shared. Our two sons, in their tiny aprons, eagerly join us, their laughter filling the room as they flip pancakes alongside us.

                    We started with basic ingredients – flour, eggs, milk – and over time, we fine-tuned it, finding just the right balance for these fluffy, golden pancakes that will melt in your mouth.

                    So read along to find the simplest pancake recipe from scratch recipe out there!

                    Healthy Pancake Mix Ingredients:

                    Flour: Provides structure, almond flour as a gluten free, low carb option. (For gluten free pancakes use almond flour)

                    Sugar: Adds sweetness, enhances flavor.

                    Baking Soda & Powder: Creates the fluffiness by causing batter to rise and become light and airy.

                    Milk: Adds moisture.

                    Egg: Acts as a binder.

                    Melted Butter: Enhances flavor and helps moisture.

                    Vanilla Extract: Enhances flavor.

                    healthy pancake recipe

                    Best Pancake Mix Instructions:

                    1. Prepare the batter – Whisk together flour, sugar, baking powder, baking soda and salt.

                    In a separate bowl, combine milk, egg, melted butter and vanilla extract.

                    2. Mix the batter – Pour wet ingredients into the dry ingredients. Gently stir, it’s okay if there are lumps, avoid overmixing that can lead to a dense pancake. 

                    3. Pour the batter – Into your pan over medium heat. 

                    4. Cook the pancakes – Cook until bubbles form (usually 2-3 minutes)

                    5. Flip – Flip the pancakes and cook until the other side is golden brown. 

                    6. Serve – Top with berries, maple syrup or whipped cream.

                    homemade pancake mix
                    homemade pancake batter
                    homemade pancake mix recipe

                    Pancake Batter Tips:

                    • Allow pancakes to cook properly! Don’t rush them on high heat or flip them too early.
                    • Let the under-side cook to a golden-brown color. When bubbles start forming on top and around the surface, they are ready to flip. 
                    • To add a more nutty, warm flavor try browning your butter- check out my recipe here.
                    pancake mix recipes
                    ingredients for pancakes from scratch
                    keto pancakes recipe

                    Homemade Pancakes

                    A classic, homemade pancakes recipe- golden airy and light. enjoy your mornings with these perfect stacks of joy. Top with real maple syrup or fresh berries!
                    5 from 2 votes
                    Prep Time 10 minutes
                    Cook Time 15 minutes
                    Total Time 25 minutes
                    Course Breakfast
                    Cuisine American
                    Servings 4 people
                    Calories 219 kcal

                    Equipment

                    • 2 mixing bowls one for wet ingredients and one for dry ingredients.
                    • 1 Whisk
                    • 1 Measuring Cup
                    • 1 measuring spoons set
                    • 1 Skillet

                    Ingredients
                      

                    • 1 cup all-purpose flour
                    • 2 tbsp sugar
                    • 1 tbsp baking powder
                    • ½ tsp salt
                    • 1 cup milk
                    • 1 large egg
                    • 2 tbsp butter melted
                    • 1 tsp vanilla extract
                    • 2 tbsp maple syrup

                    Instructions
                     

                    Mix dry ingredients

                    • In a large bowl, combine flour, sugar, baking powder and salt.

                    Mix wet ingredients.

                    • In another bowl, mix melted butter, egg, milk and vanilla extract.

                    Combine.

                    • Pour the wet ingredients into the dry ingredients, stir until combined. The batter should be slightly lumpy which helps pancakes become fluffy

                    Heat pan.

                    • Over medium heat, lightly butter pan and wait until hot.

                    Cook pancakes.

                    • Pour batter onto skillet and cook until bubble form. ~ 2-3 minutes. flip and cook for another 1-2 minutes.

                    Serve.

                    • Serve warm and with real maple syrup.

                    Notes

                    Avoid overmixing as this will cause a dense pancake. 
                     
                    Keyword basic pancake recipe, easy homemade pancakes, homemade pancake batter, homemade pancake recipe, make pancakes from scratch, pancakes
                    easy homemade pancakes

                    What makes these homemade pancakes fluffy?

                    Through a combination of the ingredients and cooking techniques.

                    Baking powder and baking soda- These leaving agents release carbon dioxide gas when mixed with wet ingredients and being exposed to heat.

                    Avoid overmixing- Gently mix, if there are lumps that is okay. Overmixing can make the pancakes denser.

                    Resting time- Allow the batter to rest before cooking- this gives the leavening agents time to work and allows the flour to fully hydrate.

                    Correct Cooking Temperature- Cook over medium heat for even cooking.

                    Flipping- Wait until bubbles form on the surface of the pancake before flipping. 

                    pan cake recipe easy

                    FAQs for Basic pancake recipe

                    Can you make this homemade pancake mix recipe keto friendly?

                    Substitute almond flour in place of all-purpose flour and use monk fruit sweetener.

                    What is the best way to freeze homemade pancake batter?

                    Allow the pancakes to cool completely after cooking. Stack pancakes with parchment paper to prevent sticking then wrap in plastic wrap and place them in a zip lock baggie.

                    How to reheat this easy homemade pancake recipe?

                    Reheat in the oven to avoid over drying.

                    Can you make these pancakes from scratch recipe without baking powder?

                    Yes, substitute a mixture of 1/2 tsp cream of tartar, 1/4 tsp baking soda and 1/4 tsp cornstarch.

                    Can you avoid sugar for this best recipe for pancakes?

                    Yes by using natural sweeteners like stevia, monk fruit, or erythritol instead of sugar. Alternatively, you can use mashed bananas or unsweetened applesauce to add sweetness.

                    How to increase the protein content to 20g?

                    Add ingredients such as protein powder, Greek yogurt, eggs, or nut butter to the recipes. You can also incorporate ingredients like chia seeds or hemp seeds for additional protein.

                    How can I modify the recipes to fit a paleo diet?

                    Replace regular flour with paleo-friendly alternatives such as almond flour, coconut flour, or tapioca flour. Use natural sweeteners like honey or maple syrup instead of refined sugar.

                    pin
                    keto shrimp poke bowl
                    Cook Recipes

                    Shrimp Poke Bowl

                    This article may contain links from my partners. I may receive a small commission if you make a purchase through a link. Please read my disclosure and how I make money here.

                    If you are craving a zesty, Thai chili mayo cooked shrimp poke bowl you have found it! 

                    The textures and tastes of the juicy shrimp, vibrant vegetables, and a crave worthy sauce create the perfect dish. 

                    With this easy shrimp poke bowl recipe, you will be able to create the most flavorful, homemade poke bowl with the best creamy homemade poke sauce making it an easy meal prep throughout the week or a refreshing lunch meal.

                    hawaii poke bowl

                    Homemade Poke Sauce:

                    Making Sriracha mayonnaise sauce is simple and requires just a few ingredients. Here’s a basic recipe:

                    Ingredients:

                    • 1/2 cup mayonnaise
                    • 2 tablespoons Sriracha sauce (adjust to taste)
                    • 1 tablespoon lime juice (optional)
                    • 1 teaspoon honey or sugar (optional, for sweetness)
                    • Salt and pepper to taste
                      shrimp poke bowl

                      Shrimp Poke Bowl

                      5 from 3 votes

                    Poke Bowl Homemade Instructions:

                    1. In a small bowl, combine the mayonnaise and Sriracha sauce. Start with 2 tablespoons of Sriracha and adjust according to your desired level of spiciness.
                    2. If using, add lime juice for a tangy flavor and honey or sugar for sweetness. Mix well to combine.
                    3. Taste the sauce and adjust the seasoning with salt and pepper as needed.
                    4. If the sauce is too thick, you can thin it out with a little water or lime juice until you reach your desired consistency.
                    5. Serve the Sriracha mayonnaise sauce immediately or store it in an airtight container in the refrigerator for up to a week.

                    This Sriracha mayonnaise sauce is perfect for adding a spicy kick to your homemade shrimp poke bowl.

                    Shrimp Poke Bowl Instructions:

                    1.Prepare the Thai Chili Mayo Sauce: In a small bowl, whisk together mayonnaise and Thai chili paste. Adjust the spice level according to your preference.

                    2. Cook the Shrimp:
                    – Heat a skillet over medium-high heat. Add a bit of oil.

                    3. Prepare your ingredients – Cook Edamame, Rice & Cut: Cut cucumber, avocado and carrots, cook sushi rice and steam your edamame.

                    4. Drizzle with Thai Chili Mayo Sauce:
                    – Generously drizzle the Thai Chili Mayo Sauce over the ingredients.

                    5. Garnish and Serve
                    – Add your rice to a bowl, and top with ingredients, garnish with cilantro and chopped green onions for added flavor & Enjoy!


                    keto shrimp poke bowl

                    pin
                    Sirloin steak
                    Cook Recipes

                    Sirloin Steak

                    This article may contain links from my partners. I may receive a small commission if you make a purchase through a link. Please read my disclosure and how I make money here.

                    Hey there, foodie friends! So, after a solid decade of swimming in the pescatarian pond, I’ve got a story to spill – and it’s all about how I broke free from my seafood shackles. 

                    Spoiler alert: it involves the sirloin steak recipe that’s about to become your new obsession.

                    I get it – the idea of going from sea vibes to a land of carnivorous cravings might seem like a stretch. But trust me, this sirloin steak recipe is worth it. 

                    Why eat steak?

                    Steak is the most nutrient dense food out there. 

                    Get your B Vitamins

                    Vitamin B helps keep your red blood cells healthy, protecting brain cells and boosting your metabolism. 

                    It can prevent iron deficiency

                    Iron is one of the most important nutrients for our bodies as it plays a key role in delivering oxygen from lungs to tissues and organs throughout the body.

                    Iron plays an important role in hormone production and cellular function.

                    Sirloin Steak Instructions:

                    Step 1: Making rice

                    • Rinse the rice to ensure fluffy texture. Add water to medium size pan and bring to a boil then add your rice. 
                      Once rice is in pan the boil will lessen, let it come back to a gentle simmer.
                      Cover the saucepan and reduce heat to low. Keep lid on for around 18 minutes.

                    Step 2: Making the Sauce

                    • Pour remaining juice from steak in saucepan, add water, soy sauce, fish sauce, maple syrup and corn starch. Bring to simmer until slightly thickened. 

                    Step 3: Cooking steak

                    • Pan sear steak over high heat until brown crust forms, about 1-2 minutes per side. Then reduce heat to medium and cook to desire.

                    Step 4: Steam broccoli

                    • Add broccoli to your steamer basket over water for about 6 minutes.

                    Step 5: Plate & serve

                    • Top with scallions and sesame seeds and serve with rice and broccoli.
                    pin
                    smore smoothie
                    Breakfast Dessert

                    Toasted Smore Milkshake in Every Sip

                    This article may contain links from my partners. I may receive a small commission if you make a purchase through a link. Please read my disclosure and how I make money here.

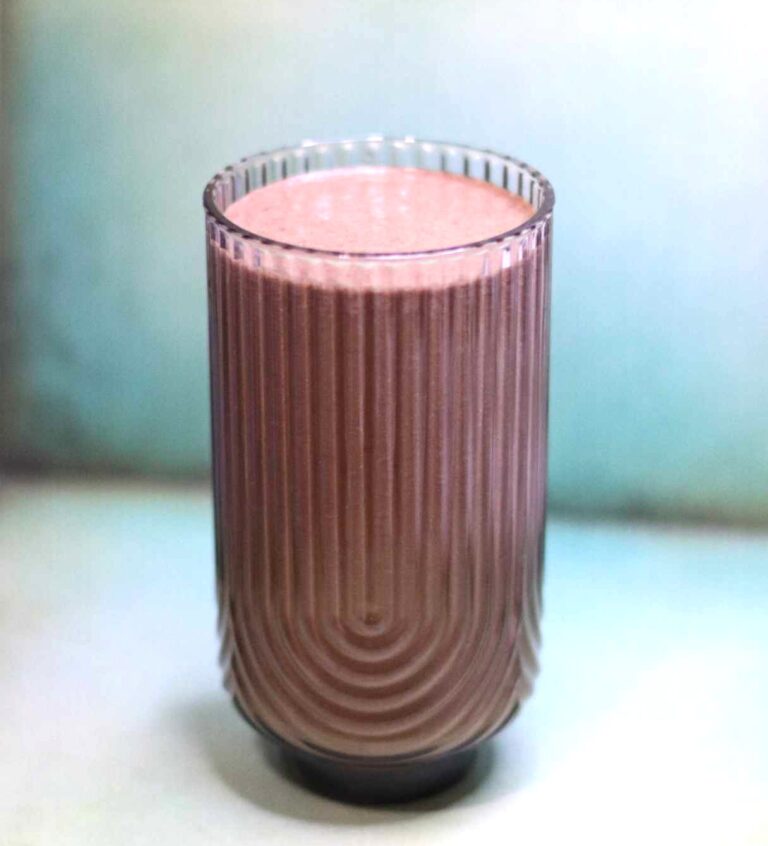
                    This smore milkshake will become your favorite for the rich, creamy consistency, graham cracker crumbs, chocolate chips, yogurt and mini marshmallow creating an explorer’s dream smore smoothie come true!

                    My little explorer has recently found an obsession with marshmallows.

                    As we await our fireside tales, camping snacks, leaf crunching hikes and sunrise seeking – I thought I would create a little camping inspired smoothie – filled with avocado, chocolate, graham cracker crumbs and of course, marshmallow.

                    As we created this smoothie, we spoke of witnessing the sunrise atop the mountains – a breathtaking sight of the sky in hues of warmth.

                    Asheville hikes
                    If only photos could capture the true beauty of this breathtaking sunrise… Now, back to the smoothie recipe!

                    HI THERE!

                    Welcome to Hike Cook Share!

                    Wife to a talented chef and mama to two little sous chefs, I’m passionate about food photography, exploring and sharing!

                    Finding inspiration in the beauty of the outdoors and the joy of a well-crafted dish, all while sharing moments together.

                    imageedit 1 7887394045 1024x1024 2
                    healthy smoothie

                    Smore Smoothie Ingredients:

                    Avocado: Creates the rich, creamy texture of the smoothie.

                    Graham Cracker Crumbs: Hint of sweet, nutty flavor, reminiscent of a classic smore, providing a satisfying base. 


                    Chocolate Chips: Bursts of rich chocolatey goodness. 


                    Yogurt: Enhances creaminess and sweetness.


                    Maple Syrup: Creates a warmth undertone, sweetener. 


                    Mini Marshmallows: Provides an airy sweet texture

                    Just like my marshmallow mixed berry pie, you will love the sweet airy texture marshmallows create!

                    Smore Smoothie Instructions:

                    1. Blend: Combine all ingredients and blend until desired consistency.
                    2. Pulse: Pulse in your marshmallows for some added flavor.
                    3. Pour & Enjoy: Top with graham cracker crumbs and marshmallows.
                    smore smoothie

                    Smore Smoothie

                    Prep Time 5 minutes
                    Total Time 5 minutes
                    Course Dessert
                    Cuisine American

                    Equipment

                    • 1 Blender

                    Ingredients
                      

                    • 1 ripe Avocado peeled and pitted
                    • 1 cup Graham Cracker Crumbs
                    • ½ cup Chocolate Chips
                    • ½ cup Yogurt unsweetened
                    • ¼ cup Mini Marshmallows
                    • 2 tsp Maple Syrup

                    Instructions
                     

                    • Place all ingredients in a blender.
                    • Blend ingredients.
                    • Serve.
                    Keyword smore smoothie

                    Are you looking for more smoothie recipes – follow along for more and be sure to comment if you have tried this Smores Smoothie!

                    pin
                    Carrot Cake
                    Breakfast

                    Best Carrot Cake Ever!

                    This article may contain links from my partners. I may receive a small commission if you make a purchase through a link. Please read my disclosure and how I make money here.

                    If you are looking for the best carrot cake recipe ever, you’ve come to the right place! This carrot infused cake is divine, covered with toasted walnuts, cinnamon, raisins, pineapple and cream cheese icing. It will be a hit at every Holiday get together!

                    Carrot Cake

                    Ingredients For The Best Carrot Cake:

                    • Carrots (grated): Base of the cake. Tip: Use the larger part of grater
                    • All purpose flour: Provides adequate structure for the frosting.
                    • Sugar: Sweetener. You can use maple syrup or honey.
                    • Cinnamon: Adds flavor.
                    • Salt: To bring out the sweetness and provide balance.
                    • Vegetable Oil: Adds moisture in.
                    • Raisins: Chewy texture, sweetness that complements the warm spices in the cake
                    • Pineapple (crushed): Adds moisture and sweetness.
                    • Baking soda: To help rise flour.
                    • Walnuts: Nutty flavor complements the warm spices of the cake

                    Instructions To Make The Best Carrot Cake:

                    • Step 1: Preheat the oven to 350 degrees° F.
                    • Grease and flour two 10 inch round cake pans.
                    • Step 2: Combine grated carrots and sugar in a medium bowl. Stir in raisins.
                    • Step 3: Beat eggs until light. Gradually beat in sugar, oil, vanilla extract and pineapple.
                    • Step 4: Combine flour, cinnamon, baking soda and salt in a separate bowl then stir into egg mixture until absorbed.
                    • Step 5: Pour into prepared pans.
                    • Step 6: Bake in oven for 45 minutes.

                    Cool for about 10 minutes before removing cake from pan.

                    Carrot Cake Frosting

                    Although you can use whip cream I prefer using cream cheese for the frosting. I skipped using powered sugar like most recipes, and opted for granulated sugar. The grit of the sugar crystals helped fluff up the butter and cream cheese. 

                    Ingredients:

                    1/2 cup unsalted butter, softened

                    1 package cream cheese, softened

                    1 teaspoon vanilla

                    1 cup granulated sugar

                    1/2 teaspoon salt


                    Frosting Instructions:

                    Mix the cream cheese with a electric mixer. Add in your butter, vanilla, sugar and salt. Mix until smooth. Since opting out of the powdered sugar there’s no need to worry about overbeating which causes your frosting to be runny.

                    blender

                    Now, your delicious carrot cake is ready to be enjoyed with this heavenly cream cheese frosting.

                    For a special celebration or an everyday treat, this carrot cake, crowned with velvety cream cheese frosting, is a delightful treat that will have everyone coming back for more.

                    Happy baking!

                    cheese cake

                    Check out my post on Kitchen Essentials here. 

                    7
                    cballs
                    Chocolate Chip Cheese Cake Balls
                    Check out this recipe

                    About HikeCookShare.com

                    meet hike cook share

                    About Hike Cook Share


                    keto
                    Only 3g of carbs!
                    Untitled design 2

                    About CGM®

                    Hi! I’m Trisha, founder of CGM®.
                    My husband is the creator of the recipes, we make a pretty great team and enjoy sharing what we’re eating, creating and some exploring along the way!

                    Please leave a comment & star rating!

                    If you tried this recipe, I would be so grateful if you leave a comment and a star rating when you post your feedback. star ratings are the best because they allow people to discover my recipes online.
                    your support means the world, thank you!

                    overnight oats jar

                    Healthy Simple Overnight Oats

                    Read More
                    Van Life Essentials

                    Van Life Essentials

                    Read More
                    muffin pan

                    Kitchen Essentials

                    Read More
                    Black Balsam NC Hikes

                    North Carolina Hikes

                    Read More
                    healthy camping snacks

                    Camping Snacks

                    Read More
                    easter basket

                    Easter Basket DIY

                    Read More
                    easy chicken pot pie homemade crust

                    Homemade Chicken Pot Pie

                    Read More
                    sugar free pancakes

                    Healthy Pancakes

                    Read More
                    blogging mountain mama

                    Blogging tips for beginners

                    Read More

                    Pinterest


                    Instagram

                    pin
                    easy pizza chaffle
                    Cook Recipes

                    Pizza Chaffle

                    This article may contain links from my partners. I may receive a small commission if you make a purchase through a link. Please read my disclosure and how I make money here.

                    Create this guilt free pizza chaffle crust made of the most cheesy and easy crust will easily replace regular crust. Topped with garlic tomato sauce, pepperoni, mushrooms, red bell peppers, and basil, it will be sure to be a crowd pleaser.

                    With just cheese and egg, this recipe offers an easy low carb meals that help maintain stable blood sugar levels and being satiated quicker!

                    Say goodbye to the post-pizza blood sugar spikes that often accompany traditional pizza. A delicious pizza can be more than just a treat—it can be a step towards a healthier, happier you!

                    What is a chaffle?

                    It’s a low carb, keto friendly waffle made with cheese- a cheese waffle, Yum!

                    Keto Pizza Crust Ingredients:

                    • Cheese
                    • 5 Eggs
                    • Butter

                    That’s it for the crust! 

                    keto pizza

                    Pizza Chaffle

                    This cheesy keto friendly pizza chaffle will become a replacement for your regular crust - this cheesy egg crust is satisfying and so easy to make!
                    Servings 4 people

                    easy keto pizza chaffles

                    Chaffle Recipes Pizza Instructions:

                    1. Preheat your waffle maker. 

                    2. Whisk eggs in a small bowl; stir in mozzarella cheese and butter until batter is well combined.

                    3. Pour 1/2 of the batter onto the preheated waffle maker, spreading it out from the center with a spoon.

                    Close the waffle maker and cook until steaming stops and chaffle is well browned, about 3 minutes. 

                    Don’t overcook, as that will make it chewy. Repeat with remaining batter.

                    Then spread the waffles onto a baking pan.

                    keto pizza in waffle maker,

                    Your going to want this waffle maker – we use ours every single week!

                    chaffle pizza crust

                    Add Ons for Keto Pizza Chaffle Recipe:

                    Next, sauté mushrooms and peppers in a pan.

                    Then pour your pizza sauce on your chaffles, spread more mozzarella on, add your red peppers and mushrooms then pepperoni.

                    Place your pizza in the oven and bake at 400° for 15-20 minutes. 

                    Top with fresh basil.

                    Serve pizza warm and enjoy!

                    chaffle recipes pizza

                    Who said eating keto friendly foods had to be bland and boring?! This pepperoni chaffle makes ketosis as delicious as it is nutritious!


                    chaffle pizza keto

                    Unlike the quick energy spikes and crashes with high-carb meals, the Chaffle Keto Pizza provides sustainable energy, keeping you fueled and focused throughout the day.

                    chaffle pizza almond flour

                    Have you tried this Chaffle Pizza?

                    I’d love to hear about your experience!

                    Share your thoughts, variations, and feedback in the comments below.

                    pin
                    apple smoothie
                    Breakfast

                    Apple Smoothie

                    This article may contain links from my partners. I may receive a small commission if you make a purchase through a link. Please read my disclosure and how I make money here.

                    Enjoy my Apple Pecan Smoothie, where the perfect blend of crisp apples, earthy pecans, warm cinnamon, creamy avocado, and the sweetness of maple syrup blend together to create one delicious smoothie!

                    apple smoothie for weight loss

                    Each ingredient in this apple pecan smoothie contributes to a delicious and nutritious blend.

                    • Avocado: Can we all just agree that Avocado is the bees knees?! It creates this creamy texture and provides healthy fats. These fats help keep you satiated and provide that velvety smooth texture in the smoothie. 
                    • Maple Syrup: Adds Sweetener and brings a distinct warm sweetness to your blend.
                    • Ice: helps achieve the consistency and gives the smoothie a refreshing chill.
                    • Apple: Adds natural sweetness, a fruity flavor, and provides dietary fiber.
                    • Cinnamon: Enhances the overall taste with warm and comforting notes and may have potential health benefits.
                    • Pecans: Introduce a nutty flavor and provide a good source of healthy fats, protein, and essential nutrients.
                    • Rolled Oats: Contribute to the smoothie’s texture, add fiber for satiety, and provide complex carbohydrates for sustained energy.
                    • Milk: Creates the creamy texture.


                    muffin pan

                    Kitchen Essentials

                    pin
                    Cauliflower wings
                    Breakfast

                    Cauliflower Wings

                    This article may contain links from my partners. I may receive a small commission if you make a purchase through a link. Please read my disclosure and how I make money here.

                    These Cauliflower wings are a delicious, perfect snack for game day! Make these easy, baked cauliflower wings as a quick appetizer for your next get together! An amazing Super Bowl food idea!

                    Cauliflower wings

                    Pin HERE for later and follow my boards for more recipe ideas.

                    Crispy Cauliflower Wings Recipe

                    If you are looking for a healthy appetizer, these cauliflower wings are one of my favorite things to make! Serve alongside with some fresh veggie sticks, guacamole or with some simple cheese for your guests.

                    This dish features cauliflower florets that are coated, baked until crispy, and then tossed in flavorful barbecue sauce.

                    cauliflower

                    Do cauliflower wings taste good?

                    BBQ Cauliflower Wings are not only the best way to enjoy cauliflower but they are a delicious vegetarian, gluten free, vegan, palo and low carb alternative to your classic chicken wings.

                    Plus, they are simple to make with pantry friendly ingredients that you can customize with whatever you have on hand! 


                    the best bbq sauce
                    A Keto and low carb friendly BBQ Sauce

                    Cauliflower Wing Ingredients:

                    • Cauliflower Florets: Be sure to use fresh cauliflower and not frozen otherwise your wings will be soggy.
                    • Batter:-Flour: Creates a crispy and golden coating.-Milk: Acts as a binder and adds moisture to the batter.-Spices: (Garlic Powder, Onion Powder, Smoked Paprika, Salt and Pepper) all enhance the batter with a savory taste.-BBQ sauce: We like to use a keto friendly BBQ sauce such as Primal Kitchen, it adds a bold, sweet, smoky and tangy flavor.


                    Cauliflower Wing Instructions:

                    1. Preheat the Oven: Preheat your oven to 450°F (230°C). This high temperature will help achieve a crispy texture.

                    2. Prepare the cauliflower: Cut the cauliflower into bite-sized florets. Make sure the florets are similar size for even cooking.

                    3. Make the batter: In a bowl, whisk together the flour, milk, garlic powder, onion powder, smoked paprika, salt, and pepper until you have a smooth batter. Adjust the consistency by adding more flour or milk if needed.

                    4. Coat the cauliflower: Dip each cauliflower floret into the batter, making sure it is coated well.

                    5. Arrange on baking sheet: Place a wire rack on a baking sheet to allow air circulation. Arrange the battered cauliflower on the rack, Make sure florets are not touching each other.

                    6. Bake in the oven: Bake in the preheated oven for 20-25 minutes or until the cauliflower is golden brown and crispy. You can flip them halfway through for even browning.

                    7. Heat the BBQ sauce: While the cauliflower is baking, warm the barbecue sauce in a saucepan over low heat. If desired, add extra spices or hot sauce for more flavor.

                    8. Coat cauliflower in BBQ sauce: Once the cauliflower is done, transfer it to a large mixing bowl. Pour the warmed barbecue sauce over the cauliflower and toss until each piece is evenly coated.

                    9. Serve and Enjoy: Arrange the BBQ cauliflower wings on a serving plate, and optionally garnish with fresh green onion. Serve with your favorite dipping sauce and enjoy!

                    [mailpoet_form id=”3″]

                    Cauliflower wings

                    Whether you’re a dedicated vegan, a plant-based enthusiast, or simply someone looking to explore new culinary horizons, these BBQ cauliflower wings are a perfect example that plant-based eating can be incredibly satisfying and downright irresistible. 

                    So, go ahead, elevate your snacking experience, and let these BBQ cauliflower wings sweep you off your feet!

                    Looking for more savory dinners or appetizers?

                    8
                    pork rind chicken tenders
                    Pork Rind Chicken
                    Check out this recipe

                    pin
                    blueberry crumb smoothie
                    Breakfast

                    Blueberry Crumb Smoothie

                    This article may contain links from my partners. I may receive a small commission if you make a purchase through a link. Please read my disclosure and how I make money here.

                    Embrace the winter blues… with this Blueberry Crumb Smoothie that is!

                    After a long morning of play, my son and I enjoy a refreshing blueberry smoothie together, the creamy blend of blueberries, avocado, and oats creating a crumbly warmth that’s utterly addicting, making it our go-to snack for both nourishment and pure delight.

                    As a parent, I understand the joy of discovering recipes that not only benefit our health but also bring smiles to our little ones. 

                    This smoothie has been a household favorite, especially with my son, who eagerly looks forward to this refreshing treat. The vibrant colors, perfect texture, and naturally sweet flavors make it a hit with the youngest members of our family.

                    The creaminess from the avocado, the sweetness from the blueberries and dates, and the fun of sipping through a straw – it’s a winning combination for toddlers who might be a little picky about what goes into their tummies. Plus, it’s an excellent way to sneak in some essential nutrients without them even realizing it.

                    This smoothie will be everyone’s favorite and will satisfy any sweet craving!

                    blueberry crumb smoothie

                    Blueberry Crumb Smoothie Ingredients:

                    Blueberries: Includes antioxidants, vitamins and fiber plus adds a sweet and tart flavor. Avocado: Creates the creaminess texture and contains healthy fats.Oats: Adds fiber and a nutty flavor. Vanilla Extract: Enhances the flavors.Maple Syrup: Sweetener.Ground Cinnamon: Adds warmth. Dates: Sweetener.Milk: Adds creaminess and helps with consistency. Love almond milk!Ice: Creates refreshing and cool element to the smoothie!


                    blueberry crumb ingredients

                    Blueberry Crumb Instructions:

                    1. Prepare Ingredients: Pit the dates.
                    2. Blend: In a blender, combine blueberries, ripe avocado, oats, ice cubes, pitted dates, ground cinnamon, milk, maple syrup, and vanilla extract.
                    3. Blend Until Smooth: Blend on high speed until the ingredients form a smooth and creamy consistency.

                    Serve- Garnish with my simple crunchy granola.

                    [mailpoet_form id=”3″]

                    blueberry crumb ingredients

                    oats


                    61jkyCiZhrL. SL1000

                    So, whether you’re a parent looking for a nutritious snack for your little one or someone seeking a burst of flavor and energy, join me in the world of smoothies, where health meets happiness.

                    Let’s blend up a glass of this delicious Blueberry Crumb Smoothie and enjoy the taste and well-being!

                    Be sure to leave a comment if you’ve tried this recipe!

                    pin
                    maple pecan blueberry waffles
                    Breakfast

                    Homemade Blueberry Waffles

                    This article may contain links from my partners. I may receive a small commission if you make a purchase through a link. Please read my disclosure and how I make money here.

                    If your looking for the homemade blueberry waffles you’ve stumbled across the best – made with simple ingredients that make them so fluffy and light on the inside and crispy on the outside. Their perfect every time!

                    With an easy waffle batter from scratch and a bit of love, you can create a breakfast masterpiece that’s sure to impress family and friends alike.

                    For those who are health-conscious, don’t worry—this recipe for healthy homemade waffles is just what you need. 

                    Adding chia seeds provides extra fiber and omega-3 fatty acids, while pecans add healthy fats and a satisfying crunch. 

                    homemade waffle mix recipe


                    This handcrafted waffle recipe is the best especially covered in butter, real maple syrup and pecans thrown in with a burst of blueberries and the subtle crunch of chia seeds. 

                    Whether you’re looking for the best protein waffles or the best frozen keto waffles, you’ll find that this recipe is versatile enough to cater to your dietary preferences.

                    waffles from scratch recipe


                    Being gifted this waffle maker for Christmas we have become quite obsessed with perfecting the best waffle recipe. 

                    No need for a special waffle mix – this basic waffle recipe promises to make the most amazing homemade waffle mix around!

                    Homecooked waffles are our favorite to enjoy together as a snack or quick breakfast and can be prepared beforehand to enjoy for several days.

                    Check out my homemade pancakes recipe, it will not disappoint!

                    SASRunamok
                    [mailpoet_form id=”3″]

                    homemade waffle mix recipe

                    Homemade waffles from scratch are timeless – standing out as the best because of the perfect balance of flavors and textures. 

                    The sweet crunch of chia seeds and pecans combined with the bursts of juicy blueberries brings an explosion to your taste buds! 

                    Upgrade your Baking With King Arthur

                    Ingredients for Best Homemade Waffles Recipe:

                    All Purpose Flour: Provides the base structure for the waffles.

                    Milk/Lemon: Substitute for buttermilk. Mix together and set aside so it combines well.

                    Sugar: Adds sweetness to balance the flavors.

                    Baking powder and baking soda: These leavening agents help the waffles rise and become fluffy.

                    Salt: Enhances and balances the sweetness.

                    Unsalted butter: Rich and buttery flavor.

                    Egg: Binding agent and contributes to the waffle’s structure.

                    Vanilla extract: Adds a warm and aromatic flavor.

                    Blueberries: Bursts of sweetness and a juicy texture.

                    Pecans: Provide a sweet crunch, adding a layer of texture and flavor.

                    Chia seeds: Bring a nutritional boost and a subtle crunch.

                    King Arthur Recipe of the Year - Supersized, Super Soft Chocolate Chip Cookies
                    homemade waffles healthy


                    maple pecan blueberry waffles

                    Homemade Blueberry Waffles

                    Blueberries, pecans and crunchy chia seeds make the best recipe for homemade waffles! This basic waffle recipe makes healthy homemade waffles to enjoy everyday of the week.
                    5 from 3 votes
                    Prep Time 15 minutes
                    Cook Time 15 minutes
                    Total Time 30 minutes
                    Course Breakfast
                    Cuisine American
                    Servings 4 people
                    Calories 739 kcal

                    Equipment

                    • 1 Waffle Maker
                    • 2 bowls
                    • 1 Measuring Cup
                    • 1 tsp

                    Ingredients
                      

                    • 2 cups all-purpose flour
                    • 2 tbsp sugar
                    • 1 tbsp baking powder
                    • ½ tsp salt
                    • 2 large eggs
                    • 1 ¾ cups milk
                    • ½ cup butter melted
                    • 1 tsp vanilla extract
                    • 1 cup frozen blueberries do not thaw
                    • ½ cup pecans chopped
                    • 2 tbsp chia seeds
                    • 1 tbsp maple syrup

                    Instructions
                     

                    • Preheat your waffle iron.
                    • In a large bowl, whisk together the flour, sugar, baking powder, and salt.
                    • In a separate bowl, beat the eggs and then add the milk, oil (or melted butter), and vanilla extract. Mix until well combined.
                    • Pour the wet ingredients into the dry ingredients and stir until just combined. Be careful not to overmix; it's okay if there are a few lumps.
                    • Gently fold in the frozen blueberries, chopped pecans, and chia seeds until evenly distributed throughout the batter.
                    • Lightly oil the waffle iron with butter or a light brush of oil.
                    • Pour the batter into the preheated waffle iron, using a ladle or measuring cup, and spread it out evenly. Be sure not to overfill.
                    • Close the waffle iron and cook for 3-5 minutes or until waffles are golden brown and crisp.
                    • Remove waffles and serve with maple syrup,

                    Notes

                    • If you prefer a bit more crunch, toast the pecans in a dry skillet over medium heat for a few minutes before adding them to the batter.
                    • For a healthier twist, you can substitute half of the all-purpose flour with whole wheat flour.
                    • To keep waffles warm while you cook the remaining batter, place them in a single layer on a baking sheet in a preheated 200°F (95°C) oven.
                    easy homemade waffles


                    How To Make Homemade Waffle Batter:

                    1. Preheat your waffle maker and rub butter on.
                    2. In a bowl, whisk together flour, sugar, baking powder, baking soda, and salt.
                    3. In a separate bowl, whisk together milk and lemon- set aside for a few minutes (or use buttermilk) and then mix melted butter, egg, and vanilla extract.
                    4. Combine wet and dry ingredients, then fold in blueberries, chopped pecans, and chia seeds.
                    5. Pour batter onto the waffle iron and cook.
                    6. Once cooked, place waffles on the oven rack at the lowest temp, to create crispy outsides of your waffle and keep warm until ready to serve.
                    7. Serve the waffles warm with fresh maple syrup.
                    homemade waffle mix


                    Homemade Waffles – Most Asked Questions

                    Can I make the batter ahead of time?

                    • It’s best to make the batter just before cooking for optimal freshness, but you can prepare it the night before and refrigerate.

                    Can I freeze leftover waffles?

                    • Yes, you can freeze them. Reheat in a toaster or oven on broil for a quick and convenient breakfast.

                    Can I use frozen blueberries?

                    Yes, you can use frozen blueberries, thaw them before so your waffle won’t be too moist.

                    waffles from scratch recipe


                    pin
                    Shrimp Pad Thai
                    Breakfast

                    Pad Thai

                    This article may contain links from my partners. I may receive a small commission if you make a purchase through a link. Please read my disclosure and how I make money here.

                    This homemade Shrimp Pad Thai recipe is easy to make, quick and delicious. You can customize the ingredients, protein and spice to your liking! 

                    The star of this dish is the plump, juicy shrimp that adds a delightful seafood twist to the classic Pad Thai. Combined with silky rice noodles, the shrimp creates textures that will have your taste buds dancing. 

                    shrimp pad thai ingredients

                    As you whip up this tantalizing shrimp pad thai recipe, you’re not just making a meal – you’re crafting the best shrimp pad thai experience right in your kitchen.

                    With fresh ingredients and healthy twists, this shrimp pad thai promises to satisfy your cravings while keeping things nutritious. 


                    pad thai ingredients
                    [mailpoet_form id=”3″]
                    garlic press

                    Pad Thai Instructions: 

                    1. Prepare the Rice Noodles:

                      • Cook the rice noodles according to package instructions. Drain and set aside.
                    2. Make the Pad Thai Sauce:

                      • In a bowl, whisk together tamarind paste, fish sauce, soy sauce, brown sugar, and chili sauce until well combined. Set aside.
                    3. Cook the Shrimp:

                      • Heat 1 tablespoon of vegetable oil in a large pan or wok over medium-high heat. Add the shrimp and cook until pink and opaque. Remove from the pan and set aside.
                    4. Cook the Vegetables:

                      • In the same pan, add another tablespoon of oil. Add minced garlic, sliced bell pepper, and chopped green onions. Stir-fry for a couple of minutes until vegetables are tender-crisp.
                    5. Scramble the Eggs:

                      • Push the vegetables to one side of the pan. Pour the beaten eggs into the empty side and scramble. Once the eggs are cooked, mix them with the vegetables.
                    6. Combine Everything:

                      • Add the cooked rice noodles and prepared Pad Thai sauce to the pan. Toss everything together until well combined.
                    7. Add Shrimp:

                      • Add the cooked shrimp to the pan. Toss until heated through.
                    8. Serve:

                      • Transfer the Shrimp Pad Thai to serving plates. Garnish with chopped peanuts, fresh cilantro, and lime wedges.
                    9. Enjoy!

                      • Squeeze lime over it before devouring for an extra burst of freshness.

                    And there you have it – Garnished with the satisfying crunch of chopped peanuts and the fresh burst of cilantro.

                    So, gather your loved ones, squeeze a bit of lime over your plate for that final touch of freshness, and dive into the enchanting world of Shrimp Pad Thai. 

                    Cheers to the joy of creating, sharing, and relishing the magic of homemade Shrimp Pad Thai – Enjoy

                    Shrimp Pad Thai

                    About HikeCookShare.com

                    meet hike cook share

                    About Hike Cook Share

                    easy chicken pot pie homemade crust

                    Homemade Chicken Pot Pie

                    cheese being spread onto pizza

                    Easy Meal Recipes

                    pin
                    Coconut curry soup
                    Breakfast

                    Curry Coconut Cauliflower Soup

                    This article may contain links from my partners. I may receive a small commission if you make a purchase through a link. Please read my disclosure and how I make money here.

                    Welcome to the heart of soup season, where my Curry Coconut Cauliflower Soup takes center stage.

                    Dive into a bowl of pure comfort, as creamy coconut, savory cauliflower, and aromatic curry create warmth and flavor. 

                    The addition of vibrant red peppers, radishes, carrots, cilantro, and a touch of lime elevates the experience, creating a culinary journey that warms both body and soul.


                    Spice B3G2

                    Ingredients:

                    Cauliflower: Hearty and nutritious base for the soup.
                    Adds a subtle nutty flavor and creamy texture when cooked. 

                    • Add shrimp or chicken for more protein.

                    Coconut Milk: Creates the rich and creamy consistency.

                    Chicken or Vegetable Stock: Base of the soup, Enhances the overall flavor.

                    Red Peppers, Radishes, Carrots: Provides essential vitamins and antioxidants, contributing to a wholesome and nutritious dish.

                    Cilantro and Lime: balances the richness of coconut milk and the earthiness of cauliflower.

                    Curry Powder: Warm and aromatic spices.

                    Coconut Oil: Used for sautéing garlic and cauliflower.

                    Salt and Pepper: Seasoning.

                    ingredients for soup

                    Instructions:

                    1. In a large pot, heat olive oil over medium heat. Add garlic.

                    2. Add chopped cauliflower to the pot and sauté for a few minutes until slightly browned.

                    3. Sprinkle curry powder over the cauliflower, stirring to coat evenly.

                    4. Pour in coconut milk and chicken or vegetable stock. Bring to a simmer and let it cook until the cauliflower is tender.

                    5. Add diced red peppers, sliced radishes, and diced carrots to the pot. Simmer for an additional 10-15 minutes until the vegetables are cooked to your liking.

                    6. Season the soup with salt and pepper to taste. Adjust the curry powder if you desire a stronger flavor.

                    7. Stir in freshly chopped cilantro and lime juice. Let it simmer for an additional 5 minutes to allow the flavors to meld.

                    8. Once the soup is well-seasoned and the vegetables are tender, remove from heat.

                    9. Serve hot, garnished with additional cilantro and lime wedges if desired over rice.

                    Coconut curry soup

                    9
                    spaghetti squash
                    Deliciously Loaded Spaghetti Squash Boats for the Best Guilt-Free Dinner
                    Check out this recipe


                    Facebook


                    Twitter


                    Pinterest


                    Instagram

                    pin
                    tuna salad
                    Breakfast

                    Tuna Salad

                    This article may contain links from my partners. I may receive a small commission if you make a purchase through a link. Please read my disclosure and how I make money here.

                    My tuna salad recipe will be a new favorite, easy, flavorful and a healthy snack! 

                    This flavorful creation brings together the richness of flaky tuna, crispness of celery and zing of red onion, all united by a creamy Greek yogurt and mayonnaise blend.

                    Whether enjoyed atop a bed of greens, sandwiched between two slices of bread or between a cracker, this recipe invites you to savor a delightful combination that is easy to make and a joy to savor.

                    Keep reading to create the perfect tuna salad!


                    tuna

                    Shop King Arthur Baking for all your baking needs!

                    1. In a bowl, combine drained tuna, mayonnaise, greek yogurt, chopped celery, red onion and mustard.
                    2. Mix ingredients thoroughly until well combined.
                    3. Season with salt and pepper to taste. Adjust yogurt or mayo for desired creaminess.
                    4. Chill in refrigerator for at least 30 minutes before serving.

                    tuna salad

                    Whether served on a lazy Sunday afternoon, packed for a workday lunch, or shared with friends at a gathering this recipe is an invitation to enjoy a timeless classic.

                    Can I use fresh tuna instead of canned tuna?

                    Yes, you can use fresh tuna. Cook and flake it before mixing with other ingredients. Canned tuna is the convenient option, but fresh tuna can add a different texture and flavor.

                    What are healthy alternatives to mayonnaise?

                    Greek yogurt, avocado, or hummus can be used as healthier alternatives to mayo. These options add creaminess while reducing overall calorie and fat content.

                    How can I add a crunchy texture?

                    Chopped celery, diced pickles or toasted nuts like almonds or walnuts can add a nice crunch to your salad.

                    Can I make this recipe ahead of time?

                    Yes, tuna salad can be made ahead. However, it’s recommended to add ingredients like celery and avocado just before serving to maintain their freshness and texture.

                    What are some creative add-ins to enhance the flavor?

                    Diced apples, dried cranberries, capers, or chopped fresh herbs (such as dill or parsley) can add interesting flavors.

                    How long does tuna last in the refrigerator?

                    It can generally be stored in the refrigerator for 2-3 days. Ensure it is stored in an airtight container to maintain freshness.

                    Can I make without mayonnaise?

                    Absolutely! You can use alternatives like Greek yogurt, mustard, or avocado for a mayo-free tuna salad. Experiment with flavors to find your preferred combination.

                    Are there any vegetarian or vegan alternatives to tuna for a plant-based tuna salad?

                    Yes, you can use ingredients like chickpeas, tofu, or jackfruit as plant-based alternatives.

                    Experiment with different variants of this classic recipe, adding a hint of lemon, touch of sriracha or a handful of nuts- let your creativity shine! The beauty of tuna salad is its simplicity, versatility and joy it brings to any meal!

                    Share this recipe with friends and family. Comment below and let me know what you added to this recipe to make it unique!


                    22

                    pin
                    fruit rollups
                    Breakfast

                    Fruit Rollup

                    This article may contain links from my partners. I may receive a small commission if you make a purchase through a link. Please read my disclosure and how I make money here.

                    Creating a homemade fruit rollup is so easy and a healthy way to enjoy a burst of fruity flavors. Start by pureeing a mix of fruits, spread evenly onto a lined baking sheet and dehydrate or bake until it transforms into a flexible, chewy texture. Cut into strips, roll up and enjoy!

                    fruit rollups

                    This homemade treat is a delicious snack but also provides fiber, antioxidants and vitamins. You will also be avoiding any artificial additives or preservatives, sugars and have fresh, high quality fruits in your rollup.


                    They are fun to make, reduces waste and are quite cost effective as well. 

                    Commonly Asked Questions

                    Can you use frozen fruit?

                    Yes thaw them first, and drain water. 

                    How thin should the fruit strips be spread? 

                     Aim for an even, thin layer for even drying and texture.

                    Can I make fruit roll ups without a dehydrator?

                    Yes, I actually used the oven. Just set it at the lowest temperature and prop the door open slightly to help moisture escape.

                    photo 1519996529931 28324d5a630e

                    How to prevent sticking to parchment paper?

                    Lightly grease the paper or use a silicone baking mat to prevent sticking. 

                    How long does it take to dehydrate fruit roll ups?

                    Dehydration varies but typically 4-8 hours. 

                    What is the difference between fruit leather and fruit roll ups? 

                    Fruit leather is a lot thicker and chewier compared to the thinner and more pliable fruit rollups.

                    pin
                    cballs
                    Breakfast

                    Chocolate Chip Cheese Cake Balls

                    This article may contain links from my partners. I may receive a small commission if you make a purchase through a link. Please read my disclosure and how I make money here.

                    Disclosure: Some of the links below are affiliate links. This means that, at zero cost to you, I will earn an affiliate commission if you click through the link and finalize a purchase. 

                    Today I’m so excited to share with you the best Chocolate cheesecake ball recipe. Simple, easy and no need for a water bath! 

                    The texture is smooth, rich and creamy over a outside layer of homemade graham cracker crust.

                    1. Whip 1 pack room temp cream cheese with heavy cream and sugar. (Whip until fluffy and no lumps)

                    2. Add in Cinnamon, chocolate chips and blend in.


                    20231105031730 IMG 1079

                    3. Place in freezer until cold so you can form balls.

                    4. Once balls are formed, roll in graham cracker mixture. 

                    5. Freeze for 1 hour and place in refrigerator for enjoying!

                    20231105055331 IMG 1099
                    20231105060527 IMG 1157

                    How to make Homemade graham crackers

                    Ingredients you will need: Flour, Cinnamon, Baking Soda, Corn Starch, Butter, Apple Sauce, Honey

                    Instructions:

                    In a bowl, mix 1 cup flour, 3 to 2 tbsp cinnamon, 1/2tbsp baking soda, 2tbsp cornstarch.

                    After dry ingredients mixed, grate 4 tbsp cold butter and mix in flour.

                     Add 1/4 cup apple sauce,1/4 cup honey, 2tbsp water and mix until a nice ball of dough forms similar to making pie crust.

                    Now roll mixture into a square using rolling pin as well as you can. 

                    Cut into rectangular shapes like graham crackers come in the package.

                    To help with level crackers take a fork and poke holes all the way across your now cut crackers.

                    Sprinkle brown sugar over top before baking.

                    Place in oven at 350­°F for 18-23 minutes depending on the crispness of the cracker you desire.

                    20231105041018 IMG 1083
                    20231105041326 IMG 1092
                    20231105041050 IMG 1086

                    Commonly Asked Questions

                    1. Can I substitute any ingredients for a healthier version? Use low-fat cream cheese, homemade graham crackers and a dark chocolate for a healthier option. 

                    2. Can I freeze Chocolate Cheesecake balls? Yes, freeze in a airtight container for up to a month.

                    3.What toppings can I add to the Cheesecake balls? Sprinkles, chopped nuts or drizzled chocolate.

                    4. Can I make these ahead of time for a party? Absolutely, prepare them a day in advance and store in the fridge. 

                    5. How many balls does the recipe typically yield? It depends on the size, usually 20-24.

                    6. What is a good substitute for cream cheese in the filling for those that are lactose intolerant? Try lactose-free cream cheese or a non-dairy alternative like vegan cream cheese.

                    pin
                    pork rind chicken tenders
                    Breakfast

                    Pork Rind Chicken

                    This article may contain links from my partners. I may receive a small commission if you make a purchase through a link. Please read my disclosure and how I make money here.

                    Using pork rinds to coat your chicken instead of flour is our new favorite! Pork rinds make the most magical substitute for bread crumbs and are keto friendly! Serve with coleslaw, roasted veggies or a simple green salad. 

                    I never thought I would be a fan of pork rinds. The sound of fried pork skin grossed me out until I tried them. They add crunch and so much flavor to a lot of recipes. You can use them with dips, chili and a coating for fried chicken!

                    Mac’s Pork Rinds are by far my favorite brand.

                    pork rind chicken tenders

                    Instructions:

                    1: Place pork rinds in a zip lock baggie. Zip the bag up and pound the pork rinds with a meat tenderizer.

                    2. Then pound the chicken tenders with meat tenderizer.

                    3. Mix together salt, pepper, sesame seeds, eggs, buttermilk.

                    4. Brush Mixture onto chicken.

                    5. Then coat the chicken in the crushed-up pork rinds.

                    6. Cook chicken on stovetop, about 4 minutes each side.

                    Use Code Welcome20 for $20 off any box + Free Shipping!

                    1. How do you properly prepare the pork rinds for coating the chicken? Crush pork rinds finely and set up a station for coating with seasoned flour.
                    2. Do you recommend any specific seasonings or spices to enhance the flavor? Use a mix of garlic powder, onion powder, paprika, salt and pepper for a flavorful blend.
                    3. Can this recipe be adapted for both baking and frying? What are the recommended cooking times and temperatures? Both methods work; baking at 400°F for 20-25 minutes or frying until golden brown.
                    4. How do you ensure the chicken stays crispy and doesn’t become soggy? Ensure the chicken is patted dry before coating and avoid overcrowding during cooking.
                    5. Suggestions for delicious dipping sauces that pair well with pork rind chicken? A spicy mayo, ranch or tangy barbecue sauce for dipping!
                    6. How should leftovers be stored to maintain crispiness? Store in an airtight container in the refrigerator.
                    pin
                    spaghetti squash
                    Breakfast

                    Spaghetti Squash

                    This article may contain links from my partners. I may receive a small commission if you make a purchase through a link. Please read my disclosure and how I make money here.

                    Spaghetti squash is a nutritious winter vegetable known for its stringy noodle like flesh when cooked. It offers a lot of fiber, beta-carotene, folate and more.

                    This vegetable spaghetti is a great substitute for pasta and you can add a variety of flavors to make it a family favorite!

                    How to cook Spaghetti Squash:

                    There are many different cooking methods such as microwaving, steaming in a pan of water or sliced into rings and baked. However I have found this method the easiest and here’s why.

                    spaghetti squash

                    Cut the squash in half, rub olive oil inside and roast it cut side down on a baking sheet. This method reduces the amount of moisture and yields golden, caramelized edges that add extra flavor.

                    tasty recipes

                    You will need a very sharp knife in order to cut the squash. Getting this knife sharpener is a kitchen essential.


                    knife sharpener
                    This knife sharpener is a kitchen essential.

                    Are there specific seasons or ingredients that pair well with noodle squash? It pairs well with fall flavors like sage, roasted mushrooms, fresh thyme, lemon zest and parmesan cheese or incorporate into summer salads with fresh herbs and vegetables. 

                    Instructions for spaghetti squash:

                    1. Preheat oven to 400 degrees F
                    2. Use a very sharp knife to cut off the tip-top and very bottom ends of the squash.
                    3. Stand the squash upright and carefully slice through it from top to bottom.
                    4. Drizzle olive oil and rub it all over the inside of the squash. Sprinkle Salt and pepper inside and then place them cut-side down on the baking sheet.

                    5. Bake for 60 minutes or until the cut sides are turning golden and inside is easily pierced through with a fork.

                    Enjoy your delicious and wholesome spaghetti squash creation!

                    Squaghetti Most asked questions:

                    Can you freeze? Yes, store the spaghetti squash noodles in a airtight container.

                    What are the nutritional benefits? It is a good source of fiber, vitamin C and A and contains antioxidants. Its also low in carbs!

                    You may also like my meatball recipe, check it out here. 


                    meatballs

                    smartphone 1200 width

                    pin
                    beef stroganoff
                    Breakfast

                    Beef Stroganoff

                    This article may contain links from my partners. I may receive a small commission if you make a purchase through a link. Please read my disclosure and how I make money here.

                    Disclosure: Some of the links below are affiliate links. This means that, at zero cost to you, I will earn an affiliate commission if you click through the link and finalize a purchase. 

                    What is Beef Stroganoff?

                    It is a savory dish characterized by juicy beef, mushrooms and coated in a creamy sauce.

                    It’s hearty, warm and perfect for chilly weather ahead!

                    beef stroganoff
                    beef stroganoff

                    Why use Beef Gelatin?

                    It is a colorless, tasteless water soluble protein prepared from collagen. 


                    Enhance your healthy cooking! Its perfect for thickening stews, sauces, creating marshmallows, Jell-O, gummy words and custard.


                    Beef Gelatin boosts your metabolism and energy.
                    Mix as advertised in cool water and then add to whatever you want.


                    This beef gelatin isn’t gritty, blends smoothly and is a secret ingredient in some of my recipes! Check out this Toasted Coconut Chocolate Whipped Cream Pudding recipe and how I used this beef gelatin.


                    beef gelatin

                    How to make egg noodle

                    First oil your pan and turn on medium heat. 

                    Then put your eggs in a blender, combining the beef gelatin until smooth and granules are dissolved.

                    Pour just enough mixture into pan to cover surface of pan.

                    Eggs should not bubble; slowly heat and use spatula to scrape around outer surfaces until able to lift without egg ripping. 

                    20230727053926 IMG 9580 1

                    Gently fold egg over in a pinwheel motion and continue rolling.

                    20230727053942 IMG 9581

                    Once rolled up transfer from pan to cutting board as the residual heat will continue to cook the almost noodles thoroughly.

                    20230727054121 IMG 9590

                    Then cut small sections horizontal across rolled egg. Gently roll out sliced sections and you will have your egg noodles!

                    20230727054547 IMG 9591

                    Making the sauce

                    Cut the beef across grain into strips. 

                    Cook mushrooms, onions and garlic in butter until onions are tender, remove from skillet

                    Cook beef in same skillet until brown, stir in 1 cup of broth, salt and Worcestershire sauce. Heat to boiling; reduce heat. Cover and simmer for 15 minutes.

                    Stir remaining 1/2 cup broth into flour and stir into beef mixture. Add onion mixture; heat to boiling, stirring constantly.

                    Stir in sour cream; heat until hot (do not boil) serve over egg noogles.

                    pin
                    pineapple upside down cake
                    Breakfast

                    Pineapple Upside Down Cake

                    This article may contain links from my partners. I may receive a small commission if you make a purchase through a link. Please read my disclosure and how I make money here.

                    This classic pineapple upside down cake will be sure to wow your friends! With tasting notes that boast fruit, gooey, caramelly goodness it’s no wonder why this has been a favorite for generations! 

                    The juices of the cherries drip into the cake, adding even more flavor and texture. 

                    A classic, favorite using pineapple and maraschino cherries, this retro cake is served upside down and perfect anytime of the year!

                    upside down cake

                    Instructions

                    Step 1: Brown your butter. A simple but important step to create the best Pineapple upside-down cake – read my post here about browning butter and what it brings to the recipes! 

                    Step 2: Take butter and brown sugar and heat in a saucepan.
                    As soon as sugar and butter are incorporated, pour into Pyrex dish. 

                    Step 3: Drain pineapple rings and place them side by side on top of the sugar and butter mixture.

                    Place Maraschino cherries in the holes of the pineapple. Trust me, their worth the price compared to other cherries.

                    Next, follow the instructions on your cake mix. We used King Arthurs yellow cake mix.

                    Step 4: To make boxed cake all you will need to do is Whisk the dry ingredients together, add the wet ingredients and combine. 

                    You can add the leftover pineapple juice to the mixture to add more flavor.

                    Then pour batter over pineapples and spread with a spatula.

                    Step 5: Bake at 350 for 30-35 minutes.

                    After removing cake from oven, flip the cake over pretty quickly to prevent cake from sticking.

                    Add extra cherries on top with freshly made whip cream – see this recipe here on how to make your homemade whip cream!

                    upside down pineapple
                    pin
                    meatballs
                    Breakfast

                    Meatball Recipe

                    This article may contain links from my partners. I may receive a small commission if you make a purchase through a link. Please read my disclosure and how I make money here.

                    If you looking for the most delicious meatball recipe including ground beef, almond flour, parmesan cheese and a medley of aromatic herbs, you’ve come to the perfected seasoned recipe!

                    These meatballs are browned to perfection and simmered in a tomato sauce. They deliver a mouthwatering combination of juiciness and rich taste. 

                    Serve over spaghetti or enjoy them as a savory appetizer.

                    These meatballs can be used for just about anything – spaghetti or snacks, or even used as dippers for appetizers.

                    meatballs

                    Meatballs are such a classic recipe – perfect in soups, casseroles, meatball sandwiches or over noodles.

                    You can freeze them and just pop them into a pot of soup or marinara sauce to create a homemade meal in minutes!

                    Meatball Ingredients:

                    The Perfect Meatball Instructions:

                    Step 1: Mix together flour, milk, garlic, salt and pepper, onion and egg together.

                    Step 2: Once mixed, combine beef and form balls. 

                    Step 3: Place meatballs into oven for 20 minutes. 

                    Step 4: Serve over noodles. 

                    How many meatballs will 1lb make?

                    One pound of ground beef will make 22 meatballs with my recipe. Plan on 1/4 beef per person. I used 85% for this recipe. 

                    meatballs

                    meatballs

                    Italian Seasoning

                    This seasoning is my favorite, add to meatballs, salad and add to your pizza for more flavor!

                    2YearSupplyofGroundBeef2 00

                    Meatball Tips & questions

                    making meatballs without eggs

                    Using an alternative to eggs such as yogurt, ricotta cheese or unsweetened apple sauce can help retain the meatball shape.

                    How to make juicy meatballs?

                    Adding a combination of finely ground nuts (such as almonds, pecans or walnuts) and milk helps retain the moisture. This adds a nutty flavor and contributes to a unique textured meatball. 

                    How to prevent meatballs from falling apart during cooking?

                    Ensure proper binding by using a mixture of egg and ground nuts, or breadcrumbs. Avoid over mixing. 

                    What other flavors to add to the meatballs?

                    Try basil, oregano or grated parmesan cheese to enhance the taste.

                    Now you have created a bath of homemade meatballs that are full of flavor.

                    Choose to top them over a bed of spaghetti, in a sub or as an appetizer. 

                    Enjoy these easily made meatballs and be sure to leave a comment below if you have tried my recipe!

                    pin
                    20230914003623 IMG 0642 1 e1695652651815
                    Breakfast

                    Crunchy Granola

                    This article may contain links from my partners. I may receive a small commission if you make a purchase through a link. Please read my disclosure and how I make money here.

                    My crunchy granola recipe has always been one of my favorite treats to add to yogurt, a parfait or just that good to eat by the handful – it’s such a simple recipe with low sugar and you can jazz it up as much as you’d like!

                    granola

                    My recipe is only 7 ingredients and very basic but tasty. You can of course adjust the ingredients to your preference, but the main ingredients are Old fashioned oats, a neutral oil, a sweetener, nuts, dried fruit or my favorite – chocolate chips.

                    Is granola healthy?

                    Making homemade granola is literally the best, cheapest and guarantees NO added ingredients your unaware of such as the sugars, oils or fats.

                    Depending upon the ingredients used, granola is calorie dense as well as rich in protein, fiber and micronutrients. It can also provide iron, magnesium, zinc, copper, selenium, B & E vitamins.


                    oats

                    glyphosate free

                    Other potential health benefits:

                    Antioxidants- Such as coconut, chia seeds, Brazil nuts are good sources of inflammation fighting antioxidants.

                    Improve Gut Health- Increases the levels of healthy gut bacteria.

                    Reduce Glucose- Whole grains, dried fruit nuts and seeds help reduce blood sugar levels.

                    Improve Blood Pressure- High fiber ingredients like oats and flax seeds have shown to reduce blood pressure

                    How to eat granola?

                    I eat granola by the handful, with a spoon! You can of course add it to your yogurt or a parfait with berries – yum.

                    premium photo 1673816475398 4877871a584b

                    To achieve really good clumps press down on the finished granola before it cools and avoid jostling the pan, until its cool completely.

                    Check out my post on Kitchen Essentials to be prepared for any recipe!

                    Leave a comment and let me know how your granola turned out and what you added in to make it unique!

                    pin
                    Ridiculously Easy and Creamy Vitamix Almond Butter