gluten free recipe for zucchini bread
Dessert

Moist & Fudgy Gluten Free Chocolate Zucchini Bread

This article may contain links from my partners. I may receive a small commission if you make a purchase through a link. Please read my disclosure and how I make money here.

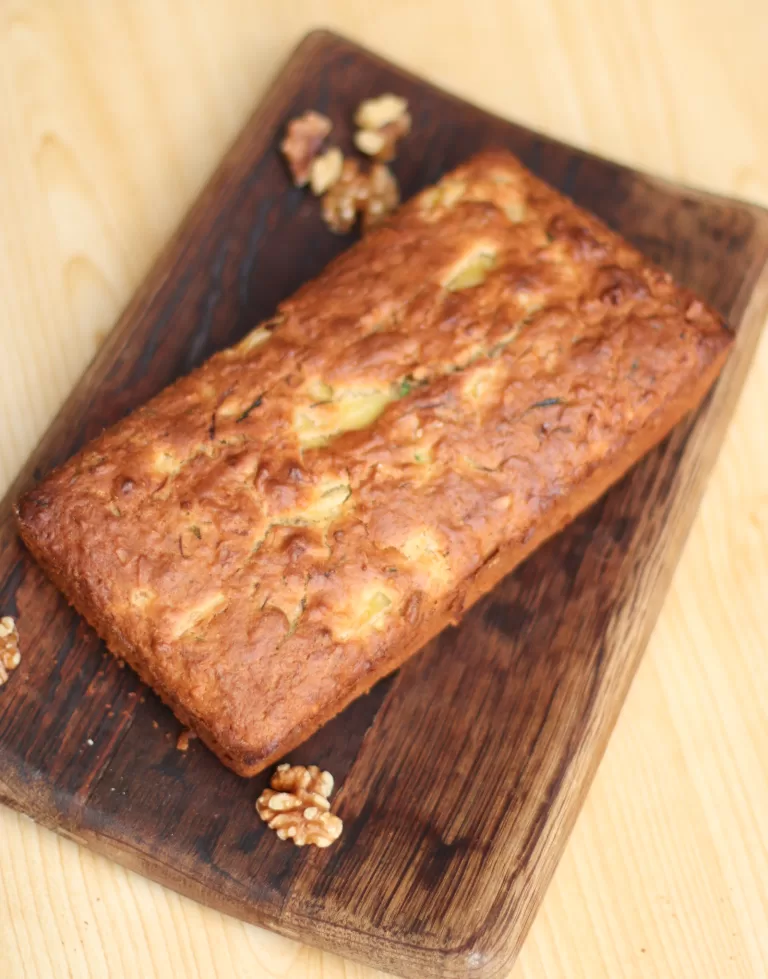
Get ready to make the most moist and rich gluten free chocolate zucchini bread that’s packed with flavor! This recipe combines the sweetness of zucchini with the richness of chocolate, creating the most perfect balance for this easy gluten free zucchini bread recipe.

If you’re craving a slice of zucchini oat bread for breakfast or dessert, this gluten free recipe for zucchini bread is easy to make and loaded with wholesome ingredients.

This gluten free chocolate zucchini bread, It’s the perfect treat for any time of day!

gluten free recipe for zucchini bread

You’ll absolutely love this perfectly moist zucchini oat bread, here’s why:

  1. Moist and Tender: With zucchini being naturally sweet and retains water, creating the most moist desserts.
  2. Wholesome and Nutritious: Made with oats, this bread is packed with fiber and essential nutrients.
  3. Gluten-Free Friendly: Just swap in gluten-free oats and almond flour to make it GF.
  4. Easy to Make: With simple ingredients and quick prep time, this zucchini oat bread is perfect for busy bakers or those new to baking.
  5. Customizable: Make this a savory zucchini bread or sweet by adding in nuts, chocolate chips or spices.
gluten free flour bread recipe

Gluten free recipe for zucchini bread

This zucchini bread oat flour adds some wholesome, slightly sweet, nutty flavor to this zucchini bread recipe and adds a tender crumb.

When using a combination of oat flour and other gluten free flours it helps maintain moisture and prevents the bread from falling apart.

King Arthur Recipe of the Year - Supersized, Super Soft Chocolate Chip Cookies

Delicious savory dishes like my cheesy chicken poblano burritos or my cheddar cheese shell tacos pair perfectly with a savory zucchini bread recipe – just simply swap out the sugar for herbs like rosemary, thyme or cheese.

Using oat flour in savory recipes makes this nutty flavor that will be the best zucchini bread savory you’ve made!

Oh, hey there!

Welcome! I’m an aspiring foodie who loves sharing adventures, hikes, local finds, and all things delicious. Wife to an incredible chef and mama to two adorable sous chefs, I’m always creating, sharing and enjoying every bite along the way!

Read more and subscribe to get my most tried and loved recipes delivered straight to your inbox!

imageedit 1 7887394045 1024x1024 2

Walnut Oat Bread Ingredients:

  • Gluten Free Oatmeal: Just like my gluten free pumpkin cream cheese muffins oats make the perfect gluten free option and also creates a crumbly crust.
  • Almond Flour: Adds a rich, nutty taste and adds moisture to the oat flour.
  • Baking Soda: Leavening agents provide lift and lightness.
  • Salt: Balances and enhances all the flavors in the bread.
  • Cinnamon: Adds warm flavor.
  • Eggs: Acts as a binder, holding the ingredients together. Eggs also help the bread rise and add richness.
  • Vanilla Extract: Enhances the flavor of earthiness and sweet in this recipe.
  • Butter: Helps enhance richness and flavor and tenderness. Add the extra step of browning your butter for extra deliciousness!
  • Walnuts: Texture and crunch, slight bitterness which pairs well with the sweetness of zucchini.
  • Chocolate Chips: Provides rich bursts of sweetness and depth.
  • Zucchini: Provides moisture and a tender texture to the bread, thanks to its high water content.
savory zucchini bread

How to make zucchini bread

  • Preheat Oven: Set your oven to 350°F (175°C) and grease a 9×5-inch loaf pan, or line it with parchment paper.
  • Prepare Zucchini: Grate the zucchini, then lightly squeeze it in a clean towel or paper towels to remove excess moisture. Set it aside.
  • Mix Dry Ingredients: In a large bowl, whisk together the flour, oats, baking soda, baking powder, cinnamon, and salt.
  • Combine Wet Ingredients: In another bowl, whisk the eggs, then add the sugar, oil, and vanilla extract. Stir until well mixed.
  • Add Zucchini: Fold the grated zucchini into the wet ingredients.
  • Combine Wet and Dry: Gradually mix the dry ingredients into the wet ingredients until just combined. Be careful not to overmix. If using, fold in walnuts or chocolate chips.
  • Pour and Bake: Pour the batter into the prepared loaf pan and smooth the top. Bake for 50–60 minutes, or until a toothpick inserted in the center comes out clean.
  • Cool: Allow the gluten free chocolate zucchini bread to cool in the pan for about 10 minutes, then transfer to a wire rack to cool completely.
zucchini bread calories

This is truly an easy gluten free zucchini bread recipe because it’s simple to follow, requires minimal ingredients, and makes the most moist, flavorful gluten free chocolate zucchini bread.

When making this rich gluten free chocolate zucchini bread, the zucchini oat bread is simple to make, even beginners can whip up this delicious bread in no time!

zucchini bread oat flour
gluten free recipe for zucchini bread

Gluten Free Chocolate Zucchini Bread

Gluten free chocolate zucchini bread makes the perfect walnut oat bread, a great option for gluten free flour bread recipe that creates the best fall desserts.
Prep Time 15 minutes
Cook Time 1 hour
Total Time 1 hour 15 minutes
Course Dessert
Calories 220 kcal

Equipment

  • 1 loaf pan
  • 2 mixing bowls
  • 1 grater/kitchen aid
  • 1 tsp
  • 1 Measuring Cup

Ingredients
  

  • 1 ½ cups gluten free oats
  • ½ cup almond flour
  • 1 tsp baking soda
  • ½ tsp salt
  • 1 tsp cinnamon
  • 3 large eggs
  • 1 stick butter
  • ½ cup brown sugar
  • 1 tsp vanilla extract
  • 1 ½ cups zucchini grated cheese
  • 1 cup chocolate chips or walnuts

Instructions
 

  • Preheat Oven: Set your oven to 350°F (175°C) and grease a 9×5-inch loaf pan, or line it with parchment paper.
  • Prepare Zucchini: Grate the zucchini, then lightly squeeze it in a clean towel or paper towels to remove excess moisture. Set it aside.
  • Mix Dry Ingredients: In a large bowl, whisk together the flour, oats, baking soda, baking powder, cinnamon, and salt.
  • Mix Dry Ingredients: In a large bowl, whisk together the flour, oats, baking soda, baking powder, cinnamon, and salt.
  • Combine Wet Ingredients: In another bowl, whisk the eggs, then add the sugar, oil, and vanilla extract. Stir until well mixed.
  • Add Zucchini: Fold the grated zucchini into the wet ingredients.
  • Combine Wet and Dry: Gradually mix the dry ingredients into the wet ingredients until just combined. Be careful not to overmix. If using, fold in walnuts or chocolate chips.
  • Pour and Bake: Pour the batter into the prepared loaf pan and smooth the top. Bake for 50–60 minutes, or until a toothpick inserted in the center comes out clean.
  • Cool: Allow the bread to cool in the pan for about 10 minutes, then transfer to a wire rack to cool completely.
Keyword gluten free chocolate zucchini bread, gluten-free zucchini bread, walnut oat bread, zucchini walnut
gluten free chocolate zucchini bread

Does zucchini bread need to be refrigerated?

Zucchini bread doesn’t always need refrigeration, but it depends on how long you plan to store it and the temperature of your kitchen.

When to refrigerate this gluten free chocolate zucchini bread:

  • Warm or Humid Environments: In warmer or more humid conditions, refrigeration helps prevent mold growth, especially since moisture-rich ingredients like zucchini are used in recipes like zucchini oat bread.
  • Storing for Longer Than a Few Days: If you’re keeping the bread for more than 2-3 days, it’s a good idea to refrigerate it. This applies to all variations, including gluten free chocolate zucchini bread, to maintain freshness for a longer time.

By refrigerating, it helps retain the tenderness of this gluten free chocolate zucchini bread.

gluten-free zucchini bread

How to store zucchini bread:

At Room Temperature (2-3 days):

  • Wrap it: Once the gluten free chocolate zucchini bread has completely cooled, wrap it tightly in plastic wrap, foil, or place it in an airtight container.
  • Store in a cool, dry place: This will keep the bread fresh for up to 2-3 days at room temperature.

In the Fridge (Up to 1 week):

  • Wrap or store airtight: Wrap the bread tightly in plastic wrap or store it in an airtight container.
  • Refrigerate: Keep it in the refrigerator to extend freshness for 5-7 days.
recipe gluten free zucchini bread

Can you freeze zucchini bread?

Of course, Wrap in plastic and foil: First, wrap the bread tightly in plastic wrap, then cover it with aluminum foil to avoid freezer burn, this seems to be the best way to freeze zucchini bread. Thaw at room temp and enjoy!

zucchini oat bread

I hope you enjoy this easy gluten free zucchini bread recipe!

If you try the chocolate version, a savory zucchini bread, or a walnut oat bread, it’s sure to be a hit!

Your feedback helps make each recipe even better for everyone.

Don’t forget to leave a comment, give the recipe a rating, and subscribe to get more of the most tried, loved, and shared recipes sent right to your inbox!

pin
brown butter bites
Dessert

Toasty Brown Butter Bites

This article may contain links from my partners. I may receive a small commission if you make a purchase through a link. Please read my disclosure and how I make money here.

Brown butter bites add a rich, nutty flavor with a caramel-like sweetness to any dish.

But, eating butter alone, especially in the form of brown butter bites, can be a great option if you’re following a high-fat, low-carb diet like keto or carnivore, where fats are an essential energy source.

Butter is rich in healthy fats that support brain function, provide sustained energy, and help keep you full for longer. Brown butter also adds an incredible depth of flavor, that creates a nutty, almost caramel-like taste.

brown butter bites jpg

Plus, fats can help balance blood sugar and support a healthy metabolism!

Their the perfect carnivore desserts, melting in mouth like toffee, with delicious hints of hazelnut in every bite.

I’m a total chocolate fanatic, so it took some convincing to try these butter bites as a substitute for my sweet tooth.

Now, in almost every recipe, I refer back to this browned butter bites trick because it takes every dish to the next level, just like for my gluten free oatmeal chocolate chip cookies.

The secret ingredient really is in browning your butter!

brown butter oatmeal cookies

Brown Butter Bites Ingredients:

All you really need for this recipe is unsalted grassfed butter! Add additional spices for flavor such as cinnamon, maple syrup.

  • Other add ins to the butter:
  • Vanilla Extract: Adds a warm, aromatic touch.
  • Cinnamon or Nutmeg: Perfect for a hint of spice, especially in fall recipes.
  • Sea Salt: A pinch of salt can bring out the rich flavors in the butter.
  • Sweetener: Monk fruit, honey, or maple syrup can add sweetness without overpowering the buttery flavor.
  • Chopped Nuts: Pecans, almonds, or hazelnuts add crunch and extra nuttiness.
  • Dark Chocolate Chips: For a sweet, melty twist.
  • Coconut Flakes: Adds texture and a hint of tropical flavor.
  • Herbs (like rosemary or thyme): Ideal for savory brown butter dishes.

HI THERE!

Welcome to Hike Cook Share!

Wife to a talented chef and mama to two little sous chefs, I’m passionate about food photography, exploring and sharing!

Finding inspiration in the beauty of the outdoors and the joy of a well-crafted dish, all while sharing moments together.

imageedit 1 7887394045 1024x1024 2

Is grass fed butter healthy?

Grassfed butter is often preferred because it’s richer in nutrients compared to regular butter. It contains higher levels of omega-3 fatty acids, vitamin A, and conjugated linoleic acid (CLA), which have anti-inflammatory and heart health benefits.

carnivore diet desserts

What Can You Do With Browned Butter?

The real question should be, what can’t you do with browned butter?!

It makes a great option for carnivore diet sweets, snack or you can add it to any baking recipe, sandwiches or noodles. 

How to browned butter?

This recipe is so easy – all you have to do is:

Place the stick of butter in the saucepan on medium heat.

Wait until it begins to foam – stirring it in the process. 

Cooking times vary, usually 5-8 minutes

Eventually the butter will start turning golden brown and smelling nutty and that’s when it is done!

Remove immediately to avoid burning.

As it cools, it will continue to brown.

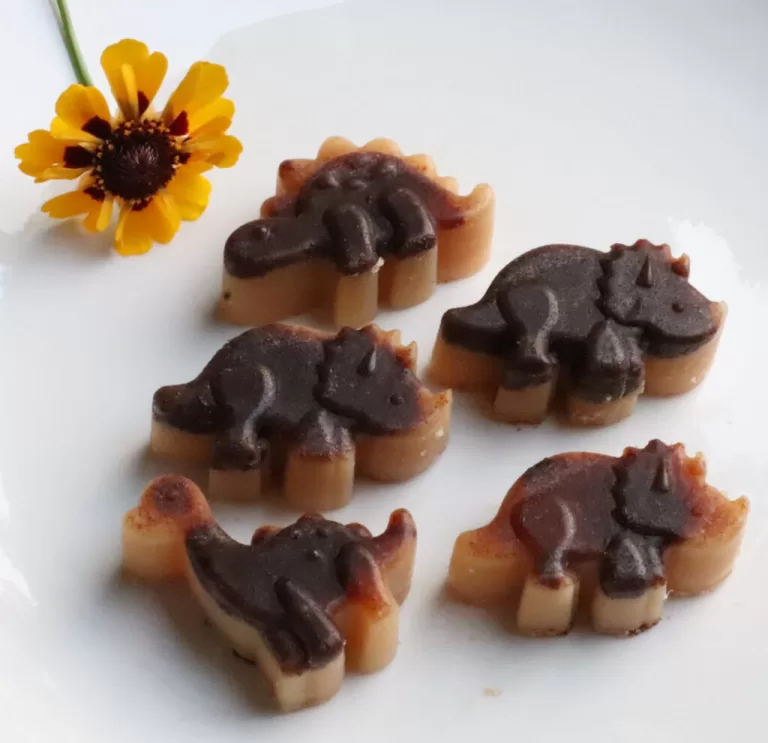
Then pour into these dinosaur silicone molds and refrigerate for future use.

carnivore brown butter bites jpg
carnivore diet sweets jpg
brown butter bites

Toasty Brown Butter Bites

Brown butter bites add flavor, richness and healthy fats back into any recipe! The flavor is like caramelized hazelnut satisfying any sweet tooth and perfect for a carnivore diet sweets treat!
Cook Time 8 minutes
Course Dessert
Cuisine American

Equipment

  • 1 saucepan
  • 1 spatula
  • 1 mold

Ingredients
  

  • 1 stick butter melted
  • 2 tsp cinnamon, nutmeg, honey, maple syrup, herbs optional

Instructions
 

  • Melt butter in sauce pan
  • Takes about 5-8 minutes
  • Stir in optional add ins such as cinnamon, herbs or honey.
  • Browned butter will appear golden brown, that is when it is ready.
  • Let cool.
  • Pour into silicone molds and refrigerate
  • Add to any recipe!
Keyword brown butter bites, browned butter bites, carnivore desserts, carnivore diet sweets

Featured Categories

From tasty desserts to crowd-pleasing appetizers and satisfying dinners, these favorite recipes are sure to hit the spot! Whether you’re hosting or just craving something delicious, each dish is packed with flavor and easy to make.

Why Should You Try Brown Butter?

Browning butter not only gives butter a lovely toasty, nutty flavor but by cooking out the water and caramelizing the milk solids you can extend the life of the butter! 

What does browned butter look like?

Browned butter has a golden to deep amber color, with tiny dark brown specks at the bottom. These specks are the milk solids that have caramelized during the cooking process.

The butter takes on a glossy, rich appearance, and you’ll notice a slight foaming at the top as it cooks. The final product has a nutty, toasty smell, signaling it’s ready to be used in your recipe.

It’s important to watch closely while cooking, as it can quickly go from browned to burnt.

browned butter bites

These Brown Butter Bites are the perfect balance of nutty, rich flavor with a touch of caramel sweetness.

They’re simple to make, incredibly satisfying, and perfect for those following a low-carb or high-fat diet.

Give them a try, and don’t forget to leave a comment on how they turned out. Be sure to check out more of my recipes for easy, delicious treats!

Ready in 15 minutes

Fusce dapibus, tellus ac cursus commodo, tortor mauris condimentum nibh, ut fermentum massa justo sit amet risus. Donec sed odio dui. Donec id elit non mi porta gravida at eget metus.

pin
pumpkin cinnamon bundt cake
Dessert

Amazingly Rich Pumpkin Spiced Bundt Cake with Sweet Maple Glaze

This article may contain links from my partners. I may receive a small commission if you make a purchase through a link. Please read my disclosure and how I make money here.

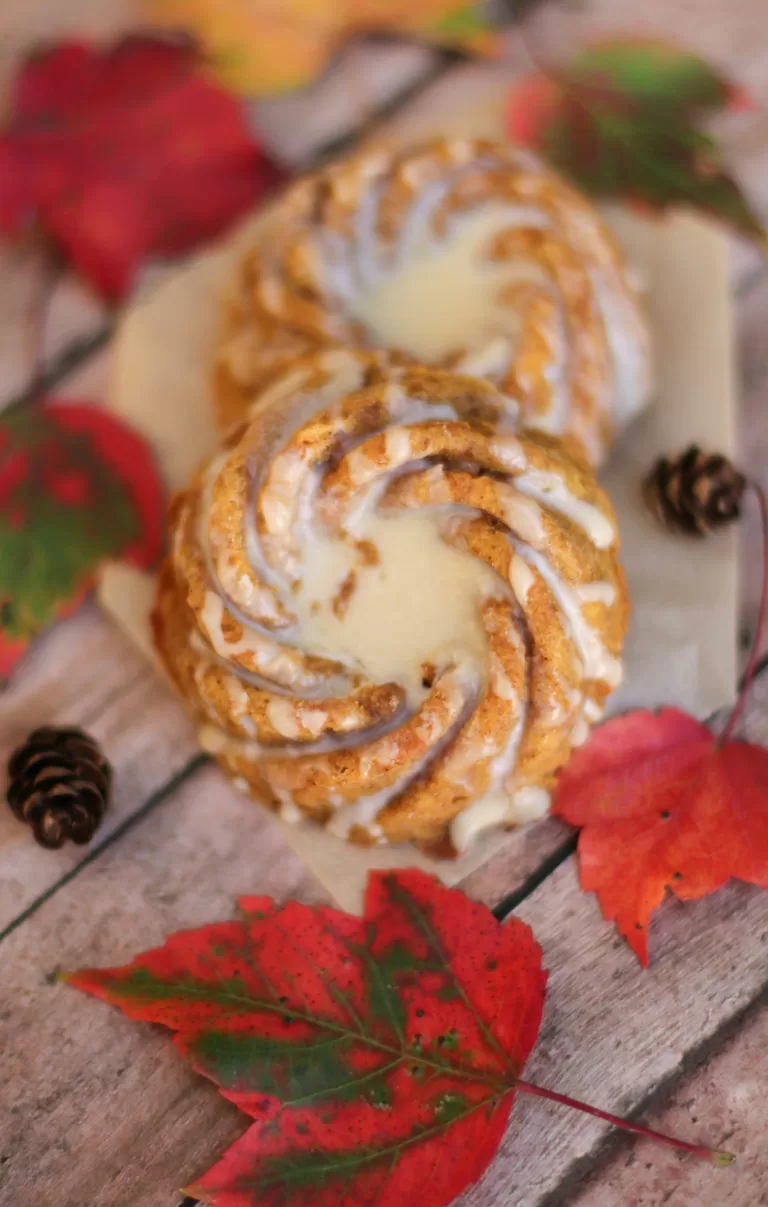
Happy Fall Y’all! As pretty as this warm pumpkin spiced bundt cake with sweet maple glaze turned out, the recipe is truly on point!

The cake is incredibly moist, packed with rich pumpkin flavor and warm notes of cinnamon. This pumpkin cinnamon bundt cake is the perfect fall dessert.

And that maple glaze? It’s the finishing touch, adding a sweet, buttery layer that makes this maple glazed pumpkin spiced bundt cake delicious.

warm spiced bundt cake

You will need this silicone mini pumpkin bundt cake mold.

This pumpkin mini bundt cake recipe is the perfect blend of warm spices, tender cake, and a buttery maple glaze, creating an irresistible fall treat you’ll love!

How to use mini bundt cake pans:

Butter your mold well, then pour the batter into the mold about 2/3 full, giving room for the rise while baking. Bake as directed and remove, let cool to help the cakes shape and preventing sticking the mold.

pumpkin mini bundt cake

This recipe is the simply the best- it strikes the perfect balance between flavor, texture, and simplicity. The spiced bundt cake is moist and tender, with just the right amount of warmth from cinnamon, nutmeg, and cloves.

Topped with a rich, buttery maple glaze, it adds a sweet, silky finish that complements the spiced flavors beautifully. Plus, the recipe is straightforward, using simple ingredients to create a show-stopping dessert that is easy enough to whip up any time!

mini bundt cake recipes

This pumpkin maple cake is so incredibly moist, with warm notes of cinnamon it gives the perfect Fall vibe. The maple glaze adds a smooth, sweet touch that complements the spices without being too rich.

HI THERE!

I’m Trisha.

Wife to a talented chef and mama to two little sous chefs, I’m passionate about food photography, exploring and sharing!

Finding inspiration in the beauty of the outdoors and the joy of a well-crafted dish, all while sharing moments together.

imageedit 1 7887394045 1024x1024 1
maple glazed pumpkin

Let’s get to making this amazing spiced bundt cake instructions:

  • Preheat oven to 350℉
  • Whisk together the flour, baking soda, baking powder, cinnamon.
  • In a separate large bowl, beat together the pumpkin puree, granulated sugar, brown sugar and eggs. Add the melted butter, vanilla extract and then mix in the milk.
  • Gradually add the dry ingredients to the wet, stirring until just combined Be careful not to overmix.
  • Spoon matter evenly into bundt cakes.
  • Bake for 20-25 minutes.
  • Serve This pumpkin spiced bund cake goes perfectly with your favorite brew!
mini pumpkin bundt cake recipes

So, how long do you bake mini bundt cakes?

Timing varies but baking this spice bundt cake, usually a good 20-25 minutes at 350F is perfect for these little cakes. Check for doneness by poking the center with a toothpick.

pumpkin glaze for cake

Brown Butter Maple Glaze:

Making this maple glazed pumpkin sauce is so simple but a must – the maple really brings out a amazing hint of bourbon maple glaze:

First whisk maple syrup and powdered sugar together, add 1 tbsp of milk until smooth. If glaze is too thick, add more milk.

Next stir in the vanilla extract.

Then drizzle the glaze over the maple pumpkin cake or dip them for a thicker yummy coating.

maple pumpkin cake
pumpkin bundt cake with maple glaze

Pumpkin Spiced Bundt Cake with Maple Glaze

The sweet flavor of warm maple syrup and brown butter over these moist spiced bundt cakes are the most perfect Fall dessert to share at family get togethers, perfect option for a gluten-free Thanksgiving dessert

Equipment

  • 1 kitchen aid
  • 1 mixing bowl
  • 1 large mixing bowl
  • 1 silicone mini bundt cake mold

Ingredients
  

For the pumpkin cake:

  • 2 cups all purpose flour
  • 1 tsp baking powder
  • 1/2 tsp baking soda
  • 1/2 tsp salt
  • 1 ½ tsp cinnamon
  • 1 cup pumpkin puree
  • ¾ cup granulated sugar
  • ½ cup brown sugar
  • 2 large eggs
  • ½ cup butter
  • 1 tsp vanilla extract
  • ½ cup milk

For the maple glaze

  • 1 cup powdered sugar
  • 2 tbsp maple syrup
  • 1-2 tbsp milk

Instructions
 

  • Preheat oven to 350℉
  • Whisk together the flour, baking soda, baking powder, cinnamon.
  • In a separate large bowl, beat together the pumpkin puree, granulated sugar, brown sugar and eggs. Add the melted butter, vanilla extract and then mix in the milk.
  • Gradually add the dry ingredients to the wet, stirring until just combined Be careful not to overmix.
  • Spoon matter evenly into bundt cakes.
  • Bake for 20-25 minutes.

For the maple glaze:

  • Whisk together powered sugar, maple syrup and milk until smooth.
    Drizzle over cooled bundt cakes
pumpkin bundt cake with maple glaze

This maple pumpkin cake is known as one of the quick and easy fall desserts! Pumpkin spiced bundt cake has the perfect blend of warm spices, moist cake and a buttery maple glaze that’s sure to become a favorite!

If you’re serving this warm pumpkin mini bundt cake for a Holiday gathering or a cozy treat at home, it’s guaranteed to be a hit!

Don’t forget to rate this recipe and let me know how it turned out for you in the comments below!

pumpkin maple cake
pin
peach cobbler in cast iron
Dessert

Unbelievably Perfect Golden Peach Cobbler In Cast Iron

This article may contain links from my partners. I may receive a small commission if you make a purchase through a link. Please read my disclosure and how I make money here.

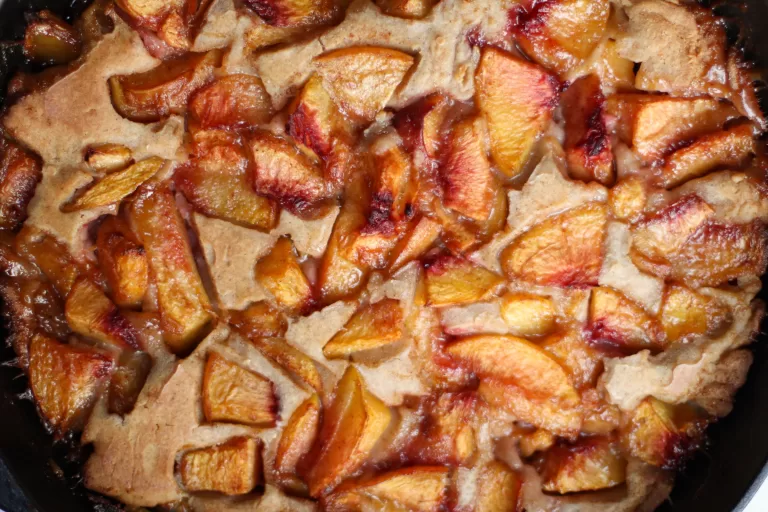
Peach cobbler in cast iron – Oh, the magical combination of fresh, juicy peaches in a well-seasoned cast iron skillet makes the most perfect peach cobbler bundt cake.

Using a peach cobbler cast iron skillet for this dessert makes the flavor and texture perfect for this dish. Cast iron skillets are known for their heat retention and even cooking, making this this recipe the easiest cast iron cobbler you’ll make.

This recipe is the best peach cobbler in cast iron for it being so easy to make, moist and has the most perfect crispy crust every time.

peach cobbler cast iron

What makes this peach cobbler cast iron skillet perfect?

This lazy peach cobbler is simple but has the most unbeatable flavor. With this being an easy Fall desserts with few ingredients, minimal prep, you get a dessert that delivers on taste without the fuss.

The peaches create the perfect balance of sweetness and juiciness while the flour creates a golden buttery topping with just the right amount of crispiness.

peach cobbler in cast iron

HI THERE!

I’m Trisha.

Welcome to

keto recipes

Wife to a talented chef and mama to two little sous chefs, I’m passionate about food photography, exploring and sharing!

Finding inspiration in the beauty of the outdoors and the joy of a well-crafted dish, all while sharing moments together.

meet hikecookshare

Peach Cobbler Cast Iron Ingredients:

  • Peaches: Their juicy flavor that adds moisture and slight tanginess really add to this cobbler.
  • Butter: Adds in moisture and crisp to the crust
  • Cinnamon: Enhances the flavor and adds a warm sweetness.
  • Brown Sugar: Adds a depth of flavor and helps caramelize as it cake peach cobbler bakes.
  • Granulated Sugar: Balances the tartness of the peaches.
  • Flour: Base and provides structure for light and fluffy texture
  • Maple Syrup: Enhances the warm caramelized notes.
  • Egg: Binds all ingredients and helps with richness.
  • Baking Powder: Leavening agent, helps cobbler rise.
  • Add corn starch to help with preventing watery cobbler filling.
  • Milk: Helps with moisture.
cast iron peach cobbler recipe

How to make peach cobbler:

Preheat your oven to 375°F (175°C). Butter your cast iron cobbler pan.

Prepare the peach filling: In a large bowl, combine sliced peaches, granulated and brown sugar, vanilla extract, and cinnamon. Toss everything together until peaches are coated, set aside.

Make the batter:
In a separate bowl, whisk together flour, sugar, baking powder and a pinch of salt.
Gradually add milk and whisk until smooth. Set aside.

Add the batter: Pour batter evenly over the peaches. Do not stir—this is key to getting that delicious, cobbler-style texture.

Bake: Bake the cobbler for 40-45 minutes, or until the top is golden brown and the peach filling is bubbling up around the edges.

Cool and serve: Let the cobbler cool for about 10 minutes before serving.

It’s best enjoyed warm, especially with a scoop of vanilla ice cream or whipped cream.

Butter is always essential in baking, but browning the butter adds a richness and nutty flavor just like with my spiced pumpkin bread.

cobbler pan

This extra step makes the overall flavor and helps balance the texture, creating a perfect crispness on the outside and tenderness on the inside.

It’s a simple trick just like my favorited gluten free oatmeal chocolate chip cookies recipe, that makes a big difference!

easy cast iron skillet peach cobbler

This one pan peach cobbler is hassle free, incredibly easy to make – just mix all of your ingredients in a cast iron skillet cobbler, bake and enjoy!

Tips to make the best peach cobbler recipe with pie crust:

Mix Lightly: Combine ingredients until just blended to avoid density

Chill the Dough: Refrigerate the dough to maintain flakiness and ease of handling.

Preheat the Oven: Bake at a high temperature (375-400°F) for a crisp, golden crust.

Add Sugar: Sprinkle sugar on top before baking for added sweetness and crunch.

cast iron skillet peach cobbler recipe

This crazy crust peach cobbler features a rich and buttery golden crust that delivers the best combination of crunch and tenderness. The crust melts in your mouth, perfectly complementing the juicy fruit beneath.

On-Demand Baking Classes at King Arthur Start Baking Now with King Arthur
cake peach cobbler

A great peach cobbler in cast iron comes down to the right mix of flavors and textures.

The peaches are juicy and naturally sweet, with just the right amount of sugar and cinnamon to bring out their flavor.

Cooking the cobbler in cast iron lets the filling cook evenly while caramelizing the edges for that perfect bite of sweetness.

iron skillet peach cobbler

The topping needs to be golden and crispy on the outside, but soft and tender underneath, which is where cast iron really shines.

If you’re making a classic or even a grilled peach cobbler, the cast iron skillet bakes everything perfectly.

This iron skillet peach cobbler is the best in this pan, it creates a beautifully crisp, golden crust that you simply can’t achieve with other plans.

peach cobbler in cast iron

Peach Cobbler

This perfectly golden peach cobbler in cast iron – fresh juicy caramelized peaches, buttery crisp perfectly golden peach cobbler bundt cake everyone will enjoy!
5 from 1 vote
Prep Time 15 minutes
Cook Time 45 minutes
Course Dessert
Cuisine American
Servings 4 people

Equipment

  • 1 cast iron

Ingredients
  

  • 6-7 ripe peaches
  • ½ cup granulated sugar
  • 2 tbsp brown sugar
  • 1 tsp vanilla extract
  • 1 tsp cinnamon
  • 1 tbsp cornstarch
  • 1 cup all purpose flour
  • 1 tsp baking powder
  • ¾ cup milk
  • 6 tbsp butter
  • 2 tbsp maple syrup

Instructions
 

Preheat oven to 375℉

    Prepare the peach filling

    • In a large bowl, combine sliced peaches, granulated and brown sugar, vanilla extract, cinnamon and cornstarch. Toss everything together until peaches are coated, set aside.

    Make the batter

    • In a separate bowl, whisk together the flour, sugar, baking powder and salt.
    • Gradually add milk and whisk until smooth. Set aside.

    Add the butter to the cast iron skillet

    • Pour batter over the butter and spoon the peach mixture evenly on top of batter.

    Bake the cobbler

    • Place skillet into oven and bake for 45 minutes or until top is golden.

    Serve warm

      Keyword cake peach cobbler, one pan peach cobbler, peach cobbler cast iron, skillet peach cobbler
      one pan peach cobbler
      cast iron peach cobbler

      Making the best peach cobbler in cast iron all starts with…

      Buttering your cast iron skillet cobbler generously to makes sure the cobbler doesn’t stick and to adds a rich, buttery flavor to the crispy edges. The butter helps the crust develop a beautiful golden color.

      peach cobbler skillet

      Are peaches in season?

      Season runs from late May through September. You can always use canned peaches for this recipe, it will still be known as one of the best savory peach recipes.

      Does peach cobbler need to be refrigerated?

      Once the cobbler has cooled, cover it tightly with plastic wrap or transfer it to an airtight container before storing it in the fridge for 4-5 days

      Can you freeze peach cobbler?

      Cool completely and cover the cobbler with plastic wrap or foil.

      I hope you enjoy making this peach cobbler in cast iron as much as we did!

      If you try out this recipe, I’d love to hear how it turns out for you.

      Please leave a comment below and share your experience.

      Your feedback helps me improve and inspires others to give it a try.

      cast iron skillet peach cobbler

      Browse

      Search for anything

      Quick Search: Dinner, Breakfast, Desserts, Snacks, Drinks, Sauces

      pin
      samoa cookies
      Dessert

      3 Ingredient Rich Samoas Coconut Cookies

      This article may contain links from my partners. I may receive a small commission if you make a purchase through a link. Please read my disclosure and how I make money here.

      If you’re a fan of rich flavors, this samoas coconut cookie recipe will become your go-to.

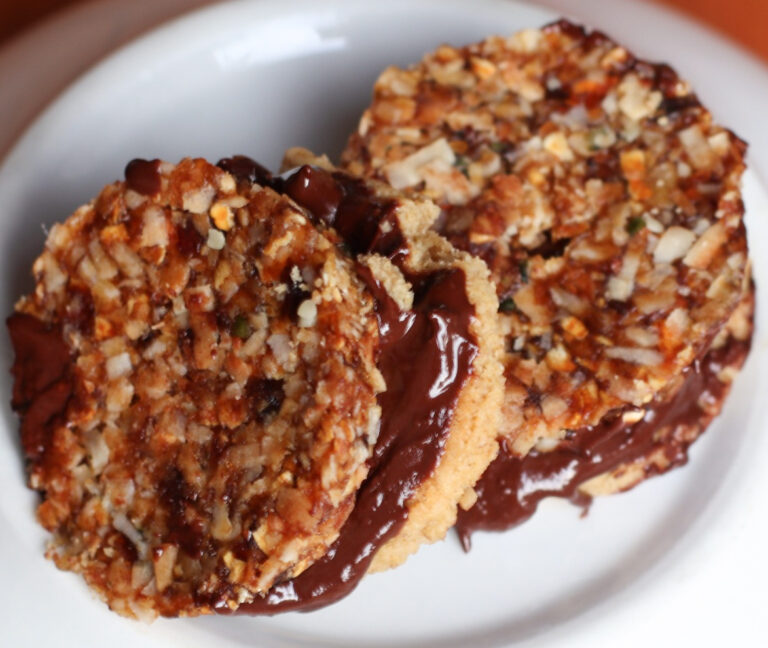
      There is nothing better than homemade samoas cookies, inspired by the beloved Girl Scout treat, pack a perfect amount of toasted coconut, rich caramel, and smooth chocolate, all atop a buttery shortbread base.

      While you can certainly add more ingredients to your Samoas coconut cookie, the samoas recipe 3 ingredients that truly make this recipe shine are dates, oats, and chocolate.

      These three ingredients are the heart and soul of a delicious Samoa-inspired treat.

      These samoa caramel coconut cookies are the perfect combination with the buttery shortbread, rich caramel, toasted coconut and rich chocolate are a must try for anyone who appreciates the classic combination of flavors that make samoa cookies so irresistible.

      caramel coconut cookies

      Simple Samoas Ingredients:

      The combination of these simple samoas ingredients creates a mouthwatering experience that is both chewy and crunchy, sweet and salty.

      Rolled Oats: Hearty and chewy texture

      Shredded Coconut: Provides sweetness

      Pitted Dates: Adds caramel flavor

      Almond Flour: Provides structure

      Maple Syrup: Adds moisture and a rich sweetness

      Hemp Seeds: Adds a nutty flavor

      Vanilla Extract: Enhances the flavor

      Salt: Balances the sweetness

      samoas ingredients

      If you’re reminiscing about your favorite girl scouts samosa cookies recipes or simply craving a caramelly rich crunchy cookie, these cookies like samoas will hit the spot every time.

      What are samoa cookies?

      The base is a buttery and crumbly shortbread with a gooey caramel mixed with toasted coconut flakes, adding a chewy and slightly nutty flavor.

      The chocolate drizzle creates a rich balance to the sweet caramel and coconut

      samoa cookies

      Samoa cookies with dates: A healthier twist on a classic

      If you love the rich flavors of traditional samoas but want a healthier option, these samoa cookies with dates are the perfect creation.

      Using dates, this recipe offers a naturally sweet and chewy treat that’s both rich and caramelly!

      recipe for samoas cookies

      Are samoas gluten free?

      Traditional samoa coconut cookies are not gluten-free because they are made with a shortbread base that typically contains wheat flour. By simply grinding up oatmeal, makes oat flour which is a perfect gluten free alternative.

      Recipe for samoas cookies:

      This buttery richness of homemade caramel with a crunchy top of toasted coconut mixed with a gooey caramel center making every bite the best recipe for homemade samoas.

      coconut samoas

      Samoas Coconut Cookies

      These caramel coconut cookies will become a favorite with the caramel from the dates, smooth rich chocolate and nutty cookie, making them the best homemade samoas.
      Prep Time 30 minutes
      Course Dessert
      Cuisine American
      Servings 12 cookies

      Equipment

      • 1 Baking Sheet
      • 1 mixing bowl

      Ingredients
        

      • 1 cup rolled oats
      • 1 cup shredded coconut
      • 1 cup pitted dates
      • ¼ cup almond flour
      • ¼ cup maple syrup
      • 1 tsp vanilla
      • ¼ tsp salt

      Instructions
       

      • Prepare the cookie base:
        Pulse oats, maple syrup, dates, vanilla and salt.
      • Pulse until mixture is doughy then roll into balls.
      • Line baking sheet with parchment paper, scoop out and roll into balls.
      • Place cookies into fridge to firm up while you melt the chocolate.
      • Drizzle melted chocolate a top of mixture and fridge.
      • Serve.
      Keyword caramel coconut cookies, gluten free samoa, healthy samoa cookies, healthy samoas, no bake samoa cookies

      HI THERE!

      I’m Trisha, creator of Hike Cook Share.

      Wife to a talented chef and mama to two little sous chefs, I’m passionate about food photography, exploring and sharing!

      Finding inspiration in the beauty of the outdoors and the joy of a well-crafted dish, all while sharing moments together.

      meet hikecookshare

      How to make samoas coconut cookies:

      Prepare the cookie base:
      Pulse the rolled oats until they form flour.
      Add dates, butter, maple syrup, vanilla extract and salt.
      Pulse until mixture is a sticky dough.
      Line a baking sheet with parchment paper, scoop out dough and roll into balls.
      Place cookies in refrigerator to set while preparing the topping

      Add the chocolate drizzle:
      Melt chocolate chips in a sauce pan and drizzle over each cookie.

      samoa cookies

      What’s the difference between samoa cookies vs caramel delites?

      Samoas are known to be a lot more rich, chewier and have a stronger chocolate and coconut flavor

      traditional samoan recipes

      Are samoas vegan?

      Traditional Samoa cookies are not vegan. Here’s why:

      1. Shortbread Base: The base of Samoa cookies is made with butter, which is not suitable for a vegan diet.
      2. Caramel Topping: The caramel topping typically contains dairy ingredients like milk or cream.
      3. Chocolate Drizzle: The chocolate used for drizzling may also contain milk or other dairy products.

      Are samoas vegan?

      For a vegan version of this samoa cookies recipe, you would need to use substitutes such as coconut oil, date pasta and maple syrup for the caramel taste and of course, chocolate.

      gluten free samoa cookies

      How to store samoas coconut cookies?

      Store in an airtight container at room temperature for up to one week.

      samoas coconut

      If you try this Samoa cookie recipe, I’d love to hear how it turned out for you!

      Your feedback is incredibly valuable and helps others discover just how delicious these samoas coconut cookies truly are.

      Don’t forget to rate this samoas coconut cookie recipe and leave a comment below—your review makes a difference.

      pin
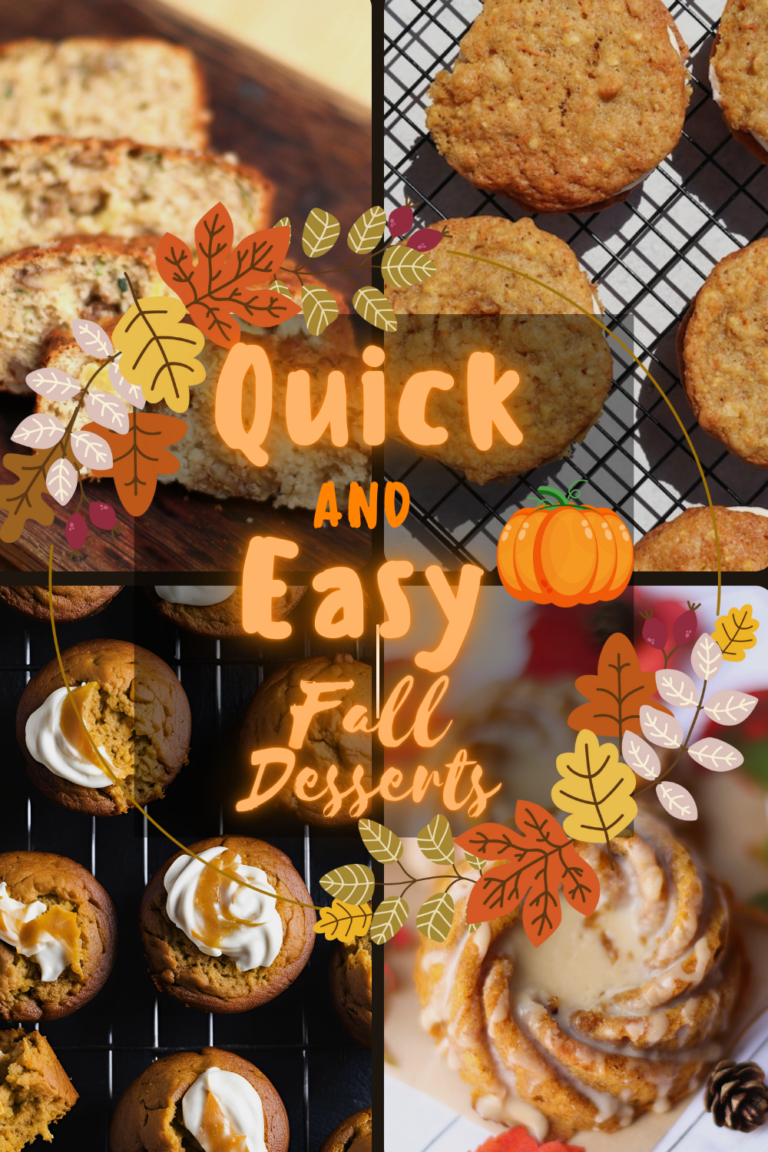
      Quick and Easy fall desserts
      Dessert

      11 Easy Fall Desserts To Make Ahead For A Crowd

      This article may contain links from my partners. I may receive a small commission if you make a purchase through a link. Please read my disclosure and how I make money here.

      Easy Fall desserts– As the air turns crisp and the leaves start to fall, there’s no better time to treat yourself to the rich, comforting flavors of Autumn.

      As someone who adores all things fall, I can’t resist the charm of cute spooky—those playful, slightly eerie vibes that capture the fun side of the season without being too spooky, although I could do without the spiders – ha!

      easy fall desserts with few ingredients

      As the leaves begin to turn and the air gets crisp, my love for all things fall comes alive, especially when it comes to the flavors of the season.

      From the warm spices of cinnamon and nutmeg of my pumpkin bread to the sweet, comforting taste of these tasty gluten free pumpkin cream cheese muffins, there’s nothing quite like indulging in the best fall desserts.

      easy pumpkin bread with cream cheese frosting 1

      If you’re looking for quick and easy fall desserts to whip up on a busy weeknight, or healthy fall desserts that don’t compromise on flavor, I’ve got you covered.

      And for those who need it, I’ve even included gluten-free fall desserts that are just as delicious.

      Continue reading as I share my favorite easy Fall desserts fall, perfect for the coziest season of the year!

      Quick and Easy Fall Desserts

      If you’re craving fall flavors but short on time, these quick and easy desserts are exactly what you need! From warm apple crisps to spiced pumpkin treats, these simple recipes deliver all the comforting tastes of the season with minimal effort.

      1
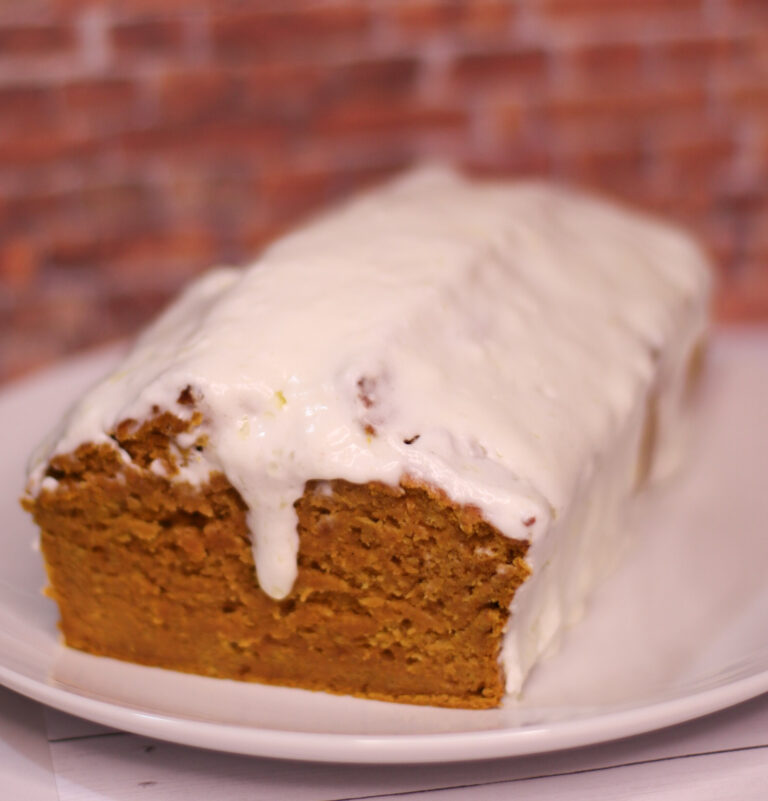
      easy pumpkin bread with cream cheese frosting
      Spiced Pumpkin Bread with Cream Cheese Frosting
      The warm, earthy notes of pumpkin are perfectly complemented by cinnamon, nutmeg, and cloves, infusing each slice with cozy flavors. The bread itself is incredibly soft and moist, with a tender crumb that melts in your mouth. Topping it all off is a rich, velvety cream cheese frosting that adds just the right amount of tangy sweetness, creating a perfect contrast to the spiced bread. Each bite is a blend of warmth, spice, and creamy indulgence—an irresistible treat that embodies the essence of fall.
      Get Recipe

      This cast iron loaf pan makes the perfect pumpkin cinnamon bread, I’ve made everything from bread to meatloaf, and everything has cooked, wonderfully, and evenly throughout! It’s also incredibly easy to clean, and with proper care, I know it will last a lifetime.

      Vegan Fall Desserts:

      Fall is the perfect time to indulge in cozy, comforting flavors, and with these vegan fall desserts, you won’t have to miss a thing!

      From rich pumpkin spice treats to my scary monster balls, these plant-based recipes are a great way to enjoy the warmth of the season while being kinder to the planet.

      2
      apple pie crumble bars
      Planted-Pantry
      Vegan Apple Pie Crumble Bars
      These bars feature a buttery oatmeal cookie base that’s perfectly chewy, layered with crisp, juicy apples sweetened just right, and topped with a golden, crunchy oat crumb. Each bite is a delightful mix of textures and flavors, from the soft, tender apples to the satisfyingly crisp crumble, making these bars the perfect sweet treat to enjoy as the leaves begin to turn.
      Check out this recipe
      3
      brown butter bites
      Toasty Brown Butter Bites
      Brown butter bites add flavor, richness and healthy fats back into any recipe! The flavor is like caramelized hazelnut satisfying any sweet tooth and perfect for a carnivore diet sweets treat!
      Check out this recipe
      4
      coconut peanut butter protein balls
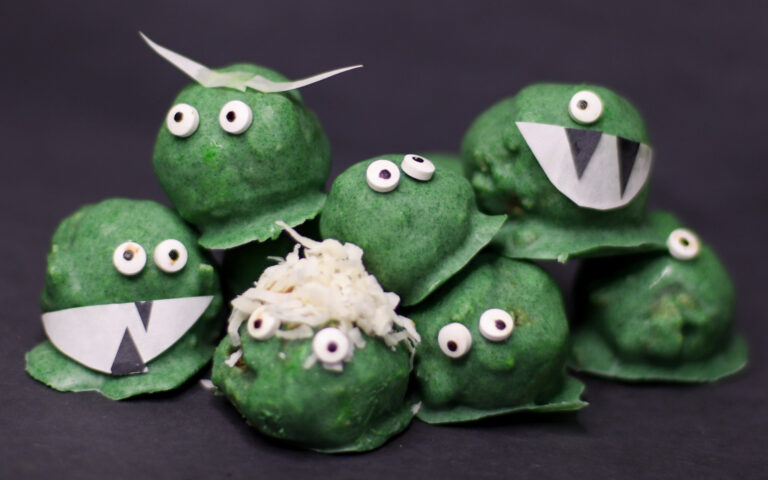
      Spooky Monster Energy Balls
      These spooky monster energy balls are not only delicious but packed with nutritious ingredients like dates, oats, and coconut flakes, and jazzed up with white chocolate and a vibrant green color, these monster balls are a wholesome snack disguised as a creepy creature.
      Get Recipe

      Easy Fall Desserts with Few Ingredients:

      Are you looking for a quick and easy Fall desserts that are sure to satisfy your apple cravings? Check out this healthy apple mug cake.

      5
      honeycrisp apple mug cake
      Melissa Traub
      Honeycrisp Apple Mug Cake
      This easy Honeycrisp Apple Mug Cake is like a warm hug in a cup, filled with the cozy spices and rich flavors of fall. With tender chunks of juicy Honeycrisp apple nestled in every bite, the cake is infused with the comforting aroma of cinnamon and nutmeg. Made with white whole wheat flour, it’s not only delicious but also packed with extra fiber and nutrients. A touch of maple syrup adds a natural sweetness, making this mug cake a healthier indulgence that doesn’t skimp on flavor!
      Get Recipe

      Oh, Hi there!

      I’m Trisha, of Hike Cook Share

      Welcome to my little corner of the web, where delicious recipes meet outdoor adventures! We’re a husband and wife duo with a passion for food and the great outdoors. My husband loves cooking and crafting new dishes, while I enjoy capturing the beauty of it all through photography and sharing our stories. Our two sons are our enthusiastic sous chefs, giving every recipe their seal of approval.

      meet hikecookshare

      Gluten free pumpkin cream cheese muffins:

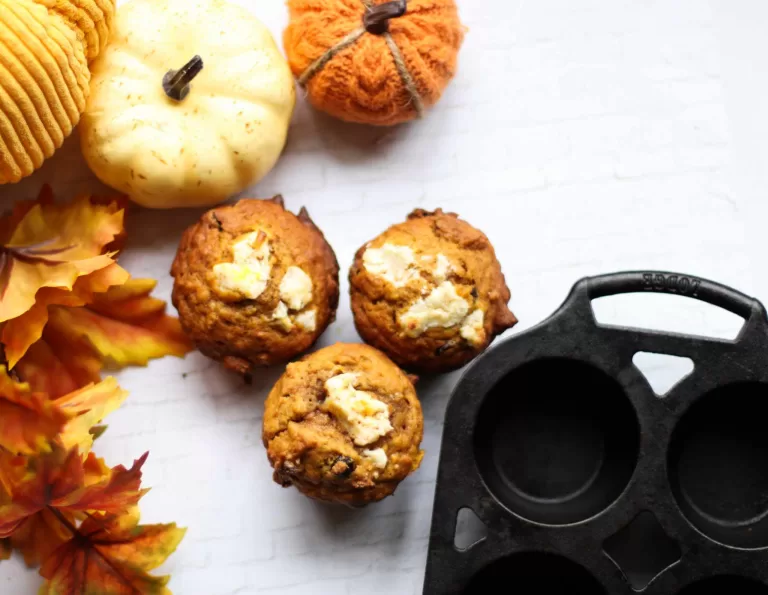
      These gluten free cream cheese muffins are moist, so easy and will get anyone in the cozy pumpkin Fall spirit!

      6
      keto cream cheese muffins
      Gluten Free Pumpkin Cream Cheese Muffins
      This moist cream cheese frosting pumpkin bread is the best fall comfort food, combining tender, spiced pumpkin bread with a rich, velvety layer of cream cheese frosting. Each slice melts in your mouth, offering a perfect balance of warm autumn spices and sweet, tangy creaminess that makes it impossible to resist.
      Get Recipe

      This cast iron muffin pan is my go-to when making muffins. Skip using muffin liners, this pan is nonstick.

      Most Tried & Loved Recipes

      Be sure to explore my other recipes—they’re savory, delicious, and sure to impress. From comforting classics to dishes with unexpected flavor combinations, there’s something to satisfy every craving.

      homemade waffles healthy

      Breakfasts

      7
      big fat chewy oatmeal chocolate chip cookies
      The Best Gluten-Free Oatmeal Chocolate Chip Cookies
      These soft gooey gluten-free oatmeal chocolate chip cookies are the perfect blend of chewy oats and rich chocolate, making them irresistible and the best oatmeal chocolate chip cookies!
      Get Recipe
      8
      coconut samoas
      Samoas Coconut Cookies
      These amazingly easy homemade samoas are so tasty, they'll fool you into tasting cookies like samoas, the simple samoas ingredients are gluten free and delicious- Definity a party favorite!
      Get Recipe
      9
      cast iron skillet peach cobbler
      Perfectly Golden Peach Cobbler
      Oh, the magical combination of fresh, juicy peaches in a well-seasoned cast iron skillet makes the most perfect peach cobbler bundt cake.
      Check out this recipe
      10
      oatmeal peanut butter chocolate chip muffins
      Oat Flour Chocolate Chip Muffins
      Easy moist chocolate muffins made with oat flour, loaded with chocolate chips. Perfect for a healthy, gluten-free treat that's simple to bake
      Check out this recipe
      11
      Halloween Breakfast Bacon Bats
      Halloween Breakfast Bacon Bats
      Maple Glazed Bacon Bats are perfect for your spooky Halloween breakfast. They’re oven baked and so tasty!
      Check out this recipe
      12
      pumpkin bundt cake with maple glaze
      Pumpkin Spiced Bundt Cake with Maple Glaze
      The sweet flavor of warm maple syrup and brown butter over these moist spiced bundt cakes are the most perfect Fall dessert to share at family get togethers, perfect option for a gluten-free Thanksgiving dessert
      Check out this recipe
      pin
      easy pumpkin bread with cream cheese frosting
      Dessert

      Cozy Comfort in Every Slice: Spiced Pumpkin Bread with Cream Cheese Frosting

      This article may contain links from my partners. I may receive a small commission if you make a purchase through a link. Please read my disclosure and how I make money here.

      There’s nothing better than this spiced pumpkin bread with cream cheese frosting recipe, with warm notes of pumpkin, incredibly soft bread and rich cream cheese frosting.

      The richness of the cream cheese frosting adds a layer of tangy sweetness, creates an irresistible flavor that makes each slice the best fall desserts, just like my yummy gluten free pumpkin cream cheese muffins, or my spooky monster energy balls these aren’t just a sweet treat but their easy and comforting for the coziest season!

      This easy pumpkin bread with cream cheese frosting will be known as the best fall desserts you will make!

      moist pumpkin bread with cream cheese frosting

      Why this cinnamon pumpkin bread is the best:

      This pumpkin bread stands out as the best for several reasons. if you’re baking pumpkin bread mini loaves or a full-sized loaf, each one is bursting with the comforting flavors of pumpkin cinnamon bread.

      • The bread itself is incredibly moist: The perfect blend of pumpkin and spices like cinnamon, making it a true pumpkin bread cream cheese frosting treat.
      • Easy to bake, make and eat: This easy pumpkin bread with cream cheese frosting is quick and easy. The recipe comes together in two bowls, a bread loaf pan and a whisk!

      easy pumpkin bread with cream cheese frosting

      The mouthwatering flavor of this recipe is all thanks to the cinnamon cream cheese frosting for pumpkin bread. This frosting, with its smooth texture and subtle cinnamon warmth, adds an irresistible richness that pairs perfectly with the spiced bread.

      Whether you call it pumpkin bread with icing or cream cheese frosting pumpkin bread, this topping brings the bread a whole new level of deliciousness.

      For those following a plant-based diet, this recipe can easily be adapted into a vegan pumpkin dessert recipe by swapping out dairy ingredients for vegan alternatives, without compromising on flavor or texture.

      Ingredients:

      This moist pumpkin bread with cream cheese frosting requires a simple list of ingredients and is adaptable to your tasting; add pecans, chocolate chips, or roasted pumpkin seeds for some extra crunch.

      Pumpkin desserts

      For the pumpkin bread:

      Pumpkin Purée: The star of the bread, pumpkin purée adds moisture, rich flavor, and a little sweet to balance the warm spices.

      All-Purpose Flour: Providing the structure for the bread, creating a tender crumb while allowing the pumpkin to shine.

      Sugar + Brown Sugar: Sweetens and helps with creating a tender texture and moisture.

      Coconut Oil: Helps with moisture and tenderness.

      Eggs: Binding the ingredients together and giving the bread structure.

      Baking Powder: Helps with the rise.

      Cinnamon: Brings warmth and adds a slightly sweet, nutty flavor.

      Salt: Helps with balancing balances the flavors.

      Vanilla Extract: Adds a sweetness and balances the nutty flavor.

      cinnamon pumpkin bread

      If the pumpkin cinnamon bread batter is a little lumpy, that’s okay.

      TIP: Use wax paper under bread to help lift the pumpkin cinnamon bread out when done baking.

      pumpkin cinnamon bread

      Pumpkin bread mini loaf  TIP: Cut a slit in the top of the bread before baking to help control the rise and have an even top.

      pumpkin bread mini loaf

      Pumpkin bread with cream cheese icing Ingredients:

      Cream Cheese: Adds a tangy richness that perfectly balances the sweetness of the bread.

      Butter: Adds richness and creaminess to the frosting.

      Powdered Sugar: Helps sweetens the frosting while creating a airy texture.

      Vanilla Extract: Adds flavor to the cream cheese and sweetness.

      cream cheese frosting pumpkin bread

      Cinnamon cream cheese frosting for pumpkin bread infuses the creamy, tangy frosting with a hint of warmth and spice, making the pumpkin’s natural sweetness really stand out.

      pumpkin bread recipe with cream cheese frosting

      This pumpkin bread recipe with cream cheese frosting is the perfect combination of spiced, moist bread and rich, creamy frosting, making it a go-to treat that’s sure to satisfy your autumn cravings.

      cinnamon cream cheese frosting for pumpkin bread

      pumpkin bread recipe with cream cheese frosting

      Spiced Pumpkin Bread with Cream Cheese Frosting

      Spiced pumpkin bread with cream cheese frosting is everything Fall inspired, warm and toasty with a tangy cream cheese frosting that creates the perfect balance for this pumpkin bread.
      Prep Time 15 minutes
      Cook Time 1 hour
      Total Time 1 hour 15 minutes
      Course Dessert
      Cuisine American

      Equipment

      • 1 bread pan 9x5x4
      • 1 wax paper unbleached
      • 1 kitchen aid or handheld mixer

      Ingredients
        

      • cup pumpkin puree 1 14oz can
      • ¼ cup butter melted
      • ¼ cup coconut oil
      • cup milk
      • 2 large eggs
      • ¾ cup light brown sugar
      • 1 tsp vanilla extract
      • ¾ cup sugar
      • 2 cups all purpose flour
      • 1 tsp baking powder
      • ¾ tsp salt
      • 1 tsp cinnamon

      For the icing:

      • 2 oz cream cheese
      • 4 tsp butter
      • 1 tsp vanilla extract
      • 1 tbsp milk
      • 1 tbsp powdered sugar

      Instructions
       

      Pumpkin Bread

      • Whisk together the dry ingredients and sugar in a large mixing bowl.
      • In a medium bowl, combine the wet ingredients.
      • Add dry and wet ingredients until just combined; it's okay if batter is lumpy.
      • Place wax paper in bread pan and pour batter into pan.
      • Bake pumpkin bread at 350℉ for 60 minutes.

      For the icing:

      • Combined softened butter, cream cheese, vanilla, sifted sugar and milk into the KitchenAid. Whip frosting until it is light and fluffy.

      Notes

      Frosting tip: Add more milk to the frosting if is too thick. Make sure butter is melted before adding to the icing mixture.
      Keyword cinnamon cream cheese frosting for pumpkin bread, pumpkin bread with cream cheese frosting, pumpkin bread with icing

      How to store pumpkin bread:

      Wrap it tightly in plastic wrap or place it in an airtight container to keep it moist and fresh.

      It can be stored at room temperature for a couple of days, refrigerated for up to a week, or even frozen for longer shelf life.

      pumpkin bread cream cheese frosting

      Enjoy every bite of this moist pumpkin bread with cream cheese frosting the perfect blend of warm spices, rich pumpkin flavor, and creamy sweetness.

      I hope this pumpkin bread with cream cheese frosting recipe brings as much comfort to your home as it does to mine.

      Be sure to comment and let me know how your pumpkin bread turned out—I’d love to hear how it was enjoyed!

      gluten free oatmeal balls

      Hi Friend!

      I’m Trisha.

      Wife to a talented chef and mama to two little sous chefs, I’m passionate about food photography, exploring and sharing!

      Finding inspiration in the beauty of the outdoors and the joy of a well-crafted dish, all while sharing moments together.

      meet hikecookshare
      pin
      monster energy balls
      Dessert

      Spooky Monster Energy Balls

      This article may contain links from my partners. I may receive a small commission if you make a purchase through a link. Please read my disclosure and how I make money here.

      Spooky monster energy balls are more cute than scary, their fun, quick and easy to make. Kid friendly protein balls earn bonus points around here for being healthy and tasty!

      These vibrant green protein balls are sure to make everyone happy!

      My son has always had a love for medjool dates, so these date coconut energy balls were a top priority for us to make.

      Date energy balls are naturally sweet with hints of honey and caramel, packed with fiber, and natural sugars to help get that quick boost of energy.

      Coconut flakes are also a great source in boosting energy, while also providing all the good healthy fats.

      This post is all about the spookiest yet tasty monster energy balls, perfect for any kids Halloween party food or if you’re just needing some healthy oatmeal bites to fuel your day, you will love this recipe.

      monster energy balls

      It’s hard to believe that Fall is right around the corner.

      Little monsters, spooky things and all things Fall are a favorite in our household.

      Nothing pairs more perfectly with the cooler weather, a warm cup of coffee and my delicious gluten free pumpkin cream cheese muffins.

      gluten free oatmeal balls

      While I was making my no bake chocolate chip cheesecake balls, I came up with this super cute idea – creating these monster protein balls that would be a great gluten free kids snacks as well as a creative activity to do on a rainy day.

      green protein balls

      Spooky monster energy balls made of peanut butter, dates, coconut flakes and oats make the perfect Halloween balls, creepy and delicious.

      Add faces, mouths, hair and candy eyeballs to create these spooky monster energy balls!

      Those eyes are so cute, you can’t stop looking at them!

      Ingredients You’ll Need:

      All you need to make these monster energy balls are 5 simple ingredients.

      Gluten-free rolled oats

      Peanut butter

      Coconut flakes

      Dates

      White Chocolate

      Decorate by adding coconut flakes as hair, cut out paper mouths, add some food coloring to the white chocolate balls and some candy eyeballs to make them extra creepy.

      These coconut date energy balls are delicious and vegan!

      halloween balls

      How To Make These Spooky Monster Energy Balls:

      1. Mix: Pour hot water over the pitted dates, making them soft and easy to mix in with the oats, melt white chocolate in a double boiler on stove, add peanut butter and coconut flakes.
      2. Shape the monsters: Use your hands to roll ingredients into balls. Cover the balls in the melted white chocolate.
      3. Decorate: While the melted chocolate, press the candy eyeballs, mouths and some hair onto each ball.
      4. Refrigerate: Place these spooky monster balls in the fridge for about 30 minutes.

      booster balls


      [mailpoet_form id=”3″]


      Peanut Butter Coconut Date Balls Tips:

      • Soak your dates: in hot water, helps makes the date soft and easy to mix.
      • If the mixture is too dry: add a small amount of coconut oil or nut butter. If it’s too sticky, add more nuts or seeds.
      • Add in Flavors: Cocoa powder, cinnamon or chocolate chips.
      • Add Superfoods: Hemp seeds, flaxseeds, matcha powder or chia seeds for some crunch to your healthy oatmeal bites recipe.
      • Double the recipe: Make a larger batch and freeze the extras for a convenient snack.
      • Get the kids involved: A pretty fun activity to get the little ones using their hands and they’ll enjoy eating it more since they made it!

      kid friendly protein balls

      Storage tips for date energy balls:

      In an airtight container with a lid, in the fridge.

      date coconut energy balls

      coconut peanut butter protein balls

      Spooky Monster Energy Balls

      These spooky monster energy balls are not only delicious but packed with nutritious ingredients like dates, oats, and coconut flakes, and jazzed up with white chocolate and a vibrant green color, these monster balls are a wholesome snack disguised as a creepy creature.
      Prep Time 5 minutes
      25 minutes
      Total Time 30 minutes
      Course Dessert, Snack
      Cuisine American
      Servings 16 people
      Calories 93 kcal

      Equipment

      • 1 mixing bowl

      Ingredients
        

      • cup Oats
      • 4 tbsp Peanut butter
      • 3 Medjool dates
      • ¾ cup Coconut flakes
      • 1 cup White chocolate

      Instructions
       

      • Pour boiling water over dates to soften, mash with a fork.
      • Add oats, peanut butter, coconut flakes and blend If mix is a bit, add a couple tablespoons of water or coconut oil.
      • Use your hands and roll mixture into balls.
      • Melt white chocolate and cover balls.
      • Add candy eyeballs.
      • Refrigerate for 30 minutes before serving.
      Keyword date energy balls, gluten free oatmeal balls, kids halloween party food, monster energy balls, peanut butter coconut date balls

      coconut peanut butter protein balls

      Be sure to leave a comment if you tried this recipe and let me know what you added to these date energy balls to make them special.

      pin
      keto cream cheese muffins
      Dessert

      Gluten Free Pumpkin Cream Cheese Muffins

      This article may contain links from my partners. I may receive a small commission if you make a purchase through a link. Please read my disclosure and how I make money here.

      Gluten free pumpkin cream cheese muffins are the perfect fall treat.

      Made with wholesome gluten-free oats and pumpkin puree, filled with a delicious cream cheese center, these muffins are sure to be a hit.

      These low carb cream cheese muffins are low on sugar and packed with spices that’ll warm your soul during this cooler, crisp Fall season.

      This post is all about the best, gluten free pumpkin cream cheese muffins that are easy pumpkin cream cheese muffins and will become your most favorited gluten free Fall desserts. 

      keto cream cheese muffins

      These gluten-free oat pumpkin cream cheese muffins are incredibly moist and delicious, thanks to the natural sweetness and moisture from the pumpkin puree.

      Mixing up cinnamon and nutmeg creates the best rich, warm and comforting taste that’s perfect for Fall.

      Easy Gluten Free Pumpkin Muffins Ingredients:

      Pumpkin Puree: Adds moisture, flavor and richness Oats: Creates a hearty chewy texture 
      Baking Powder: Helps muffins rise and become fluffy
      Baking Soda: Provides structure
      Cinnamon: Adds warmth and spice 
      Cream Cheese: Adds a creamy, tangy flavor
      Nutmeg: Enhances the pumpkin flavor
      Salt: Balances the sweetness
      Eggs: Binds the ingredients
      Sugar: Adds sweetness
      Brown Sugar: Adds sweetness and a hint of caramel flavor
      Butter: Helps with moisture and tenderness, Brown your butter to get that deep richness flavor.
      Vanilla Extract: Adds a sweet flavor

      gluten free cheese muffin recipe

      These pumpkin muffins with oat flour are just like my Healthy Samoa Cookies and my Oat Flour Chocolate Chip Muffins, easy and are the most tried, loved and shared recipes!

      keto pumpkin cheesecake muffins


      HI THERE!

      I’m Trisha.

      Wife to a talented chef and mama to two little sous chefs, I’m passionate about food photography, exploring and sharing!

      Finding inspiration in the beauty of the outdoors and the joy of a well-crafted dish, all while sharing moments together.

      imageedit 1 7887394045 1024x1024 2

      I was featured in

      DAILY MAGAZINE
      FOOD TIMES
      MORNING BOSTON
      RECIPE 101
      TRM NETWORK
      keto cream cheese muffins

      Gluten Free Pumpkin Cream Cheese Muffins

      Prep Time 20 minutes
      Cook Time 25 minutes
      Total Time 45 minutes
      Course Dessert
      Cuisine American
      Servings 6 People
      Calories 210 kcal

      Equipment

      • 1 muffin pan
      • 3 mixing bowls

      Ingredients
        

      • 1 cup pumpkin puree
      • 2 cups oat flour
      • 1 tsp baking powder
      • 1 tsp baking soda
      • 1 tsp cinnamon
      • 1/2 tsp nutmeg
      • 1/2 tsp salt
      • 2 large eggs
      • 3/4 cup sugar
      • 1/2 cup brown sugar
      • 1/2 stick butter
      • 1 tsp vanilla extract
      • 8 oz cream cheese

      Instructions
       

      • Preheat oven to 350℉
      • In a medium bowl, beat the softened cream cheese, sugar and vanilla extract until smooth.
      • In a large bowl, whisk together oats, baking powder, baking soda, cinnamon, nutmeg and salt.
      • In another bowl, whisk together pumpkin puree, eggs, brown sugar, sugar, butter and vanilla.
      • Add the wet ingredients to the dry, mix until just combined.
      • Fill each muffin cup halfway with batter, adding in cream cheese filling. Add additional batter over cream cheese.
      • Bake for 20-25 minutes.
      • Serve.
      Keyword easy gluten free pumpkin muffins, low carb cream cheese muffins, low carb pumpkin cream cheese muffins
      gluten free pumpkin muffins with cream cheese

      Gluten Free Pumpkin Cream Cheese Muffins Instructions:

      1. Preheat oven to 350℉.
      2. In a medium bowl, beat the softened cream cheese, sugar and vanilla extract until smooth.
      3. In a large bowl, whisk together oats, baking powder, baking soda, cinnamon, nutmeg and salt.
      4. In another bowl, whisk together pumpkin puree, eggs, brown sugar, sugar, butter and vanilla.
      5. Add the wet ingredients to the dry, mix until just combined.
      6. Fill each muffin cup halfway with batter, adding in cream cheese filling. Add additional batter over cream cheese.
      7. Bake for 20-25 minutes.
      8. Serve.
      low carb cream cheese muffins

      Can you freeze pumpkin cream cheese muffins?

      Let the muffins cool completely before wrapping each one tightly in plastic wrap, then place them in an airtight container. Freeze them for up to 2-3 months.

      pin
      cookie recipe
      Dessert

      Chewy Gluten Free Oatmeal Chocolate Chip Cookies You’ll Love

      This article may contain links from my partners. I may receive a small commission if you make a purchase through a link. Please read my disclosure and how I make money here.

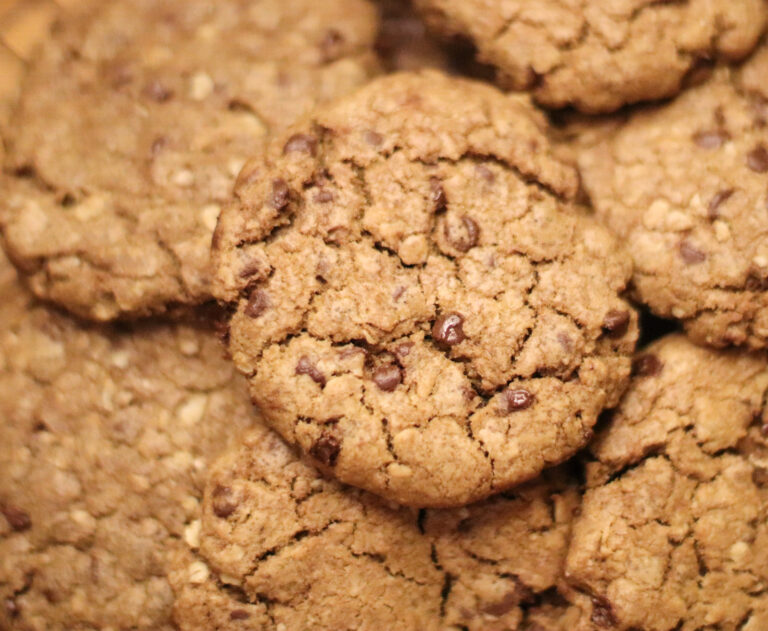
      Get ready to make the best gluten free oatmeal chocolate chip cookies you’ll ever make. These cookies have a hearty texture of oats with the rich, gooey goodness of chocolate chips creating big fat chewy oatmeal chocolate chip cookies that are sure to become a favorite!

      With golden brown edges, a nutty undertone and gooey chocolate chips this is the bakery style oatmeal chocolate chip cookies you’ve been searching for.

      This post is all about the most chewy, moist and delicious gluten free oatmeal chocolate chip cookies.

      big fat chewy oatmeal chocolate chip cookies

      Simply grinding up oatmeal to make flour makes these gluten free, chewy cookies that I’m sure you’ve been looking for. Oat flour creates the perfect dough along with my secret ingredient that will be sure to make these the best gluten-free oatmeal chocolate chip cookies you’ve ever made!

      Discover the Joy of Baking with King Arthur

      Why will this gluten free oatmeal chocolate chip cookie recipe be the best you’ve ever made?

      The secret lies in adding beef gelatin and browning the butter. This simple step adds a rich, nutty flavor that takes these outrageous oatmeal chocolate chip cookies to the next level.

      By letting the browned butter cool before mixing it in, it creates a perfect consistency and unbeatable taste.

      Be sure to check out these yummy 3 ingredient rich samoas coconut cookies!

      oatmeal chocolate chip cookies crispy

      Growing up, some of my fondest memories were made in my grandma’s kitchen. The air was always filled with freshly baked goods, and her counters were dusted with flour.

      One sunny afternoon, I remember standing on my tiptoes to peek over the counter as she introduced me to a special oat flour cookie recipe that she swore by – her chewy gluten-free oatmeal chocolate chip cookies. She carefully measured out the oat flour, saying how it gave the cookies their signature chewy texture.

      As we browned the butter, she told me stories of how her mother used the same technique to add a rich, nutty flavor to their baked goods, making these brown butter oatmeal cookies truly unforgettable.

      When we finally pulled the oatmeal flour chocolate chip cookies from the oven, they were everything she had promised – chewy, sweet, and utterly delicious. Now, every time I bake these cookies with oat flour, I’m reminded of those warm, loving afternoons in my grandma’s kitchen.

      Her oat flour cookie recipe has become my go-to, and I hope it brings as much joy to others as it has brought to our family.

      Chocolate Oatmeal Cookies Ingredients:

      • Butter (Browned): Creates a rich and nutty flavor.
      • Granulated Sugar: Sweetener, helps in spreading during the baking process and creates crispiness.
      • Brown Sugar: Adds moisture, chewiness and has a subtle molasses flavor.
      • Eggs: Acts as a binder and structure to the cookie.
      • Vanilla Extract: Enhances overall flavor.
      • Old Fashioned Oat Flour: Creates a chewy, hearty texture.
      • Baking Soda: Helps with the rise.
      • Baking Powder: Helps activate the baking soda, making cookies softer and tender.
      • Salt: Enhances flavor by balancing sweetness and cutting through richness.
      • Chocolate Chips: Choose high quality chocolate for the best taste.
      • Beef Gelatin: Adds tenderness and chewiness.
      oatmeal flour chocolate chip cookies
      best oatmeal chocolate chip cookies
      oatmeal chocolate chip cookies crispy
      big fat chewy oatmeal chocolate chip cookies

      The Best Gluten-Free Oatmeal Chocolate Chip Cookies

      These soft gooey gluten-free oatmeal chocolate chip cookies are the perfect blend of chewy oats and rich chocolate, making them irresistible and the best oatmeal chocolate chip cookies!
      Prep Time 15 minutes
      Cook Time 13 minutes
      Total Time 28 minutes
      Course Dessert
      Cuisine American
      Servings 12 people
      Calories 200 kcal

      Equipment

      • 2 mixing bowls
      • 1 Measuring Cup
      • 2 measuring spoons
      • 1 spatula
      • 1 Baking Sheet
      • 1 wire cooling rack
      • 1 oven
      • 1 Whisk

      Ingredients
        

      • 1 cup granulated sugar
      • 1 cup brown sugar
      • 1 stick butter
      • 2 eggs
      • 3 cups flour
      • 1 tsp vanilla extract
      • 1 tsp baking soda
      • 1 tsp salt
      • 1 tbsp beef gelatin
      • 1 tsp baking powder
      • 2 cups old fashioned oats

      Instructions
       

      Preheat oven to 375°F

        Prepare wet ingredients

        • In a large bowl, whisk together granulated sugar, brown sugar and butter until smooth. Beat in eggs on at a time then add vanilla extract.
          peach cobbler cast iron skillet

        Prepare dry ingredients

        • Whisk together the flour, baking soda, baking powder, salt, and beef gelatin.

        Gradually combine this mixture into the wet ingredients.

        • "just combined"-Just Until all the flour disappears then you stop. Don’t mix it more, literally “just combined” meaning as soon as the dough binds together with no separate ingredients showing.

        Add in oats and chocolate chips.

        • Stir in the old-fashioned oats and chocolate chips until evenly distributed.

        Form cookies.

        • Drop rounded spoonful of dough onto baking sheets.

        Bake.

        • Bake in the preheated oven for exactly 13 minutes, or until the edges are lightly browned.

        Let cool.

        • Allow cookies to cool on the baking sheet for a few minutes before transferring them to a wire rack to cool completely.
        Keyword best oatmeal chocolate chip cookies, oat flour oatmeal chocolate chip cookies, oatmeal flour chocolate chip cookies


        chocolate oatmeal cookies

        HI THERE!

        I’m Trisha. Nice of you to visit my blog.

        Wife to a talented chef and mama to two little sous chefs, I’m passionate about food photography, exploring and sharing!

        Finding inspiration in the beauty of the outdoors and the joy of a well-crafted dish, all while sharing moments together.

        meet hikecookshare

        Instructions:

        1. Preheat your oven to 350°F
        2. In a saucepan, melt your butter over medium heat until it turns golden brown. Brown butter recipe here.
        3. In a large mixing bowl, combine the brown sugar, brown butter and vanilla extract. Mix well.
        4. Mix in the eggs (one at a time, to create a smooth base) add in dissolved beef gelatin.
        5. In a separate bowl, whisk together the oats, flour, baking soda, baking powder and salt.
        6. Gradually add the dry ingredients to the wet ingredients. Avoid overmixing to maintain a tender texture.
        7.  Stir in chocolate chips.
        8. Place cookie dough in refrigerator for about 1-2 hours- to marry the ingredients together.
        9. Drop rounded tablespoons of cookie dough onto ungreased baking sheets.
        10. Bake for 12-15 minutes.
        11. Remove from oven and allow cookies to cool on wire racks.
        oatmeal chocolate chip cookies healthy

        Tips: To avoid overmixing, mix until ingredients are just combined, meaning as soon as the dough binds together with no separate ingredients showing.

        gluten-free oatmeal chocolate chip cookies

        gluten free oatmeal chocolate chip cookies

        Happy baking these gluten free oatmeal chocolate chip cookies!

        pin
        easy moist chocolate muffins
        Dessert

        Oat Flour Chocolate Chip Muffins: 6 Heavenly Bites

        This article may contain links from my partners. I may receive a small commission if you make a purchase through a link. Please read my disclosure and how I make money here.

        If you’re looking for a treat that’s both wholesome and delicious these irresistible oat flour chocolate chip muffins are the perfect choice. Making this recipe for gluten free muffins chocolate chip is so easy.

        These moist chocolate muffins are incredibly simple to make and have a tender, melt-in-your-mouth texture.

        These chocolate chip muffins can become an easy chocolate chip muffin recipe no milk and become a healthier alternative to the traditional muffin with more flavor!

        These chocolate chip healthy muffins are perfect for quick breakfasts or an on-the-go snack.

        Keep reading along on how to make the best oatmeal chocolate chip muffins!

        easy moist chocolate muffins

        Ingredients for the Best Oat Flour Chocolate Chip Muffins:

        Oat flour: Blend up some rolled oats turning it into fine flour making it a gluten-free option, adding in fiber and a mild nutty flavor.

        Baking Powder: Helps the muffins rise and become light and fluffy.

        Baking Soda: Helps with texture and making them light.

        Salt: Enhances flavor.

        Eggs: Provides moisture and helps bind ingredients together.

        Milk: Adds moisture and creates a smooth batter.

        Butter: Adds richness and fat to the muffin creating a rich, buttery taste.

        Chocolate Chips: Adds sweetness to the muffins.

        Honey: Natural sweetener.

        Light Brown Sugar: Adds a caramel-like sweetness and moisture due to its molasses content,

        Peanut Butter: Adds a rich nutty flavor.

        ___________________

        Making yogurt muffins: Substitute 1/2 cup milk to make these chocolate chip muffins with Greek yogurt. Yogurt muffins are a healthy chocolate chip muffins alternative.

        Follow my recipe for these easy moist oatmeal chocolate chip muffins.

        gluten free chocolate chip muffin recipe

        To make this gluten free chocolate chip muffin recipe use oatmeal instead of all-purpose flour.

        vegan chocolate chocolate chip muffins

        Using chia seeds in place of milk and egg makes these the best vegan chocolate chip muffins.

        Add sweet, very ripe banana choc chip muffins healthy.

        easy moist chocolate muffins

        Instructions:

        1. Preheat: your oven to 350°, line muffin tin with paper liners or spread oil on muffin pan.
        2. Mix dry ingredients: in a large bowl whisk oat flour, baking powder, baking soda, and salt together.
        3. Combine wet ingredients: whisk together eggs, honey, sugar, milk, vanilla extract and butter.
        4. Combine wet and dry ingredients: stir until just combined, be careful not to overmix.
        5. Add: chocolate chips.
        6. Fill: muffin cups with batter.
        7. Bake: Bake for 25minutes or until a toothpick comes out clean.
        easy moist chocolate muffins

        Combine wet and dry ingredients.

        flourless peanut butter banana muffins

        Be sure not to overmix as this will cause your batter to become dense.

        banana choc chip muffins healthy

        Add in the chocolate chips.

        gluten free peanut butter chocolate chip muffins

        Bake at 350° for 25 minutes.

        oatmeal peanut butter chocolate chip muffins

        Enjoy these amazing easy moist chocolate muffins!

        oatmeal peanut butter chocolate chip muffins

        Oat Flour Chocolate Chip Muffins

        Easy moist chocolate muffins made with oat flour, loaded with chocolate chips. Perfect for a healthy, gluten-free treat that's simple to bake
        Prep Time 10 minutes
        Cook Time 25 minutes
        Total Time 35 minutes
        Course Dessert
        Cuisine American
        Servings 6 people
        Calories 412 kcal

        Equipment

        • 1 muffin pan
        • 2 mixing bowl

        Ingredients
          

        • 1 ½ cups oat flour
        • 1 tsp baking powder
        • ½ tsp baking soda
        • ¼ tsp salt
        • 2 large eggs
        • ¼ cup honey or maple syrup
        • ¼ cup light brown sugar
        • ½ cup milk
        • 1 tsp vanilla extract
        • ¼ cup butter
        • ¼ cup peanut butter
        • ½ cup chocolate chips

        Instructions
         

        • Preheat your oven to 350°, line muffin tin with paper liners or spread oil on muffin pan.
        • Mix dry ingredients – in a large bowl whisk oat flour, baking powder, baking soda, and salt together.
        • Combine wet ingredients – whisk together eggs, honey, sugar, milk, vanilla extract and butter.
        • Combine wet and dry ingredients – stir until just combined, be careful not to overmix.
        • Add chocolate chips.
        • Fill muffin cups with batter.
        • Bake – Bake for 25 minutes or until a toothpick comes out clean.
        Keyword basic oats recipe, gluten free

        If you’re wanting to try almond flour chocolate chip muffins, follow my almond butter recipe that shows you how to make almond flour as well!

        Can you use almond flour instead of oat flour?

        • Yes, but note that almond flour has a different texture and may result in a denser muffin. You might need to adjust the liquid ingredients slightly.

        Can you make this recipe without eggs?

        • Yes, you can use flax eggs, or chia eggs.

        How can you make these muffins dairy-free?

        • Use almond, oat, yogurt or coconut milk.

        How to prevent these oat flour chocolate chip muffins from becoming too dense?

        Avoid overmixing and stir just until wet and dry ingredients are combined.

        Storage Tips:

        Room Temperature: Store the muffins in an airtight container at room temperature for up to 3 days.

        Freezer: For longer storage, wrap each muffin in plastic wrap and place them in a freezer bag.

        They can be frozen for up to 3 months. To enjoy, thaw at room temperature or warm in the microwave.

        oatmeal peanut butter chocolate chip muffins

        Baking these oat flour chocolate chip muffins healthy is the perfect way to incorporate wholesome ingredients into a treat that everyone will love.

        Share them with family and friends with a cup of coffee! Enjoy every bite!

        pin
        easy keto ice cream recipe
        Dessert

        Creamy Keto Strawberry Ice Cream

        This article may contain links from my partners. I may receive a small commission if you make a purchase through a link. Please read my disclosure and how I make money here.

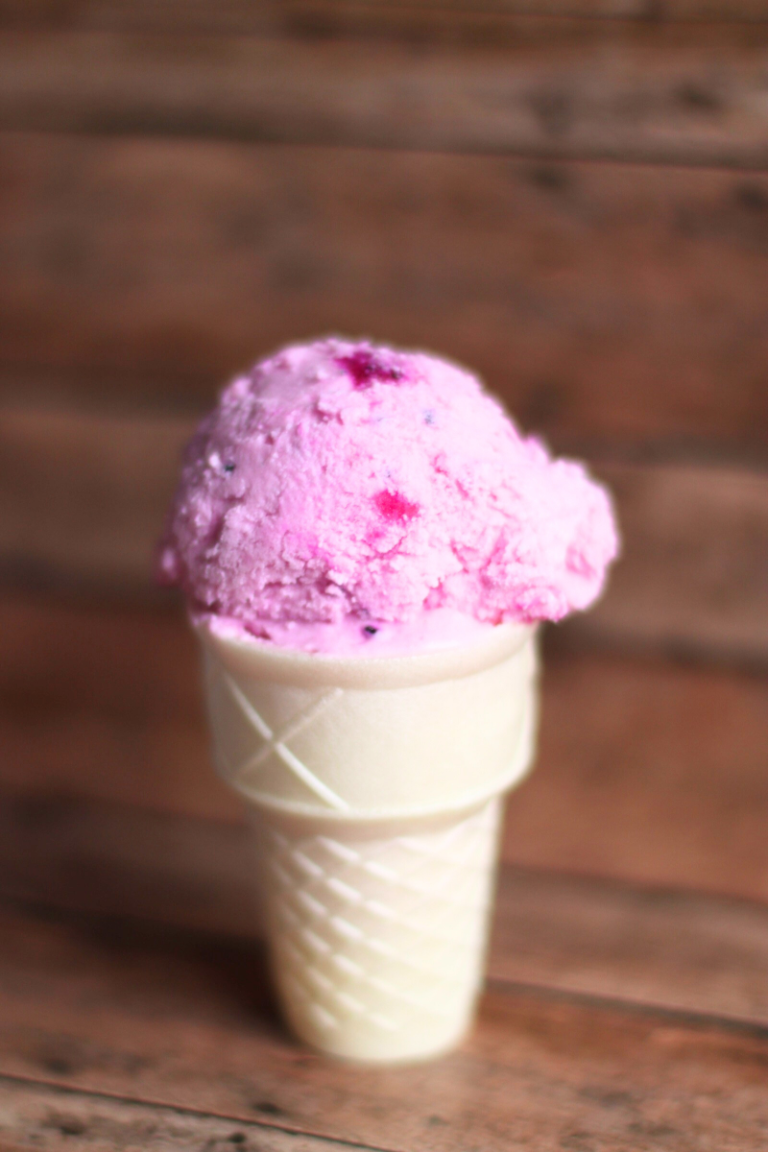
        Are you craving a sweet treat but don’t want to derail your keto diet, this homemade keto strawberry ice cream is hands down, the best homemade keto ice cream recipe!

        This low carb ice cream recipe is perfect to satisfy your dessert cravings while staying on track with your health goals! Win-win!

        Keto ice cream made with heavy whipping cream will become your store-bought ice cream replacement in no time. Who would’ve thought- yogurt into ice cream would be my new favorite – just in time for Summer. All natural, no extras!

        With just a few simple ingredients you can whip up a delicious and creamy ice cream that is keto-friendly and oh-so-delicious!

        best homemade keto ice cream

        Keto Strawberry Ice Cream

        Starting a keto diet during my first pregnancy after receiving a diagnosis of gestational diabetes was such a surprise to me! I believed my diet was balanced – Read more about my journey to maintaining a well-balanced diet here.

        Carb intake and maintaining a keto-conscious diet not only helped manage my blood sugar levels but made improvements to my overall health with increased energy levels, better appetite control, heightened mental clarity and an overall sense of vitality.

        Though my love for pasta still lingers…

        I’ve come to recognize the impact that a low-carb, keto lifestyle has on my health and quality of life.

        So, if you’re still craving treats like gooey brownies or tasty desserts, including this luscious strawberry dragon fruit ice cream, then look no further than my easy to make keto friendly desserts recipes here!

        Back to this awesome strawberry ice cream masterpiece.

        easy keto ice cream recipe

         Healthy Homemade Strawberry Ice Cream Must Haves:

        Yogurt Ice Cream Strawberry Ingredients:

        Heavy Cream: Creates the rich and creamy texture to the ice cream.

        Monk Fruit Sweetener: Adds sweetness, without the glucose spike.

        Strawberry Greek Yogurt (Full Fat): Adds creaminess and tanginess, also provides protein.

        Unsweetened Almond Milk: Creates the consistency and adds a nutty flavor.

        Vanilla Extract: Enhances the flavor.

        Dragon fruit: Adds flavor.

        easy keto ice cream recipe


        Easy Homemade Ice Cream Instructions:

        1. Mix the yogurt and dragon fruit.
        2. Then mix yogurt, heavy cream, monk fruit sweetener and vanilla extract until well combined.
        3. Chill mixture
        4. Bring mixture out and church with your ice cream machine.
        5. Once consistency is soft, transfer to a freezer safe container for at least 4 hours.
        6. Serve and enjoy this tasty keto friendly treat with a friend!
        homemade keto ice cream recipe


        keto ice cream recipe

        Homemade Keto Ice Cream

        Prep Time 10 minutes
        Total Time 10 minutes
        Course Dessert
        Cuisine American

        Equipment

        • 1 Ice cream maker

        Ingredients
          

        • 1 cup heavy cream
        • ½ cup monk fruit sweetener
        • 1 cup strawberry greek yogurt
        • ½ cup almond milk
        • 1 tsp vanilla extract
        • ½ cup dragon fruit

        Instructions
         

        • Mix the yogurt and dragon fruit.
        • Then mix yogurt, heavy cream, monk fruit sweetener and vanilla extract until well combined.
        • Chill mixture.
        • Bring mixture out and church with your ice cream machine.
        • Once consistency is soft, transfer to a freezer safe container for at least 4 hours.
        • Serve and enjoy this tasty keto friendly treat with a friend!
        Keyword 3 ingredient keto strawberry ice cream, best low carb low sugar ice cream, homemade blender ice cream, homemade fruit ice cream, homemade ice cream with yogurt, making ice cream with heavy cream, zero carb ice cream


        easy keto ice cream recipe

        How to make keto ice cream soft?

        Use a combination of fats like heavy cream, full fat yogurt, and almond milk to help the creamy texture and enhance the rich flavor.

        Can you make homemade keto ice cream with eggs?

        Yes, instead of using yogurt, Slowly, pour about half of the hot heavy cream mixture into the egg mixture, whisking constantly to temper the eggs to avoid scrambling

        How to make yogurt ice cream without a machine?

        Follow my recipe, instead of placing in the machine -u003cbr/u003eu003cstrongu003ePour the yogurt mixture into a shallow, freezer-safe containeru003c/strongu003e. The shallower the container, the faster the mixture will freeze. Make sure it’s large enough to spread the mixture out thinly.u003cbr/u003eu003cstrongu003eFreeze and Stiru003c/strongu003e: Place the container in the freezer. After about 45 minutes to 1 hour, remove the container from the freezer and stir the mixture vigorously with a spoon or whisk. This helps break up any ice crystals that may be forming.u003cbr/u003eu003cstrongu003eRepeat Freezing and Stirringu003c/strongu003e: Return the container to the freezer and repeat the process every 30 minutes to 1 hour for the next 2-3 hours. Each time you remove the mixture from the freezer, give it a good stir to break up any ice crystals and to create the creamy texture.

        pin
        smore smoothie
        Breakfast Dessert

        Toasted Smore Milkshake in Every Sip

        This article may contain links from my partners. I may receive a small commission if you make a purchase through a link. Please read my disclosure and how I make money here.

        This smore milkshake will become your favorite for the rich, creamy consistency, graham cracker crumbs, chocolate chips, yogurt and mini marshmallow creating an explorer’s dream smore smoothie come true!

        My little explorer has recently found an obsession with marshmallows.

        As we await our fireside tales, camping snacks, leaf crunching hikes and sunrise seeking – I thought I would create a little camping inspired smoothie – filled with avocado, chocolate, graham cracker crumbs and of course, marshmallow.

        As we created this smoothie, we spoke of witnessing the sunrise atop the mountains – a breathtaking sight of the sky in hues of warmth.

        Asheville hikes
        If only photos could capture the true beauty of this breathtaking sunrise… Now, back to the smoothie recipe!

        HI THERE!

        Welcome to Hike Cook Share!

        Wife to a talented chef and mama to two little sous chefs, I’m passionate about food photography, exploring and sharing!

        Finding inspiration in the beauty of the outdoors and the joy of a well-crafted dish, all while sharing moments together.

        imageedit 1 7887394045 1024x1024 2
        healthy smoothie

        Smore Smoothie Ingredients:

        Avocado: Creates the rich, creamy texture of the smoothie.

        Graham Cracker Crumbs: Hint of sweet, nutty flavor, reminiscent of a classic smore, providing a satisfying base. 


        Chocolate Chips: Bursts of rich chocolatey goodness. 


        Yogurt: Enhances creaminess and sweetness.


        Maple Syrup: Creates a warmth undertone, sweetener. 


        Mini Marshmallows: Provides an airy sweet texture

        Just like my marshmallow mixed berry pie, you will love the sweet airy texture marshmallows create!

        Smore Smoothie Instructions:

        1. Blend: Combine all ingredients and blend until desired consistency.
        2. Pulse: Pulse in your marshmallows for some added flavor.
        3. Pour & Enjoy: Top with graham cracker crumbs and marshmallows.
        smore smoothie

        Smore Smoothie

        Prep Time 5 minutes
        Total Time 5 minutes
        Course Dessert
        Cuisine American

        Equipment

        • 1 Blender

        Ingredients
          

        • 1 ripe Avocado peeled and pitted
        • 1 cup Graham Cracker Crumbs
        • ½ cup Chocolate Chips
        • ½ cup Yogurt unsweetened
        • ¼ cup Mini Marshmallows
        • 2 tsp Maple Syrup

        Instructions
         

        • Place all ingredients in a blender.
        • Blend ingredients.
        • Serve.
        Keyword smore smoothie

        Are you looking for more smoothie recipes – follow along for more and be sure to comment if you have tried this Smores Smoothie!

        pin
        diy popsicle recipe
        Dessert

        Best Homemade Popsicles

        This article may contain links from my partners. I may receive a small commission if you make a purchase through a link. Please read my disclosure and how I make money here.

        These delicious chocolate fudgy pudding popsicles are the best homemade popsicle recipe, easy to make and a lot healthier than store bought popsicles!

        You can trust the quality ingredients in these popsicle recipes while avoiding all the added ingredients that would be found in the store-bought popsicles – choose high quality chocolate, milk and freshness!

        Stay cool this summer with the best homemade popsicles that are easy, healthy and perfect for the whole family.

        chocolate popsicle recipes

        Homemade Popsicle Recipes Ingredients:

        Dark Chocolate: Rich, smooth flavor.
        Milk: Creates the creamy texture.
        Honey: Natural sweetener.
        Vanilla Extract: Flavor enhancer
        Salt: Brings out the burst of flavor.
        Corn Starch: Thickening agent that creates the fudgy consistency.
        Water: Dissolves the cornstarch.

        [mailpoet_form id=”3″]

        Now It’s Time to Make Your Own Popsicles

        diy popsicle recipe

        Instructions

        Step 1: First combine milk and cocoa powder to saucepan,

        Then Turn on medium high heat and whisk together.:

        Step 2: While milk is heating crack two eggs separate yolk and whites and put yolk in large bowl. 

        Add cornstarch and whisk gently until incorporated.

        Step 3: Before milk boils, remove and gently pour into egg mixture very slowly while whisking rapidly. (If poured too fast eggs will scramble)

        At this point your tempering your eggs and bringing them up to a high temperature slowly

        Step 4: Once mixed together add back to sauce pan and whisk on low med heat. You will be able to see a pudding like consistency after a couple minutes of whisking. 

        Then pour into cups for a quick cooling time.

        healthy popsicle recipes

        For the cute little monster in your life, get these great popsicle mold.

        diy popsicle recipe

        pin
        20230528045542 IMG 8487 4
        Dessert

        Dreamy Marshmallow Mixed Berry Pie

        This article may contain links from my partners. I may receive a small commission if you make a purchase through a link. Please read my disclosure and how I make money here.

        If you’re looking for the perfect summer dessert this marshmallow mixed berry pie will become your favorite summer pies! This no bake berry pie is not only convenient but also a perfect treat for any occasion.

        Being a top rated summer desserts, it will have you imagining you’re in a cloud of fluffy, marshmallow goodness with a luscious medley of sweet, ripe berries, all within a golden, buttery easy pie crust.

        Mixed berry pie with graham cracker crust served and a dollop of freshly whipped berry cream creates the best balance of sweet and tangy flavors for any easy homemade berry pie!This post features Marshmallow Mixed Berry Pie, your new favorite for easy summer dessert recipes.

        berry berry pie recipe

        Making this perfect mixed berry pie – his enthusiasm grew, and when we finally pulled the pie out of the oven, we were both so excited! Sitting down to enjoy our berry fruit pie, with the berry-stained smiles and sticky fingers, we enjoyed not just the delicious pie, but the memories we had made together, inspired by our favorite, Little Bear.

        Check out my post on how to create the cutest Little Bear themed birthday party!

        little bear birthday

        Mixed Berry Pie Ingredients

        • Butter: Adds richness to overall flavor.
        • Marshmallows: Creates gooey and creamy texture. (You can substitute whipped cream.)
        • Milk: Creates smooth and creamy texture.
        • Heavy Cream: Creates velvety consistency.
        • Frozen Mixed Berries: Natural sweetness, tartness and burst of flavor to each bite. 
        • Pre-Made Graham Cracker Crust: Crunchy base that complements the creamy filling and juicy berries.
        no bake pie

        Marshmallow Mixed Berry Pie

        This no-bake pie features the fluffiest marshmallow mixed with juicy berries atop a honey graham cracker crust. Best keto pie recipe, bursting with flavor!
        Course Dessert
        Cuisine American
        Servings 8 people
        Calories 250 kcal

        Equipment

        • 1 pie dish
        • 1 mixing bowl
        • 1 saucepan for melting
        • 1 spatula

        Ingredients
          

        • 1 graham cracker pie crust premade
        • cup granulated sugar
        • 6 tbsp butter unsalted, melted
        • 1 bag marshmallows
        • ½ cup heavy cream
        • 1 cup mixed berries frozen

        Instructions
         

        • In a saucepan, melt marshmallows and stir in heavy cream. Stir until smooth and continue stirring.
        • Dethaw mixed berries in a strainer.
        • Allow mixture to cool slightly then fold in your mixed berries.
        • Pour the mixture into a premade graham cracker pie crust.
        • Refrigerate for 4-6 hours or until firm.

        Notes

        • Fold in Berries Gently:Once the marshmallows have melted, let the mixture cool a bit before adding the mixed berries. Carefully fold them in to prevent the berries from being crushed and to ensure they are evenly distributed.
        • Serve Chilled: Marshmallow Mixed Berry Pie is best enjoyed cold, straight from the refrigerator. Chilling enhances the flavors and textures.
        • Store Properly: Store any leftover pie covered in the refrigerator. It should keep well for a few days.
        Keyword gluten free, keto friendly, mixed berry pie
        triple berry pie

        Marshmallow Mixed Berry Pie Instructions:

        1. In a pan on low heat, mix butter, milk and marshmallows. Be sure to stir occasionally so that you do not have the marshmallow stick to the pan or burn.
        2. I recommend browning your butter beforehand to get that added rich flavor. 
        mixed berry fruit pie recipe

        Melt the marshmallows and heavy cream slowly, stir frequently to avoid burning or uneven melting.

        berry pie filling

        2. Once mixed together, let it cool.  Put it in the freezer for quicker cooling. 

        best berry pie filling recipe

        3. Next pour heavy cream in your mixer to create your own whip cream.

        betty crocker blue berry pie

        4. Add your frozen mixed berries into the whipped heavy cream.

        easy mixed berry pie


        5. Mix your whipped cream berry mixture together with the marshmallows and pour into pie crust.

        graham recipe

        fresh berry pie

        Then, let it cool in the fridge for a few hours.

        Next comes the waiting…the hardest part of the recipe!

        Refrigerate for 4-6 hours for the consistency to become firmer.

        Make sure to refrigerate the pie for at least 2 hours that way it will be firm enough to cut and hold its shape.

        frozen berries pie recipe

        Put some berries on top and enjoy with your Little Bear! 

        marshmallow mixed berry pie
        pin
        The Best Gluten-free oatmeal chocolate chip cookies