This article may contain links from my partners. I may receive a small commission if you make a purchase through a link. Please read my disclosure and how I make money here.
Spaghetti squash boats are the perfect healthy, low-carb dinner idea that are packed with flavor.
The squash strands create a light, creamy spaghetti squash texture that pairs perfectly with melted cheese and a hearty sauce.
Spaghetti squash boats are also incredibly easy to make—just roast, fill, and bake!
How to tell if spaghetti squash is ripe?
To tell if a spaghetti squash is ripe, check for a deep yellow color and a firm, hard skin. It should feel heavy and have no soft spots or blemishes.
If the squash is still green or has a pale-yellow hue, it’s likely an unripe spaghetti squash. Unripe squash won’t have developed its full sweetness and may have a tougher, less desirable texture.
What does spaghetti squash taste like?
It’s slightly sweet flavor and has a texture similar to al dente pasta, making it perfect for absorbing the flavors of whatever it’s paired with.
When you make stuffed spaghetti squash, the squash itself takes on the savory richness of the fillings, whether it’s hearty ground turkey, marinara sauce, or roasted vegetables, while still maintaining a light, slightly nutty taste.
Spaghetti Squash Boats
Spaghetti squash boats are just as savory and make for great lazy Sunday ideas, just like my easy gluten free meatballs, poblano burritos, or crispy chaffle pizza.
Recipe for spaghetti squash boats:
Spaghetti squash: Their slightly sweet, mild flavor makes a perfect low-carb alternative to traditional pasta.
Ground beef: Ground beef adds a savory, satisfying base, and when cooked, it absorbs the seasoning for a balanced, meaty filling.
Marina sauce: A classic tomato-based sauce made with tomatoes, garlic, onions, and herbs. Marinara sauce brings a tangy, slightly sweet, and savory component that complements the squash and beef.
Mozzarella cheese: This soft, melty cheese is mild and creamy, perfect for topping the dish. As it melts, it creates a gooey, golden layer that ties all the ingredients together.
Garlic: Enhances the flavor of the beef and sauce, creating a more robust, savory flavor.
Olive oil: Adds richness and prevents sticking.
Salt and pepper: Helps with flavoring and spice.
Parsley: Fresh flavor to balance the rich, savory elements of the dish
Loaded Spaghetti Squash Boats
Spaghetti squash boats are so easy to make, perfect for a busy mom meal planning, gluten free fall recipes and fall recipes kids will love!
Drizzle the cut sides of the spaghetti squash with olive oil, and sprinkle with salt and pepper.
Place the squash halves cut-side down on a baking sheet. Roast for 35-40 minutes or until the flesh is tender and easily scraped with a fork to form "spaghetti-like" strands.
Cook the ground beef.
While the squash is roasting, heat olive oil in a skillet over medium heat.Add minced garlic and sauté for 1-2 minutes.
Add the beef and cook until browned, breaking it up as it cooks.
Season with salt and pepper.
Stir in the marinara sauce and let it simmer for 5-7 minutes until heated through.
Fill each spaghetti squash half with the beef marinara mixture.
Sprinkle with mozzarella and Parmesan cheese.
Return the filled squash boats to the oven and bake for an additional 10 minutes, or until the cheese is melted and bubbly.
Remove from the oven and garnish with chopped parsley if desired.
Drizzle the cut sides of the spaghetti squash with olive oil, and sprinkle with salt and pepper.
Place the spaghetti squash boats with halves cut-side down on a baking sheet. Roast for 35-40 minutes or until the flesh is tender and easily scraped with a fork to form “spaghetti-like” strands.
Cook the ground beef.
While the squash is roasting, heat olive oil in a skillet over medium heat.
Add minced garlic and sauté for 1-2 minutes.
Add the ground beef and cook until browned, breaking it up as it cooks.
Season with salt and pepper.
Stir in the marinara sauce and let it simmer for 5-7 minutes until heated through.
Fill each spaghetti squash half with the beef marinara mixture.
Sprinkle with mozzarella and Parmesan cheese.
Return the filled squash boats to the oven and bake for an additional 10 minutes, or until the cheese is melted and bubbly.
Remove from the oven and garnish with chopped parsley if desired.
Cutting spaghetti squash tips:
Cutting into these spaghetti squash boats can be tricky because of their tough skin, but these tips will help make it easier and safer:
Soften it in the microwave:
Poke a few holes in the squash with a fork.
Microwave it for 3–5 minutes (depending on size) to slightly soften the skin, making it easier to cut.
Stabilize the squash:
Lay the squash on a stable cutting board with a damp towel underneath to prevent slipping.
If the squash is too round, trim off a small section of one end to create a flat surface to keep it stable.
Carefully insert the tip of the knife into the squash first, then rock the knife back and forth to cut through.
Cut lengthwise
For long strands: Cut the squash lengthwise from stem to end to get longer spaghetti-like strands.
For shorter strands: Cut it crosswise into rings, which results in shorter strands.
Oh, hey there!
Welcome! I’m an aspiring foodie who loves sharing adventures, hikes, local finds, and all things delicious. Wife to an incredible chef and mama to two adorable sous chefs, I’m always creating, sharing and enjoying every bite along the way!
Read more and subscribe to get my most tried and loved recipes delivered straight to your inbox!
Yes, you can freeze cooked spaghetti squash! Here’s how to do it properly to preserve its texture and flavor:
Steps to freezing spaghetti squash:
Cook the squash: Roast, bake, or microwave the spaghetti squash as usual. Once cooked, scrape the strands out of the shell using a fork.
Cool completely: Let the cooked squash cool to room temperature before freezing this helps prevent squishiness.
Portion it out: Divide the spaghetti squash into portion sizes that you will use later.
Drain excess moisture: If the squash is particularly watery, press it gently with a paper towel or drain it in a colander before freezing.
Store in airtight containers: Place the portions in airtight freezer-safe bags or containers. If using freezer bags, remove as much air as possible before sealing to prevent freezer burn.
How long does spaghetti squash last?
Frozen spaghetti squash can last up to 6-8 months in the freezer.
Thawing and reheating:
Thaw: Place the frozen squash in the fridge overnight or thaw it in the microwave.
Reheat: Warm it up on the stovetop or microwave, and it’s ready to use!
Freezing spaghetti squash is a great way to save time and enjoy it later without losing much of its texture or flavor.
If you’re looking for the best spaghetti squash recipe, these loaded spaghetti squash boats are a must-try.
Packed with savory ground beef, marinara sauce, and melty mozzarella cheese, they’re the perfect combination of healthy and delicious.
The spaghetti squash strands mimic pasta, but with fewer carbs, making this dish a guilt-free, satisfying meal.
This article may contain links from my partners. I may receive a small commission if you make a purchase through a link. Please read my disclosure and how I make money here.
Need some inspiration for last minute dinner recipes? You’re in the right place! Whether you’re craving a comforting bowl of creamy zucchini pasta, a perfectly cooked beef sirloin steak sous vide, a low-carb twist with crispy chaffle pizza, or flavorful poblano enchiladas, these quick and delicious meals are here to save your evening.
Really easy, last minute dinner recipes
Chicken Poblano Enchiladas
This chicken poblano enchiladas recipe is a favorite, it’s one of my best, quick last minute dinner ideas, very tasty and delicious!
1
Cheesy Chicken Poblano Enchiladas
This savory chicken poblano enchiladas with tender shredded chicken, smoky roasted poblano peppers and sweet bell peppers wrapped in soft tortillas and topped with rich, melty cheddar cheese, making every bite of these creamy poblano chicken enchiladas the best.
Welcome! I’m an aspiring foodie who loves sharing adventures, hikes, local finds, and all things delicious. Wife to an incredible chef and mama to two adorable sous chefs, I’m always creating, sharing and enjoying every bite along the way!
Read more and subscribe to get my most tried and loved recipes delivered straight to your inbox!
The best creamy lemon chicken pasta marinated in zesty lemon, sweet zucchini and squash with a slight nutty flavor paired with al dente pasta and tossed in a lemon-infused creamy sauce.
Delicious and satisfying easy healthy tacos that are keto-friendly and mouthwatering.Made with crispy, chedar cheesy taco shells, these tacos are filled with seasoned ground beef, topped with fresh salsa, and garnished with cilantro.⅗⅗
This article may contain links from my partners. I may receive a small commission if you make a purchase through a link. Please read my disclosure and how I make money here.
This incredibly smooth and creamy vitamix almond butter is a favorite in our kitchen.
If you’re whipping up this batch of this easy homemade honey almond butter or enjoying the deep, nutty flavor of toasted almond butter, it’s sure to become a staple in your pantry.
Sit back and enjoy the simple pleasure of this easily-made, creamy Vitamix almond butter—it’s a treat you’ll love every time!
What is almond butter?
If you haven’t tried almond butter yet, I hate to say it, but you’re missing out! While store-bought can be pricey, making it at home is so easy and much more affordable.
It’s a smooth, creamy spread made by simply blending almonds into a delicious paste.
When it comes to almond butter vs peanut butter, almond butter offers a milder, slightly sweeter flavor and is packed with more vitamins and minerals.
So, is almond butter better than peanut butter?
Well, it depends on what you’re looking for!
Almond butter has more vitamins, minerals, and healthy fats compared to peanut butter, making it a great option if you’re after a nutrient boost.
Peanut butter has a bit more protein but more sugars.
What does almond butter taste like?
Almond butter on its own has a rich, slightly nutty taste, but you can add natural sweeteners like honey or maple syrup.
A favorite- honey almond butter brings a balance of sweetness and nuttiness, making it perfect for spreading on toast or using in desserts.
If you prefer a different flavor, you can create maple almond butter by simply mixing in a bit of maple syrup, which adds a deep, caramel-like sweetness.
Creamy Almond Butter Add Ins: Cinnamon, sea salt, cocoa or expresso powder, chia or flax seeds, crushed pecans, sunflower seeds, dried fruits like chopped dates.
Roast the Almonds: Preheat your oven to 350°F (175°C). Spread the almonds on a baking sheet and roast them for 10-12 minutes until lightly golden. Allow them to cool for a few minutes.
Blend the Almonds: Place the almonds in a high-speed blender or food processor. Blend for about 5-10 minutes, stopping occasionally to scrape down the sides. At first, the almonds will turn into a coarse meal, then a thick paste, and eventually smooth, creamy almond butter.
Keep Blending: The oils will release from the almonds as they continue to break down, turning the mixture creamy. If it’s too thick, add a tablespoon of neutral oil (like coconut or avocado) to help with the texture.
Creamy Vitamix Almond Butter
Creamy vitamix almond butter is so easy, delicious and quick to make. Spread onto bread, mix in with oats, yogurt or use it to make nutty flavored sauces!
Keyword almond butter with cinnamon, creamy almond butter
Store: Transfer the almond butter to an airtight container and store at room temperature for up to a week or refrigerate for up to a month.
Follow me on Pinterest
@hikecookshare
A place where adventure meets flavor! Here, I share my love for the outdoors, delicious recipes, and all the hidden gems I find along the way. Whether you’re looking for healthy, easy-to-make meals, discovering new hikes, or finding tips for cooking while exploring nature, you’ll find it here.
This article may contain links from my partners. I may receive a small commission if you make a purchase through a link. Please read my disclosure and how I make money here.
Get ready to make the most moist and rich gluten free chocolate zucchini bread that’s packed with flavor! This recipe combines the sweetness of zucchini with the richness of chocolate, creating the most perfect balance for this easy gluten free zucchini bread recipe.
If you’re craving a slice of zucchini oat bread for breakfast or dessert, this gluten free recipe for zucchini bread is easy to make and loaded with wholesome ingredients.
This gluten free chocolate zucchini bread, It’s the perfect treat for any time of day!
You’ll absolutely love this perfectly moist zucchini oat bread, here’s why:
Moist and Tender: With zucchini being naturally sweet and retains water, creating the most moist desserts.
Wholesome and Nutritious: Made with oats, this bread is packed with fiber and essential nutrients.
Gluten-Free Friendly: Just swap in gluten-free oats and almond flour to make it GF.
Easy to Make: With simple ingredients and quick prep time, this zucchini oat bread is perfect for busy bakers or those new to baking.
Customizable: Make this a savory zucchini bread or sweet by adding in nuts, chocolate chips or spices.
Gluten free recipe for zucchini bread
This zucchini bread oat flour adds some wholesome, slightly sweet, nutty flavor to this zucchini bread recipe and adds a tender crumb.
When using a combination of oat flour and other gluten free flours it helps maintain moisture and prevents the bread from falling apart.
Using oat flour in savory recipes makes this nutty flavor that will be the best zucchini bread savory you’ve made!
Oh, hey there!
Welcome! I’m an aspiring foodie who loves sharing adventures, hikes, local finds, and all things delicious. Wife to an incredible chef and mama to two adorable sous chefs, I’m always creating, sharing and enjoying every bite along the way!
Read more and subscribe to get my most tried and loved recipes delivered straight to your inbox!
Almond Flour: Adds a rich, nutty taste and adds moisture to the oat flour.
Baking Soda: Leavening agents provide lift and lightness.
Salt: Balances and enhances all the flavors in the bread.
Cinnamon: Adds warm flavor.
Eggs: Acts as a binder, holding the ingredients together. Eggs also help the bread rise and add richness.
Vanilla Extract: Enhances the flavor of earthiness and sweet in this recipe.
Butter: Helps enhance richness and flavor and tenderness. Add the extra step of browning your butter for extra deliciousness!
Walnuts: Texture and crunch, slight bitterness which pairs well with the sweetness of zucchini.
Chocolate Chips: Provides rich bursts of sweetness and depth.
Zucchini: Provides moisture and a tender texture to the bread, thanks to its high water content.
How to make zucchini bread
Preheat Oven: Set your oven to 350°F (175°C) and grease a 9×5-inch loaf pan, or line it with parchment paper.
Prepare Zucchini: Grate the zucchini, then lightly squeeze it in a clean towel or paper towels to remove excess moisture. Set it aside.
Mix Dry Ingredients: In a large bowl, whisk together the flour, oats, baking soda, baking powder, cinnamon, and salt.
Combine Wet Ingredients: In another bowl, whisk the eggs, then add the sugar, oil, and vanilla extract. Stir until well mixed.
Add Zucchini: Fold the grated zucchini into the wet ingredients.
Combine Wet and Dry: Gradually mix the dry ingredients into the wet ingredients until just combined. Be careful not to overmix. If using, fold in walnuts or chocolate chips.
Pour and Bake: Pour the batter into the prepared loaf pan and smooth the top. Bake for 50–60 minutes, or until a toothpick inserted in the center comes out clean.
Cool: Allow the gluten free chocolate zucchini bread to cool in the pan for about 10 minutes, then transfer to a wire rack to cool completely.
This is truly an easy gluten free zucchini bread recipe because it’s simple to follow, requires minimal ingredients, and makes the most moist, flavorful gluten free chocolate zucchini bread.
When making this rich gluten free chocolate zucchini bread, the zucchini oat bread is simple to make, even beginners can whip up this delicious bread in no time!
Gluten Free Chocolate Zucchini Bread
Gluten free chocolate zucchini bread makes the perfect walnut oat bread, a great option for gluten free flour bread recipe that creates the best fall desserts.
Preheat Oven: Set your oven to 350°F (175°C) and grease a 9×5-inch loaf pan, or line it with parchment paper.
Prepare Zucchini: Grate the zucchini, then lightly squeeze it in a clean towel or paper towels to remove excess moisture. Set it aside.
Mix Dry Ingredients: In a large bowl, whisk together the flour, oats, baking soda, baking powder, cinnamon, and salt.
Mix Dry Ingredients: In a large bowl, whisk together the flour, oats, baking soda, baking powder, cinnamon, and salt.
Combine Wet Ingredients: In another bowl, whisk the eggs, then add the sugar, oil, and vanilla extract. Stir until well mixed.
Add Zucchini: Fold the grated zucchini into the wet ingredients.
Combine Wet and Dry: Gradually mix the dry ingredients into the wet ingredients until just combined. Be careful not to overmix. If using, fold in walnuts or chocolate chips.
Pour and Bake: Pour the batter into the prepared loaf pan and smooth the top. Bake for 50–60 minutes, or until a toothpick inserted in the center comes out clean.
Cool: Allow the bread to cool in the pan for about 10 minutes, then transfer to a wire rack to cool completely.
Zucchini bread doesn’t always need refrigeration, but it depends on how long you plan to store it and the temperature of your kitchen.
When to refrigerate this gluten free chocolate zucchini bread:
Warm or Humid Environments: In warmer or more humid conditions, refrigeration helps prevent mold growth, especially since moisture-rich ingredients like zucchini are used in recipes like zucchini oat bread.
Storing for Longer Than a Few Days: If you’re keeping the bread for more than 2-3 days, it’s a good idea to refrigerate it. This applies to all variations, including gluten free chocolate zucchini bread, to maintain freshness for a longer time.
By refrigerating, it helps retain the tenderness of this gluten free chocolate zucchini bread.
How to store zucchini bread:
At Room Temperature (2-3 days):
Wrap it: Once the gluten free chocolate zucchini bread has completely cooled, wrap it tightly in plastic wrap, foil, or place it in an airtight container.
Store in a cool, dry place: This will keep the bread fresh for up to 2-3 days at room temperature.
In the Fridge (Up to 1 week):
Wrap or store airtight: Wrap the bread tightly in plastic wrap or store it in an airtight container.
Refrigerate: Keep it in the refrigerator to extend freshness for 5-7 days.
Can you freeze zucchini bread?
Of course, Wrap in plastic and foil: First, wrap the bread tightly in plastic wrap, then cover it with aluminum foil to avoid freezer burn, this seems to be the best way to freeze zucchini bread. Thaw at room temp and enjoy!
I hope you enjoy this easy gluten free zucchini bread recipe!
If you try the chocolate version, a savory zucchini bread, or a walnut oat bread, it’s sure to be a hit!
Your feedback helps make each recipe even better for everyone.
Don’t forget to leave a comment, give the recipe a rating, and subscribe to get more of the most tried, loved, and shared recipes sent right to your inbox!
This article may contain links from my partners. I may receive a small commission if you make a purchase through a link. Please read my disclosure and how I make money here.
Brown butter bites add a rich, nutty flavor with a caramel-like sweetness to any dish.
But, eating butter alone, especially in the form of brown butter bites, can be a great option if you’re following a high-fat, low-carb diet like keto or carnivore, where fats are an essential energy source.
“With enough butter, anything is good.”- Julia Child
Butter is rich in healthy fats that support brain function, provide sustained energy, and help keep you full for longer. Brown butter also adds an incredible depth of flavor, that creates a nutty, almost caramel-like taste.
Plus, fats can help balance blood sugar and support a healthy metabolism!
Their the perfect carnivore desserts, melting in mouth like toffee, with delicious hints of hazelnut in every bite.
I’m a total chocolate fanatic, so it took some convincing to try these butter bites as a substitute for my sweet tooth.
Now, in almost every recipe, I refer back to this browned butter bites trick because it takes every dish to the next level, just like for my gluten free oatmeal chocolate chip cookies.
The secret ingredient really is in browning your butter!
Brown Butter Bites Ingredients:
All you really need for this recipe is unsalted grassfed butter! Add additional spices for flavor such as cinnamon, maple syrup.
Other add ins to the butter:
Vanilla Extract: Adds a warm, aromatic touch.
Cinnamon or Nutmeg: Perfect for a hint of spice, especially in fall recipes.
Sea Salt: A pinch of salt can bring out the rich flavors in the butter.
Sweetener: Monk fruit, honey, or maple syrup can add sweetness without overpowering the buttery flavor.
Chopped Nuts: Pecans, almonds, or hazelnuts add crunch and extra nuttiness.
Dark Chocolate Chips: For a sweet, melty twist.
Coconut Flakes: Adds texture and a hint of tropical flavor.
Herbs (like rosemary or thyme): Ideal for savory brown butter dishes.
HI THERE!
Welcome to Hike Cook Share!
Wife to a talented chef and mama to two little sous chefs, I’m passionate about food photography, exploring and sharing!
Finding inspiration in the beauty of the outdoors and the joy of a well-crafted dish, all while sharing moments together.
Grassfed butter is often preferred because it’s richer in nutrients compared to regular butter. It contains higher levels of omega-3 fatty acids, vitamin A, and conjugated linoleic acid (CLA), which have anti-inflammatory and heart health benefits.
What Can You Do With Browned Butter?
The real question should be, what can’t you do with browned butter?!
It makes a great option for carnivore diet sweets, snack or you can add it to any baking recipe, sandwiches or noodles.
How to browned butter?
This recipe is so easy – all you have to do is:
Place the stick of butter in the saucepan on medium heat.
Wait until it begins to foam – stirring it in the process.
Cooking times vary, usually 5-8 minutes
Eventually the butter will start turning golden brown and smelling nutty and that’s when it is done!
Brown butter bites add flavor, richness and healthy fats back into any recipe! The flavor is like caramelized hazelnut satisfying any sweet tooth and perfect for a carnivore diet sweets treat!
From tasty desserts to crowd-pleasing appetizers and satisfying dinners, these favorite recipes are sure to hit the spot! Whether you’re hosting or just craving something delicious, each dish is packed with flavor and easy to make.
Browning butter not only gives butter a lovely toasty, nutty flavor but by cooking out the water and caramelizing the milk solids you can extend the life of the butter!
What does browned butter look like?
Browned butter has a golden to deep amber color, with tiny dark brown specks at the bottom. These specks are the milk solids that have caramelized during the cooking process.
The butter takes on a glossy, rich appearance, and you’ll notice a slight foaming at the top as it cooks. The final product has a nutty, toasty smell, signaling it’s ready to be used in your recipe.
It’s important to watch closely while cooking, as it can quickly go from browned to burnt.
These Brown Butter Bites are the perfect balance of nutty, rich flavor with a touch of caramel sweetness.
They’re simple to make, incredibly satisfying, and perfect for those following a low-carb or high-fat diet.
Give them a try, and don’t forget to leave a comment on how they turned out. Be sure to check out more of my recipes for easy, delicious treats!
Ready in 15 minutes
Fusce dapibus, tellus ac cursus commodo, tortor mauris condimentum nibh, ut fermentum massa justo sit amet risus. Donec sed odio dui. Donec id elit non mi porta gravida at eget metus.
This article may contain links from my partners. I may receive a small commission if you make a purchase through a link. Please read my disclosure and how I make money here.
Happy Fall Y’all! As pretty as this warm pumpkin spiced bundt cake with sweet maple glaze turned out, the recipe is truly on point!
The cake is incredibly moist, packed with rich pumpkin flavor and warm notes of cinnamon. This pumpkin cinnamon bundt cake is the perfect fall dessert.
And that maple glaze? It’s the finishing touch, adding a sweet, buttery layer that makes this maple glazed pumpkin spiced bundt cake delicious.
This pumpkin mini bundt cake recipe is the perfect blend of warm spices, tender cake, and a buttery maple glaze, creating an irresistible fall treat you’ll love!
How to use mini bundt cake pans:
Butter your mold well, then pour the batter into the mold about 2/3 full, giving room for the rise while baking. Bake as directed and remove, let cool to help the cakes shape and preventing sticking the mold.
This recipe is the simply the best- it strikes the perfect balance between flavor, texture, and simplicity. The spiced bundt cake is moist and tender, with just the right amount of warmth from cinnamon, nutmeg, and cloves.
Topped with a rich, buttery maple glaze, it adds a sweet, silky finish that complements the spiced flavors beautifully. Plus, the recipe is straightforward, using simple ingredients to create a show-stopping dessert that is easy enough to whip up any time!
This pumpkin maple cake is so incredibly moist, with warm notes of cinnamon it gives the perfect Fall vibe. The maple glaze adds a smooth, sweet touch that complements the spices without being too rich.
HI THERE!
I’m Trisha.
Wife to a talented chef and mama to two little sous chefs, I’m passionate about food photography, exploring and sharing!
Finding inspiration in the beauty of the outdoors and the joy of a well-crafted dish, all while sharing moments together.
Let’s get to making this amazing spiced bundt cake instructions:
Preheat oven to 350℉
Whisk together the flour, baking soda, baking powder, cinnamon.
In a separate large bowl, beat together the pumpkin puree, granulated sugar, brown sugar and eggs. Add the melted butter, vanilla extract and then mix in the milk.
Gradually add the dry ingredients to the wet, stirring until just combined Be careful not to overmix.
Spoon matter evenly into bundt cakes.
Bake for 20-25 minutes.
Serve This pumpkin spiced bund cake goes perfectly with your favorite brew!
So, how long do you bake mini bundt cakes?
Timing varies but baking this spice bundt cake, usually a good 20-25 minutes at 350F is perfect for these little cakes. Check for doneness by poking the center with a toothpick.
Brown Butter Maple Glaze:
Making this maple glazed pumpkin sauce is so simple but a must – the maple really brings out a amazing hint of bourbon maple glaze:
First whisk maple syrup and powdered sugar together, add 1 tbsp of milk until smooth. If glaze is too thick, add more milk.
Next stir in the vanilla extract.
Then drizzle the glaze over the maple pumpkin cake or dip them for a thicker yummy coating.
Pumpkin Spiced Bundt Cake with Maple Glaze
The sweet flavor of warm maple syrup and brown butter over these moist spiced bundt cakes are the most perfect Fall dessert to share at family get togethers, perfect option for a gluten-free Thanksgiving dessert
Whisk together the flour, baking soda, baking powder, cinnamon.
In a separate large bowl, beat together the pumpkin puree, granulated sugar, brown sugar and eggs. Add the melted butter, vanilla extract and then mix in the milk.
Gradually add the dry ingredients to the wet, stirring until just combined Be careful not to overmix.
Spoon matter evenly into bundt cakes.
Bake for 20-25 minutes.
For the maple glaze:
Whisk together powered sugar, maple syrup and milk until smooth.Drizzle over cooled bundt cakes
This maple pumpkin cake is known as one of the quick and easy fall desserts! Pumpkin spiced bundt cake has the perfect blend of warm spices, moist cake and a buttery maple glaze that’s sure to become a favorite!
If you’re serving this warm pumpkin mini bundt cake for a Holiday gathering or a cozy treat at home, it’s guaranteed to be a hit!
Don’t forget to rate this recipe and let me know how it turned out for you in the comments below!
This article may contain links from my partners. I may receive a small commission if you make a purchase through a link. Please read my disclosure and how I make money here.
Peach cobbler in cast iron – Oh, the magical combination of fresh, juicy peaches in a well-seasoned cast iron skillet makes the most perfect peach cobbler bundt cake.
Using a peach cobbler cast iron skillet for this dessert makes the flavor and texture perfect for this dish. Cast iron skillets are known for their heat retention and even cooking, making this this recipe the easiest cast iron cobbler you’ll make.
This recipe is the best peach cobbler in cast iron for it being so easy to make, moist and has the most perfect crispy crust every time.
What makes this peach cobbler cast iron skillet perfect?
This lazy peach cobbler is simple but has the most unbeatable flavor. With this being an easy Fall desserts with few ingredients, minimal prep, you get a dessert that delivers on taste without the fuss.
The peaches create the perfect balance of sweetness and juiciness while the flour creates a golden buttery topping with just the right amount of crispiness.
HI THERE!
I’m Trisha.
Welcome to
Wife to a talented chef and mama to two little sous chefs, I’m passionate about food photography, exploring and sharing!
Finding inspiration in the beauty of the outdoors and the joy of a well-crafted dish, all while sharing moments together.
Add corn starch to help with preventing watery cobbler filling.
Milk: Helps with moisture.
How to make peach cobbler:
Preheat your oven to 375°F (175°C). Butter your cast iron cobbler pan.
Prepare the peach filling: In a large bowl, combine sliced peaches, granulated and brown sugar, vanilla extract, and cinnamon. Toss everything together until peaches are coated, set aside.
Make the batter: In a separate bowl, whisk together flour, sugar, baking powder and a pinch of salt. Gradually add milk and whisk until smooth. Set aside.
Add the batter: Pour batter evenly over the peaches. Do not stir—this is key to getting that delicious, cobbler-style texture.
Bake: Bake the cobbler for 40-45 minutes, or until the top is golden brown and the peach filling is bubbling up around the edges.
Cool and serve: Let the cobbler cool for about 10 minutes before serving.
It’s best enjoyed warm, especially with a scoop of vanilla ice cream or whipped cream.
This one pan peach cobbler is hassle free, incredibly easy to make – just mix all of your ingredients in a cast iron skillet cobbler, bake and enjoy!
Tips to make the best peach cobbler recipe with pie crust:
Mix Lightly: Combine ingredients until just blended to avoid density
Chill the Dough: Refrigerate the dough to maintain flakiness and ease of handling.
Preheat the Oven: Bake at a high temperature (375-400°F) for a crisp, golden crust.
Add Sugar: Sprinkle sugar on top before baking for added sweetness and crunch.
This crazy crust peach cobbler features a rich and buttery golden crust that delivers the best combination of crunch and tenderness. The crust melts in your mouth, perfectly complementing the juicy fruit beneath.
A great peach cobbler in cast iron comes down to the right mix of flavors and textures.
The peaches are juicy and naturally sweet, with just the right amount of sugar and cinnamon to bring out their flavor.
Cooking the cobbler in cast iron lets the filling cook evenly while caramelizing the edges for that perfect bite of sweetness.
The topping needs to be golden and crispy on the outside, but soft and tender underneath, which is where cast iron really shines.
If you’re making a classic or even a grilled peach cobbler, the cast iron skillet bakes everything perfectly.
This iron skillet peach cobbler is the best in this pan, it creates a beautifully crisp, golden crust that you simply can’t achieve with other plans.
Peach Cobbler
This perfectly golden peach cobbler in cast iron – fresh juicy caramelized peaches, buttery crisp perfectly golden peach cobbler bundt cake everyone will enjoy!
In a large bowl, combine sliced peaches, granulated and brown sugar, vanilla extract, cinnamon and cornstarch. Toss everything together until peaches are coated, set aside.
Make the batter
In a separate bowl, whisk together the flour, sugar, baking powder and salt.
Gradually add milk and whisk until smooth. Set aside.
Add the butter to the cast iron skillet
Pour batter over the butter and spoon the peach mixture evenly on top of batter.
Bake the cobbler
Place skillet into oven and bake for 45 minutes or until top is golden.
Serve warm
Keyword cake peach cobbler, one pan peach cobbler, peach cobbler cast iron, skillet peach cobbler
Making the best peach cobbler in cast iron all starts with…
Buttering your cast iron skillet cobbler generously to makes sure the cobbler doesn’t stick and to adds a rich, buttery flavor to the crispy edges. The butter helps the crust develop a beautiful golden color.
Are peaches in season?
Season runs from late May through September. You can always use canned peaches for this recipe, it will still be known as one of the best savory peach recipes.
Does peach cobbler need to be refrigerated?
Once the cobbler has cooled, cover it tightly with plastic wrap or transfer it to an airtight container before storing it in the fridge for 4-5 days
Can you freeze peach cobbler?
Cool completely and cover the cobbler with plastic wrap or foil.
I hope you enjoy making this peach cobbler in cast iron as much as we did!
If you try out this recipe, I’d love to hear how it turns out for you.
Please leave a comment below and share your experience.
Your feedback helps me improve and inspires others to give it a try.
This article may contain links from my partners. I may receive a small commission if you make a purchase through a link. Please read my disclosure and how I make money here.
If you’re a fan of rich flavors, this samoas coconut cookie recipe will become your go-to.
There is nothing better than homemade samoas cookies, inspired by the beloved Girl Scout treat, pack a perfect amount of toasted coconut, rich caramel, and smooth chocolate, all atop a buttery shortbread base.
While you can certainly add more ingredients to your Samoas coconut cookie, the samoas recipe 3 ingredients that truly make this recipe shine are dates, oats, and chocolate.
These three ingredients are the heart and soul of a delicious Samoa-inspired treat.
These samoa caramel coconut cookies are the perfect combination with the buttery shortbread, rich caramel, toasted coconut and rich chocolate are a must try for anyone who appreciates the classic combination of flavors that make samoa cookies so irresistible.
Simple Samoas Ingredients:
The combination of these simple samoas ingredients creates a mouthwatering experience that is both chewy and crunchy, sweet and salty.
Rolled Oats: Hearty and chewy texture
Shredded Coconut: Provides sweetness
Pitted Dates: Adds caramel flavor
Almond Flour: Provides structure
Maple Syrup: Adds moisture and a rich sweetness
Hemp Seeds: Adds a nutty flavor
Vanilla Extract: Enhances the flavor
Salt: Balances the sweetness
If you’re reminiscing about your favorite girl scouts samosa cookies recipes or simply craving a caramelly rich crunchy cookie, these cookies like samoas will hit the spot every time.
What are samoa cookies?
The base is a buttery and crumbly shortbread with a gooey caramel mixed with toasted coconut flakes, adding a chewy and slightly nutty flavor.
The chocolate drizzle creates a rich balance to the sweet caramel and coconut
Samoa cookies with dates: A healthier twist on a classic
If you love the rich flavors of traditional samoas but want a healthier option, these samoa cookies with dates are the perfect creation.
Using dates, this recipe offers a naturally sweet and chewy treat that’s both rich and caramelly!
Are samoas gluten free?
Traditional samoa coconut cookies are not gluten-free because they are made with a shortbread base that typically contains wheat flour. By simply grinding up oatmeal, makes oat flour which is a perfect gluten free alternative.
Recipe for samoas cookies:
This buttery richness of homemade caramel with a crunchy top of toasted coconut mixed with a gooey caramel center making every bite the best recipe for homemade samoas.
Samoas Coconut Cookies
These caramel coconut cookies will become a favorite with the caramel from the dates, smooth rich chocolate and nutty cookie, making them the best homemade samoas.
Prepare the cookie base: Pulse the rolled oats until they form flour. Add dates, butter, maple syrup, vanilla extract and salt. Pulse until mixture is a sticky dough. Line a baking sheet with parchment paper, scoop out dough and roll into balls. Place cookies in refrigerator to set while preparing the topping
Add the chocolate drizzle: Melt chocolate chips in a sauce pan and drizzle over each cookie.
What’s the difference between samoa cookies vs caramel delites?
Samoas are known to be a lot more rich, chewier and have a stronger chocolate and coconut flavor
Are samoas vegan?
Traditional Samoa cookies are not vegan. Here’s why:
Shortbread Base: The base of Samoa cookies is made with butter, which is not suitable for a vegan diet.
Caramel Topping: The caramel topping typically contains dairy ingredients like milk or cream.
Chocolate Drizzle: The chocolate used for drizzling may also contain milk or other dairy products.
Are samoas vegan?
For a vegan version of this samoa cookies recipe, you would need to use substitutes such as coconut oil, date pasta and maple syrup for the caramel taste and of course, chocolate.
How to store samoas coconut cookies?
Store in an airtight container at room temperature for up to one week.
If you try this Samoa cookie recipe, I’d love to hear how it turned out for you!
Your feedback is incredibly valuable and helps others discover just how delicious these samoas coconut cookies truly are.
Don’t forget to rate this samoas coconut cookie recipe and leave a comment below—your review makes a difference.
This article may contain links from my partners. I may receive a small commission if you make a purchase through a link. Please read my disclosure and how I make money here.
Easy Fall desserts– As the air turns crisp and the leaves start to fall, there’s no better time to treat yourself to the rich, comforting flavors of Autumn.
As someone who adores all things fall, I can’t resist the charm of cute spooky—those playful, slightly eerie vibes that capture the fun side of the season without being too spooky, although I could do without the spiders – ha!
As the leaves begin to turn and the air gets crisp, my love for all things fall comes alive, especially when it comes to the flavors of the season.
From the warm spices of cinnamon and nutmeg of my pumpkin breadto the sweet, comforting taste of these tastygluten free pumpkin cream cheese muffins, there’s nothing quite like indulging in the best fall desserts.
If you’re looking for quick and easy fall desserts to whip up on a busy weeknight, or healthy fall desserts that don’t compromise on flavor, I’ve got you covered.
Continue reading as I share my favorite easy Fall desserts fall, perfect for the coziest season of the year!
Quick and Easy Fall Desserts
If you’re craving fall flavors but short on time, these quick and easy desserts are exactly what you need! From warm apple crisps to spiced pumpkin treats, these simple recipes deliver all the comforting tastes of the season with minimal effort.
6
Spiced Pumpkin Bread with Cream Cheese Frosting
The warm, earthy notes of pumpkin are perfectly complemented by cinnamon, nutmeg, and cloves, infusing each slice with cozy flavors. The bread itself is incredibly soft and moist, with a tender crumb that melts in your mouth. Topping it all off is a rich, velvety cream cheese frosting that adds just the right amount of tangy sweetness, creating a perfect contrast to the spiced bread. Each bite is a blend of warmth, spice, and creamy indulgence—an irresistible treat that embodies the essence of fall.
This cast iron loaf pan makes the perfect pumpkin cinnamon bread, I’ve made everything from bread to meatloaf, and everything has cooked, wonderfully, and evenly throughout! It’s also incredibly easy to clean, and with proper care, I know it will last a lifetime.
Vegan Fall Desserts:
Fall is the perfect time to indulge in cozy, comforting flavors, and with these vegan fall desserts, you won’t have to miss a thing!
From rich pumpkin spice treats to my scary monster balls, these plant-based recipes are a great way to enjoy the warmth of the season while being kinder to the planet.
7
Planted-Pantry
Vegan Apple Pie Crumble Bars
These bars feature a buttery oatmeal cookie base that’s perfectly chewy, layered with crisp, juicy apples sweetened just right, and topped with a golden, crunchy oat crumb. Each bite is a delightful mix of textures and flavors, from the soft, tender apples to the satisfyingly crisp crumble, making these bars the perfect sweet treat to enjoy as the leaves begin to turn.
Brown butter bites add flavor, richness and healthy fats back into any recipe! The flavor is like caramelized hazelnut satisfying any sweet tooth and perfect for a carnivore diet sweets treat!
These spooky monster energy balls are not only delicious but packed with nutritious ingredients like dates, oats, and coconut flakes, and jazzed up with white chocolate and a vibrant green color, these monster balls are a wholesome snack disguised as a creepy creature.
Are you looking for a quick and easy Fall desserts that are sure to satisfy your apple cravings? Check out this healthy apple mug cake.
10
Melissa Traub
Honeycrisp Apple Mug Cake
This easy Honeycrisp Apple Mug Cake is like a warm hug in a cup, filled with the cozy spices and rich flavors of fall. With tender chunks of juicy Honeycrisp apple nestled in every bite, the cake is infused with the comforting aroma of cinnamon and nutmeg. Made with white whole wheat flour, it’s not only delicious but also packed with extra fiber and nutrients. A touch of maple syrup adds a natural sweetness, making this mug cake a healthier indulgence that doesn’t skimp on flavor!
Welcome to my little corner of the web, where delicious recipes meet outdoor adventures! We’re a husband and wife duo with a passion for food and the great outdoors. My husband loves cooking and crafting new dishes, while I enjoy capturing the beauty of it all through photography and sharing our stories. Our two sons are our enthusiastic sous chefs, giving every recipe their seal of approval.
These gluten free cream cheese muffins are moist, so easy and will get anyone in the cozy pumpkin Fall spirit!
11
Gluten Free Pumpkin Cream Cheese Muffins
This moist cream cheese frosting pumpkin bread is the best fall comfort food, combining tender, spiced pumpkin bread with a rich, velvety layer of cream cheese frosting. Each slice melts in your mouth, offering a perfect balance of warm autumn spices and sweet, tangy creaminess that makes it impossible to resist.
This cast iron muffin pan is my go-to when making muffins. Skip using muffin liners, this pan is nonstick.
Most Tried & Loved Recipes
Be sure to explore my other recipes—they’re savory, delicious, and sure to impress. From comforting classics to dishes with unexpected flavor combinations, there’s something to satisfy every craving.
The Best Gluten-Free Oatmeal Chocolate Chip Cookies
These soft gooey gluten-free oatmeal chocolate chip cookies are the perfect blend of chewy oats and rich chocolate, making them irresistible and the best oatmeal chocolate chip cookies!
These amazingly easy homemade samoas are so tasty, they'll fool you into tasting cookies like samoas, the simple samoas ingredients are gluten free and delicious- Definity a party favorite!
The sweet flavor of warm maple syrup and brown butter over these moist spiced bundt cakes are the most perfect Fall dessert to share at family get togethers, perfect option for a gluten-free Thanksgiving dessert
This article may contain links from my partners. I may receive a small commission if you make a purchase through a link. Please read my disclosure and how I make money here.
There’s nothing better than this spiced pumpkin bread with cream cheese frosting recipe, with warm notes of pumpkin, incredibly soft bread and rich cream cheese frosting.
The richness of the cream cheese frosting adds a layer of tangy sweetness, creates an irresistible flavor that makes each slice the best fall desserts, just like my yummy gluten free pumpkin cream cheese muffins, or myspooky monster energy ballsthese aren’t just a sweet treat but their easy and comforting for the coziest season!
This easy pumpkin bread with cream cheese frosting will be known as the best fall desserts you will make!
Why this cinnamon pumpkin bread is the best:
This pumpkin bread stands out as the best for several reasons. if you’re baking pumpkin bread mini loaves or a full-sized loaf, each one is bursting with the comforting flavors of pumpkin cinnamon bread.
The bread itself is incredibly moist: The perfect blend of pumpkin and spices like cinnamon, making it a true pumpkin bread cream cheese frosting treat.
Easy to bake, make and eat: This easy pumpkin bread with cream cheese frosting is quick and easy. The recipe comes together in two bowls, a bread loaf pan and a whisk!
The mouthwatering flavor of this recipe is all thanks to the cinnamon cream cheese frosting for pumpkin bread. This frosting, with its smooth texture and subtle cinnamon warmth, adds an irresistible richness that pairs perfectly with the spiced bread.
Whether you call it pumpkin bread with icing or cream cheese frosting pumpkin bread, this topping brings the bread a whole new level of deliciousness.
For those following a plant-based diet, this recipe can easily be adapted into a vegan pumpkin dessert recipe by swapping out dairy ingredients for vegan alternatives, without compromising on flavor or texture.
Ingredients:
This moist pumpkin bread with cream cheese frosting requires a simple list of ingredients and is adaptable to your tasting; add pecans, chocolate chips, or roasted pumpkin seeds for some extra crunch.
For the pumpkin bread:
Pumpkin Purée: The star of the bread, pumpkin purée adds moisture, rich flavor, and a little sweet to balance the warm spices.
All-Purpose Flour: Providing the structure for the bread, creating a tender crumb while allowing the pumpkin to shine.
Sugar + Brown Sugar: Sweetens and helps with creating a tender texture and moisture.
Coconut Oil: Helps with moisture and tenderness.
Eggs: Binding the ingredients together and giving the bread structure.
Baking Powder: Helps with the rise.
Cinnamon: Brings warmth and adds a slightly sweet, nutty flavor.
Salt: Helps with balancing balances the flavors.
Vanilla Extract: Adds a sweetness and balances the nutty flavor.
If the pumpkin cinnamon bread batter is a little lumpy, that’s okay.
TIP: Use wax paper under bread to help lift the pumpkin cinnamon bread out when done baking.
Pumpkin bread mini loafTIP: Cut a slit in the top of the bread before baking to help control the rise and have an even top.
Pumpkin bread with cream cheese icing Ingredients:
Cream Cheese: Adds a tangy richness that perfectly balances the sweetness of the bread.
Butter: Adds richness and creaminess to the frosting.
Powdered Sugar: Helps sweetens the frosting while creating a airy texture.
Vanilla Extract: Adds flavor to the cream cheese and sweetness.
Cinnamon cream cheese frosting for pumpkin bread infuses the creamy, tangy frosting with a hint of warmth and spice, making the pumpkin’s natural sweetness really stand out.
This pumpkin bread recipe with cream cheese frosting is the perfect combination of spiced, moist bread and rich, creamy frosting, making it a go-to treat that’s sure to satisfy your autumn cravings.
Spiced Pumpkin Bread with Cream Cheese Frosting
Spiced pumpkin bread with cream cheese frosting is everything Fall inspired, warm and toasty with a tangy cream cheese frosting that creates the perfect balance for this pumpkin bread.
This article may contain links from my partners. I may receive a small commission if you make a purchase through a link. Please read my disclosure and how I make money here.
Biting into these warm, cheesy chicken poblano enchiladas that are bursting with flavors of tender shredded chicken, roasted poblano peppers and bell peppers brings a fresh crunch and delicious flavor to any low carb chicken enchiladas dish.
Creamy poblano chicken enchiladas are baked creating a golden crust of cheese on top and using Greek yogurt as sour cream substitute makes this creamy chicken enchiladas recipe the best poblano enchiladas.
This post is all about the best, creamy flavorful chicken poblano enchiladas, you have discovered the best recipe.
Chicken and Poblano Enchiladas Ingredients:
Cooked chicken breast (shredded): Provides a lean source of protein and a satisfying texture that absorbs all the rich flavors.
Flour or corn tortillas: Soft and pliable, these tortilla wraps create the crispiest low carb chicken enchiladas.
Poblano Peppers: Smoky and slightly spicy, these peppers add a depth of flavor and heat that complements the cheesy flavor.
Cheddar cheese: Rich and melty cheddar cheese binds all of the fillings and adds a creamy tangy flavor to every bite.
Red and orange bell pepper: Adds a crunch of sweetness, balancing the smokiness of the poblano peppers
This savory chicken poblano enchiladas with tender shredded chicken, smoky roasted poblano peppers and sweet bell peppers wrapped in soft tortillas and topped with rich, melty cheddar cheese, making every bite of these creamy poblano chicken enchiladas the best.
Preheat oven to 450℉Place poblano peppers on a baking sheet and roast for about 15 minutes.Remove from oven and place in a bowl, cover with lid. Let them steam for 19 minutes. Peel off skins, remove seeds and stems and chop finely.
Cook the chicken
In a large skillet, heat oil over medium and add chicken breasts to skillet. Sear chicken for about 5-7 minutes, each side.Once cooked, transfer to cutting board and pull apart with two forks.
Prepare the filling
In a large skillet, heat oil over medium heat.Add diced red and orange bell peppers.Sauté until soft.Stir in the shredded chicken, roasted poblano peppers and cheddar cheese. Mix well and cook until everything is heated.
Assemble the enchiladas
Preheat oven to 350℉Warm tortillas to make them pliable.Spoon some of the filling into tortilla and roll them up. Next, place them in oven.Sprinkle cheddar cheese over top
Bake
Cover with foil and bake for 20 minutes.Remove foil and bake for additional 10 minutes.
Serve
Serve with a side of sweet potato fries or rice.Garnish with fresh lime.
Roast poblano peppers: Preheat oven to 450℉ Place poblano peppers on a baking sheet and roast for about 15 minutes. Remove from oven and place in a bowl, cover with lid. Let them steam for 19 minutes. Peel off skins, remove seeds and stems and chop finely.
Cook the chicken: In a large skillet, heat oil over medium and add chicken breasts to skillet. Sear chicken for about 5-7 minutes, each side. Once cooked, transfer to cutting board and pull apart with two forks.
Prepare the filling: In a large skillet, heat oil over medium heat. Add diced red and orange bell peppers. Sauté until soft. Stir in the shredded chicken, roasted poblano peppers and cheddar cheese. Mix well and cook until everything is heated.
Assemble the enchiladas: Preheat oven to 350℉ Warm tortillas to make them pliable. Spoon some of the filling into tortilla and roll them up.
Next, place them in oven: Sprinkle cheddar cheese over top and cover with foil.
Bake: Bake for 20 minutes. Remove foil and bake for additional 10 minutes.
Serve: Serve with a side of sweet potato fries or rice. Garnish with fresh lime.
What to serve with chicken enchiladas:
You can serve rice, sweet potato fries or a side salad for a healthy sides for enchiladas.
Top with cheddar cheese on your poblano enchiladas to add a rich, melty layer of flavor that brings everything together.
Add your favorite salsa to the poblano cream sauce for an extra kick of flavor.
Can you freeze enchiladas?
Yes, this easy creamy chicken enchiladas are perfect for meal planning! Stop before baking. Its best to use flour tortillas. Place in a freezer safe dish and cover with plastic or aluminum foil to prevent freezer burn. When time remove and bake at 350°F at 30 minutes.
Chicken poblano enchiladas most asked questions:
How to make shredded chicken for enchiladas?
In a large skillet, heat oil over medium and add chicken breasts to skillet. Sear chicken for about 5-7 minutes, each side.
Once cooked, transfer to cutting board and pull apart with two forks.
What’s in chicken enchiladas?
This creamy chicken enchiladas recipe is unbeatable! All you need for enchiladas are tortilla wraps, shredded chicken, peppers, onions, spices, cheese, and your favorite sauce.
How to store chicken poblano enchiladas?
Refrigerate in an airtight container or cover baking dish with aluminum foil. Store up to 3-4 days.
Tips for chicken poblano enchiladas:
When cooking the chicken, If the chicken breasts are thick, add 1 cup of chicken broth or water to the skillet, cover it with a lid, and let it simmer for another 5-10 minutes until fully cooked.
These Chicken and Poblano Enchiladas are sure to become a favorite in your meal rotation, offering a combination of smoky, cheesy, and hearty flavors.
Whether you’re prepping for a busy week or hosting a gathering, this recipe for enchiladas poblanos is both comforting and easy to make. With options to refrigerate or freeze leftovers, you’ll always have a delicious meal ready to go.
This article may contain links from my partners. I may receive a small commission if you make a purchase through a link. Please read my disclosure and how I make money here.
Spooky monster energy balls are more cute than scary, their fun, quick and easy to make. Kid friendly protein balls earn bonus points around here for being healthy and tasty!
These vibrant green protein balls are sure to make everyone happy!
My son has always had a love for medjool dates, so these date coconut energy balls were a top priority for us to make.
Date energy balls are naturally sweet with hints of honey and caramel, packed with fiber, and natural sugars to help get that quick boost of energy.
Coconut flakes are also a great source in boosting energy, while also providing all the good healthy fats.
This post is all about the spookiest yet tasty monster energy balls, perfect for any kids Halloween party food or if you’re just needing some healthy oatmeal bites to fuel your day, you will love this recipe.
It’s hard to believe that Fall is right around the corner.
Little monsters, spooky things and all things Fall are a favorite in our household.
While I was making my no bake chocolate chip cheesecake balls, I came up with this super cute idea – creating these monsterprotein balls that would be a great gluten free kids snacks as well as a creative activity to do on a rainy day.
Spooky monster energy balls made of peanut butter, dates, coconut flakes and oats make the perfect Halloween balls, creepy and delicious.
Add faces, mouths, hair and candy eyeballs to create these spooky monster energy balls!
Those eyes are so cute, you can’t stop looking at them!
Ingredients You’ll Need:
All you need to make these monster energy balls are 5 simple ingredients.
Gluten-free rolled oats
Peanut butter
Coconut flakes
Dates
White Chocolate
Decorate by adding coconut flakes as hair, cut out paper mouths, add some food coloring to the white chocolate balls and some candy eyeballs to make them extra creepy.
These coconut date energy balls are delicious and vegan!
How To Make These Spooky Monster Energy Balls:
Mix: Pour hot water over the pitted dates, making them soft and easy to mix in with the oats, melt white chocolate in a double boiler on stove, add peanut butter and coconut flakes.
Shape the monsters: Use your hands to roll ingredients into balls. Cover the balls in the melted white chocolate.
Decorate: While the melted chocolate, press the candy eyeballs, mouths and some hair onto each ball.
Refrigerate: Place these spooky monster balls in the fridge for about 30 minutes.
[mailpoet_form id=”3″]
Peanut Butter Coconut Date Balls Tips:
Soak your dates: in hot water, helps makes the date soft and easy to mix.
If the mixture is too dry: add a small amount of coconut oil or nut butter. If it’s too sticky, add more nuts or seeds.
Add in Flavors: Cocoa powder, cinnamon or chocolate chips.
Add Superfoods: Hemp seeds, flaxseeds, matcha powder or chia seeds for some crunch to your healthy oatmeal bites recipe.
Double the recipe: Make a larger batch and freeze the extras for a convenient snack.
Get the kids involved: A pretty fun activity to get the little ones using their hands and they’ll enjoy eating it more since they made it!
Storage tips for date energy balls:
In an airtight container with a lid, in the fridge.
Spooky Monster Energy Balls
These spooky monster energy balls are not only delicious but packed with nutritious ingredients like dates, oats, and coconut flakes, and jazzed up with white chocolate and a vibrant green color, these monster balls are a wholesome snack disguised as a creepy creature.
This article may contain links from my partners. I may receive a small commission if you make a purchase through a link. Please read my disclosure and how I make money here.
Gluten free pumpkin cream cheese muffins are the perfect fall treat.
Made with wholesome gluten-free oats and pumpkin puree, filled with a delicious cream cheese center, these muffins are sure to be a hit.
These low carb cream cheese muffins are low on sugar and packed with spices that’ll warm your soul during this cooler, crisp Fall season.
This post is all about the best, gluten free pumpkin cream cheese muffins that are easy pumpkin cream cheese muffins and will become your most favorited gluten free Fall desserts.
These gluten-free oat pumpkin cream cheese muffins are incredibly moist and delicious, thanks to the natural sweetness and moisture from the pumpkin puree.
Mixing up cinnamon and nutmeg creates the best rich, warm and comforting taste that’s perfect for Fall.
Easy Gluten Free Pumpkin Muffins Ingredients:
Pumpkin Puree: Adds moisture, flavor and richness Oats: Creates a hearty chewy texture Baking Powder: Helps muffins rise and become fluffy Baking Soda: Provides structure Cinnamon: Adds warmth and spice Cream Cheese: Adds a creamy, tangy flavor Nutmeg: Enhances the pumpkin flavor Salt: Balances the sweetness Eggs: Binds the ingredients Sugar: Adds sweetness Brown Sugar: Adds sweetness and a hint of caramel flavor Butter: Helps with moisture and tenderness, Brown your butter to get that deep richness flavor. Vanilla Extract: Adds a sweet flavor
In a medium bowl, beat the softened cream cheese, sugar and vanilla extract until smooth.
In a large bowl, whisk together oats, baking powder, baking soda, cinnamon, nutmeg and salt.
In another bowl, whisk together pumpkin puree, eggs, brown sugar, sugar, butter and vanilla.
Add the wet ingredients to the dry, mix until just combined.
Fill each muffin cup halfway with batter, adding in cream cheese filling. Add additional batter over cream cheese.
Bake for 20-25 minutes.
Serve.
Can you freeze pumpkin cream cheese muffins?
Let the muffins cool completely before wrapping each one tightly in plastic wrap, then place them in an airtight container. Freeze them for up to 2-3 months.
This article may contain links from my partners. I may receive a small commission if you make a purchase through a link. Please read my disclosure and how I make money here.
Peanut butter and jelly overnight oats always start my mornings off happy, just like enjoying PB&J as a snack after school growing up. Those nostalgic moments bring a smile to my face, and this tasty breakfast brings the same happiness and comfort, making every day feel like a trip down memory lane.
This peanut butter and jelly overnight oats recipe combine the creamy richness of peanut butter with the sweet and tangy flavor of jelly, all combined in a hearty base of oats.
Frozen fruit in overnight oats will become your favorite morning go-to! The juices in the overnight oats frozen berries make the oats so flavorful. This post is all about a nostalgic twist on a classic favorite peanut butter and jelly overnight oats.
What Are Overnight Oats?
Overnight oats are so easy to make – combine oats with milk or water, their usually sweetened with maple syrup, honey, fruits and nuts.
Overnight Oats VS Cooked Oats?
Overnight oats are slightly chewier compared to soft creamier texture that cooked oats are. Soaking your oats helps preserve nutrients such as carbohydrates, fiber and many more nutrients.
Are Overnight Oats Healthy?
Oats contain phytic acid which can reduce the absorption of certain minerals.
Purchase sprouted oats, ferment the oats by soaking in water and a bit of yogurt or making frozen berry overnight oats with citrus fruits can improve mineral absorption.
What types of oats are best for overnight oats?
Rolled oats (old-fashioned oats) are most commonly used for overnight oats because they soften nicely overnight. Quick oats and steel-cut oats can also be used, but they have slightly different textures.
So, Can you make overnight oats with instant oatmeal?
Yes, use the same ratio of liquid to oats as you would with regular rolled oats.
Can you heat overnight oats?
Yes, you can heat overnight oats if you prefer them warm. Transfer them to a microwave-safe bowl and heat them in short intervals, stirring in between, until heated to your liking.
Ingredients Needed
Rolled oats and milk form the base of this recipe – Add yogurt, chia seeds and maple syrup to this simple overnight oats recipe.
These ingredients make this easy oats recipe even more satisfying and fulfilling.
Rolled Oats: Old-fashioned rolled oats are a must for overnight oats, using quick cooking or steel cut do not have the same creamy texture as rolled oats does.
Milk: Hydrates the oats making them soft and creamy texture. I like using whole milk because of the nutrients it provides – protein, calcium and vitamins.
Yogurt: Creates the tangy flavor which complements the sweet ingredients that I add. Added bonus for probiotics and calcium/potassium and protein!
Chia Seeds: Absorbs the liquid and create a creamy texture. Also contains fiber and omega 3s!
Extras: In my recipe, I added a simple peanut butter, jelly and blueberries – you can come up with so many variations!
Simple Overnight Oats Ratio
A 1:1 ratio of rolled oats to milk to achieve the perfect consistency. 1/2 cup of oats then you’ll want to use 1/2 cup of milk and 1/4 cup of yogurt to achieve the creaminess and to avoid over soupy oats.
Can You Make Overnight Oats with Water?
Making overnight oats with water is a simple and dairy-free option.
Best Overnight Oats
Creamy, protein-packed breakfast with this peanut butter blueberry overnight oats. This effortless recipe combines the nutty goodness of peanut butter with the sweet burst of blueberries, creating a nutritious and delicious way to start your day. Just mix the ingredients, let them sit overnight, and wake up to a ready-to-eat, wholesome meal. Perfect for busy mornings.
This article may contain links from my partners. I may receive a small commission if you make a purchase through a link. Please read my disclosure and how I make money here.
Get ready to make the best gluten free oatmeal chocolate chip cookies you’ll ever make. These cookies have a hearty texture of oats with the rich, gooey goodness of chocolate chips creating big fat chewy oatmeal chocolate chip cookies that are sure to become a favorite!
With golden brown edges, a nutty undertone and gooey chocolate chips this is the bakery style oatmeal chocolate chip cookies you’ve been searching for.
This post is all about the most chewy, moist and delicious gluten free oatmeal chocolate chip cookies.
Simply grinding up oatmeal to make flour makes these gluten free, chewy cookies that I’m sure you’ve been looking for. Oat flour creates the perfect dough along with my secret ingredient that will be sure to make these the best gluten-free oatmeal chocolate chip cookies you’ve ever made!
Why will this gluten free oatmeal chocolate chip cookie recipe be the best you’ve ever made?
The secret lies in adding beef gelatin and browning the butter. This simple step adds a rich, nutty flavor that takes these outrageous oatmeal chocolate chip cookies to the next level.
By letting the browned butter cool before mixing it in, it creates a perfect consistency and unbeatable taste.
Growing up, some of my fondest memories were made in my grandma’s kitchen. The air was always filled with freshly baked goods, and her counters were dusted with flour.
One sunny afternoon, I remember standing on my tiptoes to peek over the counter as she introduced me to a special oat flour cookie recipe that she swore by – her chewy gluten-free oatmeal chocolate chip cookies. She carefully measured out the oat flour, saying how it gave the cookies their signature chewy texture.
As we browned the butter, she told me stories of how her mother used the same technique to add a rich, nutty flavor to their baked goods, making these brown butter oatmeal cookies truly unforgettable.
When we finally pulled the oatmeal flour chocolate chip cookies from the oven, they were everything she had promised – chewy, sweet, and utterly delicious. Now, every time I bake these cookies with oat flour, I’m reminded of those warm, loving afternoons in my grandma’s kitchen.
Her oat flour cookie recipe has become my go-to, and I hope it brings as much joy to others as it has brought to our family.
Chocolate Oatmeal Cookies Ingredients:
Butter (Browned): Creates a rich and nutty flavor.
Granulated Sugar: Sweetener, helps in spreading during the baking process and creates crispiness.
Brown Sugar: Adds moisture, chewiness and has a subtle molasses flavor.
Eggs: Acts as a binder and structure to the cookie.
Vanilla Extract: Enhances overall flavor.
Old Fashioned Oat Flour: Creates a chewy, hearty texture.
Baking Soda: Helps with the rise.
Baking Powder: Helps activate the baking soda, making cookies softer and tender.
Salt: Enhances flavor by balancing sweetness and cutting through richness.
Chocolate Chips: Choose high quality chocolate for the best taste.
Beef Gelatin: Adds tenderness and chewiness.
The Best Gluten-Free Oatmeal Chocolate Chip Cookies
These soft gooey gluten-free oatmeal chocolate chip cookies are the perfect blend of chewy oats and rich chocolate, making them irresistible and the best oatmeal chocolate chip cookies!
In a large bowl, whisk together granulated sugar, brown sugar and butter until smooth. Beat in eggs on at a time then add vanilla extract.
Prepare dry ingredients
Whisk together the flour, baking soda, baking powder, salt, and beef gelatin.
Gradually combine this mixture into the wet ingredients.
"just combined"-Just Until all the flour disappears then you stop. Don’t mix it more, literally “just combined” meaning as soon as the dough binds together with no separate ingredients showing.
Add in oats and chocolate chips.
Stir in the old-fashioned oats and chocolate chips until evenly distributed.
Form cookies.
Drop rounded spoonful of dough onto baking sheets.
Bake.
Bake in the preheated oven for exactly 13 minutes, or until the edges are lightly browned.
Let cool.
Allow cookies to cool on the baking sheet for a few minutes before transferring them to a wire rack to cool completely.
Keyword best oatmeal chocolate chip cookies, oat flour oatmeal chocolate chip cookies, oatmeal flour chocolate chip cookies
HI THERE!
I’m Trisha. Nice of you to visit my blog.
Wife to a talented chef and mama to two little sous chefs, I’m passionate about food photography, exploring and sharing!
Finding inspiration in the beauty of the outdoors and the joy of a well-crafted dish, all while sharing moments together.
This article may contain links from my partners. I may receive a small commission if you make a purchase through a link. Please read my disclosure and how I make money here.
If you are looking for the most flavorful beef poblanos burritos with cheesy, crispy tortillas, salsa, yogurt, beef, poblanos and avocado you will find yourself craving this easy beef burritos recipe.
This burrito recipe is versatile and can easily be a low carb breakfast burritos that you can make ahead breakfast burrito. Just add ground beef and eggs if you enjoy starting your day with a bit of spice.
Why you’ll love this poblano avocado burrito recipe:
This poblano burrito recipe includes roasted poblano pepper, which adds a smoky and slight spice compared to the traditional burrito. Combined with tender beef, creamy avocado, and melted cheese, this poblano burrito is a flavor packed meal that’s both satisfying and easy to make.
Poblanos Burritos Ingredients:
Poblano Peppers: These peppers are mildly spicy with a deep, smoky flavor.
Ground Beef: Savory and hearty protein.
Shredded Cheese: Cheddar creates a creamy, melty richness to the cheesy burritos.
Avocado: Buttery, creamy texture with a subtle, nutty flavor. Helps balance the spiciness of the poblano peppers
Salsa: Fresh and tangy with a perfect blend of tomatoes, onions, and spice.
Yogurt: Trust me, Greek yogurt is the best substitute for sour cream! It adds a tangy creaminess.
Flour Tortillas: Holding all of the ingredients together.
Cheesy Poblanos Burritos
Cheesy, spicy beef poblano avocado burrito featuring crispy tortillas filled with salsa, yogurt, beef, avocado, poblanos, and cheese.
On broil until skins are blackened about 8-10 minutes. Set aside in a bowl and cover with a lid for 10 minutes. Then peel off skins, remove seeds and chop the peppers.
Cook the beef
In a large skillet, cook until browned and cooked through, about 8-10 minutes.
Heat up the tortillas
In a pan or microwave, to make them become pliable then add shredded cheese, avocado, salsa, peppers and beef in the center of tortilla.
Fold your burrito
Be mindful not to overfill, as this can make folding difficult and can cause the tortilla to tear. As you fold, press the filling gently but firmly to compact it and make the burrito easier to handle.
Return to skillet
To make burrito crisp up and hold together better.
Roast poblano peppers on broil until skins are blackened about 8-10 minutes. Set aside in a bowl and cover with a lid for 10 minutes. Then peel off skins, remove seeds and chop the peppers.
Cook the beef In a large skillet, cook until browned and cooked through, about 8-10 minutes.
Heat up the tortillas in a pan or microwave, to make them become pliable then add shredded cheese, avocado, salsa, peppers and beef in the center of tortilla.
Fold your burrito Be mindful not to overfill, as this can make folding difficult and can cause the tortilla to tear. As you fold, press the filling gently but firmly to compact it and make the burrito easier to handle.
Return to skillet to make burrito crisp up and hold together better.
Serve.
Beef poblano burrito Tip:
Crisp up your ground beef burrito by placing it seam-side down in a hot skillet over medium heat. Cook for a few minutes on each side until the tortilla is golden brown and crispy. This helps the burrito hold together better and adds a crunch to each bite.
And there you have it—your delicious Poblanos Burritos is ready to be enjoyed!
These burritos are sure to satisfy with their rich flavors and crunch.
Don’t forget to share your own variations and tips in the comments below—I’d love to hear how you make this recipe your own. If you enjoyed this post, be sure to subscribe for more tasty recipes and cooking tips.
[mailpoet_form id=”3″]
18
Cheese Shell Tacos
These tacos boast a crispy, cheesy shell that perfectly complements a savory filling of seasoned beef, and zesty salsa. The cheddar cheese shells add a rich, tangy flavor and a satisfying crunch to every bite. This innovative take on tacos is not only delicious but also gluten-free, making it a perfect option for those with dietary restrictions.
This article may contain links from my partners. I may receive a small commission if you make a purchase through a link. Please read my disclosure and how I make money here.
If you’re looking for a treat that’s both wholesome and delicious these irresistible oat flour chocolate chip muffins are the perfect choice. Making this recipe for gluten free muffins chocolate chip is so easy.
These moist chocolate muffins are incredibly simple to make and have a tender, melt-in-your-mouth texture.
These chocolate chip muffins can become an easy chocolate chip muffin recipe no milk and become a healthier alternative to the traditional muffin with more flavor!
These chocolate chip healthy muffins are perfect for quick breakfasts or an on-the-go snack.
Keep reading along on how to make the best oatmeal chocolate chip muffins!
Ingredients for the Best Oat Flour Chocolate Chip Muffins:
Oat flour: Blend up some rolled oats turning it into fine flour making it a gluten-free option, adding in fiber and a mild nutty flavor.
Baking Powder: Helps the muffins rise and become light and fluffy.
Baking Soda: Helps with texture and making them light.
Salt: Enhances flavor.
Eggs: Provides moisture and helps bind ingredients together.
Milk: Adds moisture and creates a smooth batter.
Butter: Adds richness and fat to the muffin creating a rich, buttery taste.
Chocolate Chips: Adds sweetness to the muffins.
Honey: Natural sweetener.
Light Brown Sugar: Adds a caramel-like sweetness and moisture due to its molasses content,
Peanut Butter: Adds a rich nutty flavor.
___________________
Making yogurt muffins: Substitute 1/2 cup milk to make these chocolate chip muffins with Greek yogurt. Yogurt muffins are a healthy chocolate chip muffins alternative.
Follow my recipe for these easy moist oatmeal chocolate chip muffins.
To make this gluten free chocolate chip muffin recipe use oatmeal instead of all-purpose flour.
Using chia seeds in place of milk and egg makes these the best vegan chocolate chip muffins.
Add sweet, very ripe banana choc chip muffins healthy.
Instructions:
Preheat: your oven to 350°, line muffin tin with paper liners or spread oil on muffin pan.
Mix dry ingredients: in a large bowl whisk oat flour, baking powder, baking soda, and salt together.
Combine wet ingredients: whisk together eggs, honey, sugar, milk, vanilla extract and butter.
Combine wet and dry ingredients: stir until just combined, be careful not to overmix.
Add: chocolate chips.
Fill: muffin cups with batter.
Bake: Bake for 25minutes or until a toothpick comes out clean.
Combine wet and dry ingredients.
Be sure not to overmix as this will cause your batter to become dense.
Add in the chocolate chips.
Bake at 350° for 25 minutes.
Enjoy these amazing easy moist chocolate muffins!
Oat Flour Chocolate Chip Muffins
Easy moist chocolate muffins made with oat flour, loaded with chocolate chips. Perfect for a healthy, gluten-free treat that's simple to bake
This article may contain links from my partners. I may receive a small commission if you make a purchase through a link. Please read my disclosure and how I make money here.
Create the most delicious and satisfying cheddar cheese shell taocs that are easy healthy tacos. These keto-friendly and mouthwatering tacos are made with crispy, cheesy taco shells, filled with seasoned ground beef, topped with fresh salsa, and garnished with cilantro.
If you’re looking for a way to enjoy a low carb, yet delicious and satisfying meal, these cheddar cheese shell tacos are the best carb free taco shells.
Your taco Tuesday with these beef tacos will leave everyone asking for more.
Our family has always had a deep love for tacos, passed down through generations. However, with adopting low-carb lifestyle, we were seeking a way to preserve the beloved tradition without compromising on taste. The idea of using cheese as a shell was a modern twist that allowed us to enjoy tacos in a new, exciting, and healthier way.
Low Carb Taco Shells
The key to these keto tacos is high-quality, sharp cheddar cheese. Using fresh, seasonal toppings like ripe tomatoes, crisp cilantro, and creamy avocados enhances the taste and nutritional value of each taco, making this taco recipes healthy!
We love this easy healthy recipe because it perfectly marries the flavor of cheddar cheese with the fresh ingredients of traditional tacos.
Are these taco shells gluten free?
Yes, these cheddar shells add a satisfying crunch, low-carb alternative that doesn’t sacrifice taste. Their a savory shell making it difficult to resist!
Creating these easy healthy tacos was a labor of love. It began with experimenting in our kitchen, trying different types of cheese and techniques to achieve the perfect shell.
We tested various methods – baking, frying and molding until we found the ideal balance of texture and flavor.
Along the way, we refined our toppings to complement the rich, cheesy base.
After many delicious trials and taste tests with family and friends, we perfected this easy healthy taco recipe that we can now proudly share with you.
Healthy Dinner Tacos Ingredients:
Cheddar Cheese: The star of the show! Rich in fat and protein while being low in carbohydrates, making it satisfy and flavorful.
Beef: Not only are these beef tacos delicious and nutritious, but the fat content also creates moisture balancing the crispy texture of the cheddar cheese shell and preventing the dish from feeling dry.
Tomato: Brings moisture, flavor and balances the richness of cheddar cheese and ground beef.
Onion: Adds a sharp tangy flavor and a satisfying crunch.
Cilantro: Enhances the flavor to a citrusy refreshing aroma.
Lime: Citrusy flavor adds a burst of freshness for overall flavor.
Keto Friendly Tacos Instructions:
Preheat the oven:
Preheat your oven to 375°F (190°C).
Line a baking sheet with parchment paper to prevent sticking.
Form the cheese circles:
Take 1/2 cup of shredded cheddar cheese and spread it into a thin, even circle on the parchment paper, about 4-5 inches in diameter.
Repeat to make additional circles, leaving some space between each one.
Bake the cheese circles:
Place the baking sheet in the preheated oven and bake for 5-7 minutes, or until the cheese is fully melted and bubbly, with the edges starting to turn golden brown.
Shape the healthy taco shells:
Carefully remove the baking sheet from the oven. Let the cheese cool for about 1-2 minutes until it’s still pliable but not too hot to handle.
Using a spatula, gently lift each cheese circle and drape it over the handle of a wooden spoon or a thick dowel to create the taco shell shape.
Let them cool completely and harden in this shape.
This taco rack is perfect for making these keto tacos shells.
Prepare the Fillings:
While the shells are cooling, prepare your beef and chop tomatoes, onions, cilantro and lime. Grill or cook your protein of choice and get your toppings ready.
Assemble the Tacos:
Once the cheddar shells are cooled and firm, fill them with your chosen ingredients. Start with a layer of beef, salsa then cilantro and lime – Add a dollop of Greek yogurt in place of sour cream.
Serve and enjoy these easy healthy tacos!
Cheddar Cheese Shell Tacos
Delicious and satisfying easy healthy tacos that are keto-friendly and mouthwatering.Made with crispy, chedar cheesy taco shells, these tacos are filled with seasoned ground beef, topped with fresh salsa, and garnished with cilantro.⅗⅗
Place about 1/4 cup of shredded cheddar cheese on the baking sheet and spread it into a thin circle, about 4-5 inches in diameter. Repeat with the remaining cheese, leaving space between each circle.
Bake 5-7 minutes or until the cheese is melted
Remove the baking sheet and let cheese cook. Making the circles firm enough to handle.
These easy healthy tacos will become your favorite with it being made with fresh, nutritious ingredients like lean protein, salsa and cheese. Keeping you satisfied and enjoying every bite.
This article may contain links from my partners. I may receive a small commission if you make a purchase through a link. Please read my disclosure and how I make money here.
Starting at #1 for a reason, its serene natural beauty, with views and wildlife throughout all seasons of the year, offers picnicking and hiking trails all along the historic parkway.
Make sure to check this site here to check for closures and delays.
Let your experiences and reflections fill these pages with the beauty of your journey.
Take A Hike
There are a variety of hiking trails suitable for all skill levels, from easy walks to the most challenging. Here, I share the most scenic, waterfall chasing, best hikes in Asheville NC.
Asheville NC Arboretum
The Asheville Arboretumhosts festivals throughout the year such as the winter lights, art galleries, plant sales and interactive exhibits to engage the young visitors.
These programs often include hands-on activities, nature trails, and educational workshops that make learning about the environment fun and accessible.
Known as Beer City USA, Asheville beer tours are perfect if you’re a beer connoisseur or just curious about craft brewing, a brewery tour in Asheville offers an educational, enjoyable, and comprehensive exploration of one of the nation’s top craft beer destinations making it one of the best things to do in Asheville NC this weekend.
New Belgium Brewery
Sierra Nevada Brewery
Live Music in Asheville NC
Highland Brewing Company in Asheville, NC, offers a vibrant atmosphere with two distinct outdoor music venues and a variety of food trucks.
The brewery features “The Meadow,” a spacious outdoor area that regularly hosts live music events. The indoor atmosphere is just as great!
There is a rooftop bar, made from a repurposed shipping container, providing scenic views of the surrounding mountains and a unique space for live performances.
River Arts District
The River Arts District (RAD) in Asheville, NC, is a artistic area where you can explore art galleries, studios and workshops.
The WNC Nature Center is home to a variety of animals, including black bears, red wolves, otters, and cougars, all of which are native to the Southern Appalachian region.
Explore the Asheville Botanical Gardens with winding paths, themed gardens, and educational displays, making it a peaceful and educational destination for nature lovers and families alike in the heart of Asheville.
A beloved culinary gem nestled in the heart of Asheville, NC, right next to the Asheville Farmers Market. Known for its warm, rustic charm and hearty Southern cuisine, Moose Cafe has been a staple in the community for years.
Zip Line Asheville
Perfect for thrill-seekers and nature lovers alike, ziplining combines the excitement of flight with the serenity of the outdoors.
Great Smoky Mountains Railroad
Enjoy scenic and breathtaking views of the Smoky Mountains on a historic train ride departing from nearby Bryson City.
French Broad Chocolate Lounge Asheville NC
The French Broad Chocolate Lounge in Asheville, NC. Renowned for its rich, decadent offerings, the wide array of treats, from truffles and brownies to hot chocolate and ice cream, it is every chocolate lover’s dream!
Combine sightseeing with live performances by costumed guides, offering a fun and memorable way to explore the city. Tours often include historical insights, local stories, and plenty of laughs, making it a popular choice for visitors looking to experience Asheville’s vibrant culture and quirky charm.
White Water Rafting
Whether you’re navigating the thrilling class IV rapids or enjoying a serene float down the French Broad River, white water rafting in Asheville NC, promises an unforgettable experience filled with excitement and breathtaking views.
Visit Hendersonville NC
Drive a short distance to Hendersonville NC, for a charming escape in the heart of the Blue Ridge Mountains. Stroll down Main Street to explore unique shops, local eateries, and art galleries.
Hands On Kids Museum
The Hands On Museum Hendersonville NC showcases engaging exhibits and activities that encourage kids to explore science, art, and technology through play.
McFarlan Bake Shop
Fresh baked goods, hearty sandwiches and the best homemade goodness in every bite!
No matter what your interests are, Asheville, NC, has something to offer everyone. From exploring vibrant local markets, restaurants to hiking scenic trails and enjoying live music, this charming city is bursting with activities that promise a memorable weekend.
Enjoy your weekend in this beautiful mountain town!
Comment below with what you think are the best things to do in Asheville NC this weekend.
This article may contain links from my partners. I may receive a small commission if you make a purchase through a link. Please read my disclosure and how I make money here.
Are you craving a sweet treat but don’t want to derail your keto diet, this homemade keto strawberry ice cream is hands down, the best homemade keto ice cream recipe!
This low carb ice cream recipe is perfect to satisfy your dessert cravings while staying on track with your health goals! Win-win!
Keto ice cream made with heavy whipping cream will become your store-bought ice cream replacement in no time. Who would’ve thought- yogurt into ice cream would be my new favorite – just in time for Summer. All natural, no extras!
With just a few simple ingredients you can whip up a delicious and creamy ice cream that is keto-friendly and oh-so-delicious!
Keto Strawberry Ice Cream
Starting a keto diet during my first pregnancy after receiving a diagnosis of gestational diabetes was such a surprise to me! I believed my diet was balanced – Read more about my journey to maintaining a well-balanced diet here.
Carb intake and maintaining a keto-conscious diet not only helped manage my blood sugar levels but made improvements to my overall health with increased energy levels, better appetite control, heightened mental clarity and an overall sense of vitality.
I’ve come to recognize the impact that a low-carb, keto lifestyle has on my health and quality of life.
So, if you’re still craving treats like gooey brownies or tasty desserts, including this luscious strawberry dragon fruit ice cream, then look no further than my easy to make keto friendly desserts recipes here!
Back to this awesome strawberry ice cream masterpiece.
Then mix yogurt, heavy cream, monk fruit sweetener and vanilla extract until well combined.
Chill mixture.
Bring mixture out and church with your ice cream machine.
Once consistency is soft, transfer to a freezer safe container for at least 4 hours.
Serve and enjoy this tasty keto friendly treat with a friend!
Keyword 3 ingredient keto strawberry ice cream, best low carb low sugar ice cream, homemade blender ice cream, homemade fruit ice cream, homemade ice cream with yogurt, making ice cream with heavy cream, zero carb ice cream
How to make keto ice cream soft?
Use a combination of fats like heavy cream, full fat yogurt, and almond milk to help the creamy texture and enhance the rich flavor.
Can you make homemade keto ice cream with eggs?
Yes, instead of using yogurt, Slowly, pour about half of the hot heavy cream mixture into the egg mixture, whisking constantly to temper the eggs to avoid scrambling
How to make yogurt ice cream without a machine?
Follow my recipe, instead of placing in the machine -u003cbr/u003eu003cstrongu003ePour the yogurt mixture into a shallow, freezer-safe containeru003c/strongu003e. The shallower the container, the faster the mixture will freeze. Make sure it’s large enough to spread the mixture out thinly.u003cbr/u003eu003cstrongu003eFreeze and Stiru003c/strongu003e: Place the container in the freezer. After about 45 minutes to 1 hour, remove the container from the freezer and stir the mixture vigorously with a spoon or whisk. This helps break up any ice crystals that may be forming.u003cbr/u003eu003cstrongu003eRepeat Freezing and Stirringu003c/strongu003e: Return the container to the freezer and repeat the process every 30 minutes to 1 hour for the next 2-3 hours. Each time you remove the mixture from the freezer, give it a good stir to break up any ice crystals and to create the creamy texture.
This article may contain links from my partners. I may receive a small commission if you make a purchase through a link. Please read my disclosure and how I make money here.
This zesty, creamy chicken lemon zucchini pasta will become a family favorite! It is easy and the leftovers are always delicious!
The flavors of lemon, tender slices of chicken, fresh zucchini and yellow squash mixed in with the creamy richness of heavy cream and parmesan cheese will make every forkful bursting with refreshing citrus flavor and creamy goodness.
This post is all about the best creamy lemon zucchini pasta recipe that will be perfect for meal prep throughout the week and will become a weekly dinner menu item! Keep reading to find the 10 tips for the perfect pasta every time!
One sunny afternoon, my husband and his grandma bonded over a shared love for cooking. With flour on their hands and laughter in the air, they concocted this simple chicken pasta recipes bursting with lemony goodness. As they cooked, the kitchen filled with the scent of citrus, and memories of Grandma’s kitchen flooded back.
Years later, he shared this cherished recipe with our own little family, passing down not just a dish, but love and tradition.
This simple yet delicious easy chicken pasta recipes pasta quickly became our go-to meal, perfect for weekly dinners and easy meal prepping.
With each bite, you will experience a satisfying dish that will become your favorite dinner recipe and an easy meal prep for lunches!
You will need this grater for zesting your lemon and shredding your cheese!
Cheesy Lemon Chicken Pasta Ingredients:
Chicken Breasts- Lean protein.
Yellow Squash: Adds sweetness to the flavor.
Zucchini: Adds sweetness to flavor.
Heavy Cream: Creates a creamy sauce, adding richness and depth of flavor.
Lemon: Adding a refreshing and zesty taste.
Parmesan Cheese: Adds a salty and nutty flavor to the dish.
Noodle: Substitute with any noodle because this recipe is that good! Linguine is a favorite.
Creamy lemon zucchini pasta instructions:
Cook noodles until al dente. Drain and set aside.
Season chicken breasts with salt and pepper.
In a large skillet, add chicken breasts and cook until golden brown – (about 4-5 minutes per side).
Add minced garlic.
Add sliced zucchini and yellow squash. Cook until tender.
Add lemon juice.
Pour heavy cream and parmesan cheese, stirring until well-combined.
Add the noodle into the creamy lemon sauce.
Serve and garnish with parsley.
10 Creamy Lemon Zucchini Pasta Tips:
1. Use pasta that holds sauce well, such as fettuccine, linguine, or penne. Cook it al dente so it doesn’t become mushy when mixed with the sauce.
2. Go for boneless, skinless chicken breasts or thighs. Pound them to an even thickness for uniform cooking.
3. Marinate the chicken in a mixture of olive oil, lemon zest, garlic, and herbs (like thyme or rosemary) for at least 30 minutes to infuse flavor.
4. Sear the chicken in a hot pan to create a golden-brown crust, which adds flavor and texture. Make sure not to overcrowd the pan.
5. Use fresh lemon juice and zest for a bright, tangy flavor. Avoid bottled lemon juice, which can taste artificial.
6. Start your sauce with a combination of butter and garlic for richness. Then add heavy cream or a mix of cream and milk for a balanced creaminess.
7. Incorporate grated Parmesan or Pecorino Romano cheese into the sauce. This not only adds a savory element but also helps to thicken the sauce.
8. Balance Flavors: Adjust the seasoning with salt, pepper, and a pinch of sugar to balance the acidity of the lemon. Add lemon zest for an extra burst of citrus flavor.
9. Reserve a cup of pasta water before draining. This starchy water can help loosen the sauce and make it cling to the pasta better.
10. Garnish the finished dish with fresh parsley or basil for color and a fresh, herby finish. A sprinkle of lemon zest on top can also enhance the lemony aroma.
Creamy Lemon Chicken Pasta
The best creamy lemon chicken pasta marinated in zesty lemon, sweet zucchini and squash with a slight nutty flavor paired with al dente pasta and tossed in a lemon-infused creamy sauce.
Bring a large pot of salted water to a boil. Add noodle and cook according to package instructions until al dente. (Reserve 1 cup of pasta water) then drain the pasta.
Prepare the chicken
While pasta is cooking, season chicken with salt and pepper. Add olive oil to pan over medium high heat, cook chicken breasts for 5-6 minutes per side. Remove and set aside.
Cook the vegetables
In same skillet add the sliced squash and zucchini and sauté for about 5 minutes until tender. Remove and set aside.
Make the sauce
In same skillet, melt butter, add garlic and sauté. Pour in heavy cream and bring to a simmer. Cook for 2-3 minutes until cream begins to thicken.Stir in lemon juice, parmesan cheese. Cook for another 2-3 minutes, stirring frequently until cheese is melted and sauce is smooth.
Combine everything.
Slice the chicken breasts into thin strips, add noodle, squash, zucchini to the sauce and toss. Add reserved pasta water to reach desired consistency.
Serve.
Keyword creamy chicken pasta
How can I use my leftover chicken for this recipe with pasta?
Slice the leftover chicken and incorporate it into the dish during the final stages of cooking. The lemony zest and creamy sauce will complement the chicken perfectly.
How can I prepare ahead for a week’s worth of meals using this recipe?
Double the recipe – Once prepared, portion it into individual servings and store them in airtight containers in the refrigerator. This makes it a very easy weeknight dinners for family!
What can I pair with this creamy lemon zucchini pasta?
Steamed broccoli, green beans, a side salad, garlic bread, or some roasted vegetables.
This article may contain links from my partners. I may receive a small commission if you make a purchase through a link. Please read my disclosure and how I make money here.
Welcome to our latest blog post camping and van life essentials. Here are the camper van essentials and camping tools that will enhance your outdoor adventures!
From cozy campfires to starlit skies, we’ll explore the gear and gadgets that make every camping trip a memorable experience.
This post is all about camping and van life essentials to make your journey simple and relaxing!
Window Covers
Provides van life privacy and controls the temperature!
Buying your own is quite the expense. If you have a hot glue gun, reflectix, fabric and magnets – you can make your own!
Ours have held up for many years.
Indoor Privacy Curtain
Hanging a black out curtain above our driving area provides a little more camping privacy and really helps with temperature control. Held up by velcro!
Puck Lights
Lighting is so important in our space and I was pretty impressed with the light they gave off and being rechargeable is a huge plus!
These puck lights are the perfect solution for van life lighting needs.
The puck lights were screwed in and can be removed for charging.
Water System
Access to clean water is an absolute necessity when it comes to must have items for vanlife.
Towels
These camping towels dry so quickly and remain odor-free even after getting wet. They’re perfect for cleaning up messes, taking showers, and drying off shoes.
Yeti Cooler
The best cooler for the money! This cooler can keep food and drinks cold for up to a week with ice.
These essential items are must-haves for anyone joining van life or RV adventures.
From versatile cooking tools to space-saving storage solutions, these essentials for camper van living make life more comfortable, convenient and enjoyable on the road.
Make sure to stock up on these RV life essentials before hitting the open road for your next adventure!
This article may contain links from my partners. I may receive a small commission if you make a purchase through a link. Please read my disclosure and how I make money here.
Before sharing my kitchen essentials list that every chef must have there are some essential health and safety tips to keep in mind.
Keep reading along to find out what kitchen tools are a necessity and tips to make your kitchen experience enjoyable!
After all – “Success in the kitchen comes from a blend of inspiration and preparation.”
Kitchen Tips:
Gather and prepare all ingredients before you start cooking- you won’t want to discover you don’t have all the ingredients our recipes call for.
Always use the type of flour specified in a recipe – bread, all purpose or self-rising.
It’s a good rule of thumb to preheat your oven as soon as you begin prep to make sure it reaches desired temperature.
Kitchen Safety:
Exercise caution when working near hot ovens, by being aware and wearing oven mits to protect your hands.
Avoid placing hot pans directly on work surfaces – use a heat mat, metal rack or heatproof board.
Be extra careful when handling sharp objects and hot liquids, being mindful of potential spills and protecting your hands,
Maintain a clean cooking area and wipe of any spills to prevent accidents.
Kitchen Hygiene:
Prioritize cleanliness – be sure to wash your hands, cutting boards, veggies and fruits thoroughly.
Use separate cutting boards with meats and veggies.
Make sure your kitchen is equipped with essential tools for efficient cooking.
Check expiration dates.
Invest in basic cookware sets and essential kitchen products to help enhance your experience cooking.
Must have kitchen essentials:
Here I have curated a collection of kitchen essentials, each recipe will have a kitchen tool checklist so you have all the necessary kitchen gadgets gathered before you begin cooking!
Peelers
Remove the skin or rind of fruits and vegetables with ease.
Garlic Press
Quickly and efficiently mince garlic cloves with minimal effort.
Wooden Spoons
Wooden spoons are great kitchen tools for their versatility, durability, and gentle touch on cookware.
With smooth surfaces that prevent scratching, and the inability to conduct heat, they’re perfect for use with non-stick pans and delicate surfaces.
And let’s not forget the heartwarming sight of a cute baby lending a hand with a wooden spoon—truly a timeless image that evokes joy and nostalgia in any kitchen setting.
Whisk
Blend ingredients, whip up eggs and create smooth textures in sauces in batters.
Basting Brush
Apply marinades, sauces and glazes to food while cooking, grilling, roasting or baking and very easy to clean.
Kitchen Scissors
Effortlessly cut through poultry, seafood, herbs and packaging materials with ease.
Pizza Cutter
With a sharp, rotating blade, it effortlessly cuts through thick or thin crusts, ensuring even slices every time.
Sharp Knifes
Having a sharp, good quality knife will make slicing, dicing and chopping easy.
Slotted Spoon
This kitchen tool is essential for straining, scooping and serving a variety of dishes.
Spatula
Helps you with flipping, lifting and transferring foods with ease.
Spaghetti Claw
This pasta server is great for lifting, portioning and serving spaghetti and other long pastas.
Silicone Spatula
With its soft, flexible head it excels at scraping, stirring and folding ingredients.
Ice Cream Scoop
Serve ice cream, gelato, sorbet and other frozen desserts with ease.
Wooden Ladel
Helps with serving soups and stirring hot liquids.
Measuring Cups & Spoons
precise and accurate ingredient measurements in cooking and baking
Pastry Cutters
Cutting butter or shortening into flour helps to ensure even distribution of fats.
Sieve
Effectively removes lumps, impurities, and excess liquid from foods, ensuring smooth textures and uniform consistency in soups, sauces, batters, and more.
Vitamix Blender
This blender is the holy grail – can blend, puree, chop, grind and emulsify without trouble. The warranty is worth every penny too!
Food Processor
Makes chopping, slicing, shredding, and mixing ingredients so much easier.
In wrapping up this post on essential kitchen tools, it’s crucial to underscore the importance of maintaining a well-equipped and safe cooking environment. Incorporating essential items in your kitchen setup not only enhances efficiency but also ensures that you’re well-prepared to tackle any culinary challenge!
This article may contain links from my partners. I may receive a small commission if you make a purchase through a link. Please read my disclosure and how I make money here.
Are you looking for the best hikes in North Carolina? In this post, I will share the trails ranging from challenging mountain views to the most peaceful forest paths.
These hikes are rewarding and perfect for both seasoned hikers and outdoor enthusiasts seeking new discoveries.
Keep reading below to find find the best North Carolina hikes.
1. Craggy Gardens
A visit to Craggy Gardens during any time of the year is special because of the scenic views from the summit.
Nestled within the majestic Blue Ridge Mountains, Craggy Gardens has the most enchanting beauty and diverse ecosystems.
As you walk along its winding trails, you’ll be greeted by rhododendron blooms in the spring and breathtaking panoramic views year-round.
It’s crucial to tread carefully and stay on designated paths to preserve the delicate environment. With fragile flora and sensitive ecosystems, venturing off-trail can cause irreversible damage.
Getting there:
From Asheville, take the Blue Ridge Parkway heading north about 18 miles to milepost 364.
You will see the Craggy Gardens Visitor Center on the left.
Continue past the visitor center and go through the Craggy Pinnacle Tunnel. Just after the tunnel, the parking area for the Craggy Pinnacle trailhead is on the left.
Beginning Your Hike:
Start the trail next to the sign that tells a story of the Catawba rhododendron, named for the Catawba Indians that lived east of the Catawba River.
Continue on through the trail of tunneled rhododendrons where the trail is wide, slightly rocky and steep but well-traveled through the season.
At 0.2 miles into the hike, you will come to a large rock where there is an overlook on top of the rock.
Continue on to a bench on the right and a fork in the trail – to the right you will see access to the lower overlook trail and to the left the summit overlook trail.
The lower overlook descends a few hundred feet to a stone wall with views of the Blue Ridge Parkway and the visitor center below.
Photo from the lower level of Craggy Gardens
Turn back and head to the summit where you will be at an elevation of 5892 and an overlook taking in the 360-degree view of the Blue Ridge Mountains, the parkway and the reservoir that provides drinking water for the city of Asheville.
For another nearby hike, head down to the visitor center parking lot and to the left of the lot you will find the Craggy Gardens Nature Trail.
It leads about 1 mile through a thick covering of rhododendron, passes a picnic shelter and emerges through the woods at the Craggy Gardens Picnic Area.
This is considered one of the best North Carolina hikes, although if you are looking for more scenic views, the pinnacle will not disappoint!
2. Old Mitchell Trail
Getting There:
The distance between Mount Mitchell and Craggy Gardens by road is approximately 22 miles, which typically takes around 45 minutes to an hour to drive, depending on traffic and road conditions.
Turn left onto milepost 355; Turn left onto NC 128 at the sign for Mount Mitchell State Park.
If traveling from Interstate 40 East of Asheville, take exit 86/NC 226 to Marion/Shelby. NC 226 merges with US 221 and US 70 in Marion. Veer left on US 70.
After another 2 miles, turn north on NC 80, follow it for 16 miles and then turn left onto the Blue Ridge Parkway at milepost 355 turn right onto NC 128. Drive 2 miles to the park office and park there to start the Old Mitchell Trail. (4.4 miles)
At the peak of Mount Mitchell 6,684 feet making it the highest point east of the Mississippi River.
Summit trail hike from the parking area:
Take the easy to follow paved, handicap accessible path just 0.25miles to the observation deck, where you will be surrounded by the vastness of the Blue Ridge Mountains.
Old Mitchell Trail (4.4 miles)
3. Graveyard Fields
Getting There:
From the Asheville area, take the Blue Ridge Parkway about 35 miles south to milepost 418. Located about 9 miles south of the Pisgah Inn.
The parking area is to the right; visit on a weekday and be sure to arrive early to avoid this high trafficked area.
In mid-August you can pick wild blueberries!
Start the trail:
By walking down the stairs, closest to the bathrooms into a paved pathway to a footbridge across Yellowstone Prong.
Cross the bridge and turn right (following the blue blaze) to Lower Yellowstone Falls.
Continuing on you will walk another 0.2 miles to a steep staircase with slippery rocks at the bottom for viewing of the falls.
Backtracking to the trail junction and turn right following the trail to the Upper Yellowstone Falls where you’ll pass through blueberry fields.
View of Lower Yellowstone Falls
The strenuous hike to the Upper Falls, you’ll slowly start to climb in elevation, on a narrow path climbing over roots and rocks. You will cross the stream several times.
View from Upper Yellowstone Falls
4. Black Balsam Knob
At elevation 6,214 feet you will be hiking to some breathtaking panoramic views!
Getting There:
When driving along the Blue Ridge Parkway from Asheville, you will see the Black Balsam sign past Graveyard fields. Take the road for 0.7 miles and you will see the parking lot.
Begin Your Hike:
The Art Lobe Trail – After a walk through a wooded area and rocky terrain. You’ll enter a meadow with amazing views.
The trail ascends gently to the top of Black Balsam Knob, where you will be at 6,214ft making it one of the highest peaks in the Pisgah National Forest.
This article may contain links from my partners. I may receive a small commission if you make a purchase through a link. Please read my disclosure and how I make money here.
Here you’ll find the best camping snacks for all of your adventures! These snacks are a must for you and your toddler’s outdoor escapades!
Remember to stash a snack for your toddler on hikes because we all know how not enjoyable the tiny hiker meltdowns are when hunger strikes!
Be prepared, keep the smiles and pack a snack.
Campfire Quesadillas
Easy camping snack over a campfire or portable stove –
Tortillas, cheese with beef or any toppings you prefer is all you’ll need for a great campsite snack.
Forest Twists: Fruit Roll-Up Delights
Fruit Rollups are the best camping snack!
Perfect for taking on long hikes to help boost energy. These rollups retain vitamins that are in fresh fruits like Vitamin C, A and various antioxidants.
Campfire Cones
A fun treat you can get creative with. Fill waffle cones with mini marshmallows, chocolate chips and fruit. Wrap them in foil and heat near the fire.
Nature’s Crunch: Rice Cake with Nut Butter and Blueberries
With a few basic ingredients you can create a delicious and nutritious granola that beats store bought versions.
Campfire Confections: Pumpkin Cream Cheese Muffin
Make ahead of time and store in a air tight container.
Easy camping snacks: Cucumber and Hummus Spears
Cucumber and Hummus Sticks: Slice cucumbers into sticks and serve with hummus for a refreshing snack
Cucumbers make for a refreshing snack a good balance of hydration while also providing a small amount of vitamins such as Vitamin K and C.
Hummus is rich in plant based protein and dietary fiber, also containing healthy fats, essential minerals like iron and magnesium.
Very durable cooler, perfect for those short hikes!
Camer and Hiker snack Delight: Waffle Morsels
Waffles are always a hit and easy to make ahead of time.
Outdoor Nibbles: Peanut Butter Cracker Bites
Easy enough, peanut butter in between these delicious crackers.
Wilderness Wraps: Veggie Roll-Ups
Yum, Fill small tortillas with cream cheese and chopped veggies for a toddler friendly wrap.
Forest Fuel: Apple Slices with Nut Butter camping snack
This Homemade Almond Butter is the best – Provides a mix of carbs, healthy fats and protein making it a satisfying and nutritious snack.
Creamy Almond Butter
Homemade roasted creamy almond butter with a hint of sweetness and touch of salt will be sure to satisfy your taste buds and become a versatile companion in your culinary adventures!
Food processer
1 bag Unsalted Almonds
1 tsp Salt
1 tbsp Maple Syrup (or honey)
1 tbsp Vanilla
1 tbsp Cinnamon
First roast your almonds.
Let them cool.
Place in food processor or blender and blend for about 10-15 minutes.
Store in a airtight container.
Camping Snacks: Woodland Delight: Apple Slice PB&J
And for those who crave a classic camping snack with a twist, why not try the timeless combination of peanut butter and jelly served alongside crisp apple slices?
As the sun sets on another day of adventure in the great outdoors, remember that the right snacks can make all the difference between a good camping trip and a great one.
This article may contain links from my partners. I may receive a small commission if you make a purchase through a link. Please read my disclosure and how I make money here.
Enjoy my delicious easyhomemade chicken pot pie recipe! With its flaky, golden crust and creamy, savory filling packed with tender chicken and vibrant vegetables, this easy chicken pot pie dish is guaranteed to warm your soul and become the best homemade chicken pot pie you have ever made!
Recently my husband and I were on the discussion of how our favorite memory growing up was going to Bob Evans and enjoying dinner as a family. I reminisced about their Chicken Pot Pie recipe, so we had to recreate this staple.
The crust was homemade, making it hands down, the best chicken pot pie crust recipe around!
Chicken Pot Pie Crust Instructions:
Step 1: Combine salt and flour.
Step 2. Add the cold, cubed butter to the flour. (Use your fingers to work the butter into the flour until the mixture resembles coarse crumbs with pea-sized pieces of butter)
3. Gradually add the ice water, one tablespoon at a time, mixing gently with a fork or your hands until the dough comes together. Be careful not to overwork the dough.
Divide the dough in half and shape each half into a disk. Wrap each disk tightly in plastic wrap and refrigerate for at least 1 hour before rolling out.
Pot Pie Fillings:
1. Preheat your oven to 375°F (190°C).
In a large skillet, heat the olive oil over medium heat. Add the diced chicken and cook until browned on all sides, about 5-7 minutes. Remove the chicken from the skillet and set aside.
Then add in the chopped onion, carrots, and celery. Cook until the vegetables are softened, about 5 minutes.
Add the minced garlic and cook for an additional minute.
2. Sprinkle the flour over the vegetables and stir to combine. Cook for 1-2 minutes, until the flour is well incorporated.
Gradually pour in the chicken broth and whole milk (stirring constantly to prevent lumps from forming)
Bring the mixture to a simmer and cook until it thickens, about 5-7 minutes.
3. Stir in the cooked chicken, frozen peas, salt, and pepper.
Allow the filling to cool slightly while you roll out the pie crust.
Assembling The Easy Chicken Pot Pie:
Roll out one disk of the chilled pie crust on a lightly floured surface to fit a 9-inch pie dish. Place the rolled-out crust into the bottom of the pie dish.
Pour the chicken filling over the crust in the pie dish.
Roll out the second disk of pie crust and place it over the filling. Trim any excess crust and crimp the edges to seal.
Cut a few slits in the top crust to allow steam to escape during baking.
Optional: Brush the top crust with beaten egg for a golden finish.
Baking:
Bake in the preheated oven for 45-50 minutes, or until the crust is golden brown and the filling is bubbly.
Allow the pot pie to cool for a few minutes before serving. Enjoy your homemade chicken pot pie with flaky crust!
Allow your home made pot pies to cool completely to let the flavors meld together.
Then, slice into generous portions and serve piping hot.
The smell alone will have everyone eagerly gathering around the table.
How long do you cook a homemade chicken pot pie for?
Bake at 375° for 45-50 minutes until the crust appears golden brown.
What makes a good chicken pot pie?
Tender chicken, flavorful veggies, creamy sauce and a flakey crust!
How to make homemade chicken pot pie healthy?
Use lean protein such as chicken breasts, load up on the veggies and instead of using heavy cream for the cause use unsweetened almond milk.
How to make gluten free chicken pot pie?
Use almond flour instead of regular flour for the crust.
This article may contain links from my partners. I may receive a small commission if you make a purchase through a link. Please read my disclosure and how I make money here.
My easy homemade pancakes will promise stacks of golden perfection and will become the best homemade pancakes you’ve made!
It all begins with the perfect batter – a blend of flour, sugar and milk to create this basic pancake recipe.
This simple pancake mix will make the fluffiest pancakes to enjoy with a cup of coffee!
In our cozy kitchen, the morning sun streams in as we gather around the stove, ready for our daily pancake ritual. It’s a simple recipe, perfected over countless mornings together.
But it’s not just about the pancakes; it’s about the moments we have shared. Our two sons, in their tiny aprons, eagerly join us, their laughter filling the room as they flip pancakes alongside us.
We started with basic ingredients – flour, eggs, milk – and over time, we fine-tuned it, finding just the right balance for these fluffy, golden pancakes that will melt in your mouth.
So read along to find the simplest pancake recipe from scratch recipe out there!
Healthy Pancake Mix Ingredients:
Flour: Provides structure, almond flour as a gluten free, low carb option. (For gluten free pancakes use almond flour)
Sugar: Adds sweetness, enhances flavor.
Baking Soda & Powder: Creates the fluffiness by causing batter to rise and become light and airy.
Milk: Adds moisture.
Egg: Acts as a binder.
Melted Butter: Enhances flavor and helps moisture.
Vanilla Extract: Enhances flavor.
Best Pancake Mix Instructions:
1. Prepare the batter – Whisk together flour, sugar, baking powder, baking soda and salt.
In a separate bowl, combine milk, egg, melted butter and vanilla extract.
2. Mix the batter – Pour wet ingredients into the dry ingredients. Gently stir, it’s okay if there are lumps, avoid overmixing that can lead to a dense pancake.
3. Pour the batter – Into your pan over medium heat.
4. Cook the pancakes – Cook until bubbles form (usually 2-3 minutes)
5. Flip – Flip the pancakes and cook until the other side is golden brown.
6. Serve – Top with berries, maple syrup or whipped cream.
Pancake Batter Tips:
Allow pancakes to cook properly! Don’t rush them on high heat or flip them too early.
Let the under-side cook to a golden-brown color. When bubbles start forming on top and around the surface, they are ready to flip.
To add a more nutty, warm flavor try browning your butter- check out my recipe here.
Homemade Pancakes
A classic, homemade pancakes recipe- golden airy and light. enjoy your mornings with these perfect stacks of joy. Top with real maple syrup or fresh berries!
2 mixing bowls one for wet ingredients and one for dry ingredients.
1 Whisk
1 Measuring Cup
1 measuring spoons set
1 Skillet
Ingredients
1cupall-purpose flour
2tbspsugar
1tbspbaking powder
½tspsalt
1cupmilk
1largeegg
2tbspbuttermelted
1tspvanilla extract
2tbspmaple syrup
Instructions
Mix dry ingredients
In a large bowl, combine flour, sugar, baking powder and salt.
Mix wet ingredients.
In another bowl, mix melted butter, egg, milk and vanilla extract.
Combine.
Pour the wet ingredients into the dry ingredients, stir until combined. The batter should be slightly lumpy which helps pancakes become fluffy
Heat pan.
Over medium heat, lightly butter pan and wait until hot.
Cook pancakes.
Pour batter onto skillet and cook until bubble form. ~ 2-3 minutes. flip and cook for another 1-2 minutes.
Serve.
Serve warm and with real maple syrup.
Notes
Avoid overmixing as this will cause a dense pancake.
Keyword basic pancake recipe, easy homemade pancakes, homemade pancake batter, homemade pancake recipe, make pancakes from scratch, pancakes
What makes these homemade pancakes fluffy?
Through a combination of the ingredients and cooking techniques.
Baking powder and baking soda- These leaving agents release carbon dioxide gas when mixed with wet ingredients and being exposed to heat.
Avoid overmixing- Gently mix, if there are lumps that is okay. Overmixing can make the pancakes denser.
Resting time- Allow the batter to rest before cooking- this gives the leavening agents time to work and allows the flour to fully hydrate.
Correct Cooking Temperature- Cook over medium heat for even cooking.
Flipping- Wait until bubbles form on the surface of the pancake before flipping.
FAQs for Basic pancake recipe
Can you make this homemade pancake mix recipe keto friendly?
Substitute almond flour in place of all-purpose flour and use monk fruit sweetener.
What is the best way to freeze homemade pancake batter?
Allow the pancakes to cool completely after cooking. Stack pancakes with parchment paper to prevent sticking then wrap in plastic wrap and place them in a zip lock baggie.
How to reheat this easy homemade pancake recipe?
Reheat in the oven to avoid over drying.
Can you make these pancakes from scratch recipe without baking powder?
Yes, substitute a mixture of 1/2 tsp cream of tartar, 1/4 tsp baking soda and 1/4 tsp cornstarch.
Can you avoid sugar for this best recipe for pancakes?
Yes by using natural sweeteners like stevia, monk fruit, or erythritol instead of sugar. Alternatively, you can use mashed bananas or unsweetened applesauce to add sweetness.
How to increase the protein content to 20g?
Add ingredients such as protein powder, Greek yogurt, eggs, or nut butter to the recipes. You can also incorporate ingredients like chia seeds or hemp seeds for additional protein.
How can I modify the recipes to fit a paleo diet?
Replace regular flour with paleo-friendly alternatives such as almond flour, coconut flour, or tapioca flour. Use natural sweeteners like honey or maple syrup instead of refined sugar.
This article may contain links from my partners. I may receive a small commission if you make a purchase through a link. Please read my disclosure and how I make money here.
I will share all the blogging tips for beginners that I believe every blogger needs to hear.
I cannot believe it has been nearly two years since I started this blog. If you’re picturing a smooth journey, let me set the record straight- it’s been anything but that.
As I sit down to share my blogging experience, I’m reminded of the countless hours spent tinkering with themes, navigating through online courses, and yes, weathering the storm of trial and error.
What started as a small idea has now become a hub of creativity, a place where I’m constantly learning, evolving, and embracing the unexpected.
This post isn’t just a stroll down memory lane; it’s all of the things I wish I’d known when I first hit that ‘Publish’ button.
From navigating the maze of uncertainty to fine-tuning my content with each passing day, I’ve gathered nuggets of wisdom that can make the blogging journey a tad smoother for you.
So, grab your favorite beverage, get comfy, and read along as I share all of my helpful blogging tips.
Niche Down
My first blogposts were about all the things- I thought I could write about everything and anything and then I realized I was struggling to find my target audience.
Ways To Niche Down:
Self-Reflecting: Identifying your passions, and unique skills.
Think to yourself, Is this my passion? Will I run out of content ideas to help my audience? What are their interests, challenges, and preferences? Understanding your audience is fundamental to niching down.
Competitor Analysis: Analyze your competitors within your chosen niche. See what they are doing well and where there may be opportunties to make your brand different and stand out.
Keyword research: Understand the search terms and phrases your target audience is using.
Tools like RankIQ is a one-of-a-kind SEO toolset build just for bloggers. Their 1-year study showing that Mediavine blogs using RankIQ increased their Google traffic 468% more than the Mediavine blogs not using RankIQ.
Using SEO tools such as RankIQhelps your research process for keywords, competitor analysis, better rankings, tracking, backlink analysis, following trends and customized suggestions generating reports and analytics to help you improve your SEO.
Market Research:
Identify trends, pain point and needs and growth prospects that may impact your business.
Pain point example:
Being a mom who wants to be there for every soccer game, school event, and bedtime story, yet feeling the financial strain of not having a steady income.
Traditional jobs just don’t cut it when they require sacrificing precious moments with your kids.
Need:
That’s where the need for a source of passive income kicks in.
Something that lets you take control of your schedule and earn while actively participating in your children’s lives. Sounds like a dream come true for a mama, am I right?!
You will need to set up your blog through Bluehost, Read my detailed Start A Blog post and learn more about why you need to choose to correct platform and a step-by-step guide on how to get things started!
Creating quality content
Focus on producing valuable, engaging, and well-written content that resonates with your audience.
be consistent with posting
Establish a consistent posting schedule to keep your audience engaged and attract new readers. Be sure to Respond to comments, encourage discussions, and build a community around your blog.
[mailpoet_form id=”4″]
Blogging is going to change your life and your character.
Since I started my blog at the end of 2022, my whole life has changed.
I started paying more attention to how I spend my free time.
My daily/weekly/monthly scheduled changed completely.
I gained confidence in myself.
The last point really hits home for me. I never considered myself confident and have grown so much in that aspect.
Having a blog, a business of my own has been a life changing experience.
Seeing the time I put in, the determination to keep going when I wasn’t seeing results shows that I can do anything I put my mind to.
Blogging is a lot of work.
-Design of website
-Coming up with content ideas
-Researching
-Writing valuable blog posts
-Constantly improving your writing skills
-Creating Pin-able Images, Descriptions & Titles
-Learning SEO
-Growing Social Media
-Getting Traffic
-Learning Email Marketing
-Creating Lead Magnets
-Getting subscribers
-Learning Affiliate Marketing
-Creating a digital product
Whew, I know that sounds like a lot. It’s a constant learning experience.
I also discovered along the way – that everything I learned was free up until a certain point where I just felt like there was something missing- like I had to of been doing something wrong, after 2 years.
Yes, after 2 years your still considered a newbie blogger!
So, I decided it was time to invest in myself and in order to learn how to earn money from home, I would have to obtain the skills through education.
I recommend the Beginner’s Blogging Bundle by Sophia Lee blogging course; it helped me a lot and is one of the best blogging courses for beginners!
In the bundle of dreams, Perfecting Blogging and Perfecting Pinterest will teach you the strategies you need to know to hit the ground running. Perfecting Blogging covered tried and true SEO strategies. Sophia’s secrets to (quickly) creating professional blogs, and her fail safe formula for crafting blog posts that are guaranteed to captivate your audience. Perfecting Pinterest provides in-depth insights into her proven strategies for driving website traffic from Pinterest, optimizing blog posts for Pinterest traffic, and her secret techniques for time-saving content uploads to Pinterst and more!
These courses are perfect for bloggers just starting out or any blogger who hasn’t been seeing the results they want and is ready to take off!
This article may contain links from my partners. I may receive a small commission if you make a purchase through a link. Please read my disclosure and how I make money here.
Enjoy the warmth of indoor bonding with your toddler as the cold weather sets in! When the temperatures drop, it’s the perfect time to engage in enriching actvitities that not only keep your little one entertained but also foster a world of learning.
From imaginative play to sensory exploration, I’ve created a listed to stimulate your toddlers curisority and promote valuable educational experiences.
Let the chilly days outside be the perfect backdrop for cozy, educational adventures indoors!
Monster Color Matching (Visual Perception Skill)
Prep: You can cut out your own clipart, make it as easy as a circle or if you have one its the perfect time to put it in use- your Cricutand cut out a monster out of each color of construction paper. Prep Time: 10 Minutes.
Save the cutout outline and place them into a container then arrange all the monsters on a tray.
How We Play: Show your child the monster tray and invite them to carry it over to your worktable.
Step 1: Pick up a monster and tell your child you are going to match it with the cutout. (They may suggest the answer, if so ask them if they would like a turn)
Then: Your toddler can take the cutout and match it to the correct color – TIP: If they don’t get the color correct, try to avoid correcting them in the moment – instead observe, see if they correct the color and if not start with that color first the next time you play!
Lastly: Have your toddler return all the materials to where they belong.
rEADING & painting:
We have this finger-painting set, its non-toxic and washable! My toddler is also a huge fan of the Brown Bear, Brown Bear, What Do You See book.
Read the book before hand and then paint.
TIP: We do a lot of finger painting and folding paper to make pretty patterns. I find it easiest to tape the paper to the table and put the paint onto the paper as he points and practices his colors.
2. Homemade Playdough
We make our own playdough because its cheap, and fun to make together!
4 Ingredients: 1/2 cup cornstarch, 1 cup baking soda and 3/4 cup water and food coloring. We put our playdough into a tuber ware container to use for later.
In a pan without heat, add the cornstarch, baking soda, water and stir.
Turn heat to medium.
Start stirring the mix constantly, it will start to bubble/turn into a solid. Once a ball starts forming in about 5 minutes take pan off the heat.
Now that your dough is hot, be careful but place your dough onto a silicone surface and knead it until it starts cooling.
Then you can add in your food coloring and that’s it! Super easy and quick.
How We Play:
Let your toddler use a rolling pin and cookie cutters. They can cut out all sorts of fun shapes and animals.
Animal foot print stamps are a win! Our toddler will make the sounds or imitate the animals as he smashes them down.
Smash the playdough with kitchen utensils – spoon, fork, potato masher, or a whisk. Get this wooden kitchen set, they will be able to practice their cutting skills too.
Teach them how to roll the playdough into little balls, we then put a hot wheels track on a incline and roll the balls down the track. That keeps him entertained and we come up with creative ways to make the track inclined.
3. Homemade Kinetic Sand
It’s very easy to make. Mix 8 cups of flour and 1 cup of coconut oil and add in the food coloring.
Make sure to knead out any balls that may form and place the sand in an air tight container.
How We Play:
We bought this sand castle kit. It has everything you’ll want for sand playing.
I love this stuff – from Dr. Seuss’s 1949 children’s book, Bartholomew and the Oobleck, It follows the adventures of a young boy named Bartholomew Cubbins, who must rescue his kingdom from a sticky green substance called oobleck.
Its a fluid consistency that temporarily thickens when a force is applied.
How To make:
Add about 5 drops of food coloring to 1/2 cup of water if you want color. Add the food coloring to the water before adding it to the cornstarch, it will help distribute it evenly.
Once you are ready, stir 1/2 cup of water into the cornstarch. To test out the oobleck try to form a ball, if you aren’t able to then add more cornstarch. If it isn’t runny like a liquid when picked up, it is too thick. Add more water. To store the oobleck, put it in an airtight container. Do not throw it in the sink, it will clog your drain – throw it in the trash.
Prepare for a mess by laying down a plastic table cloth.
How We Play:
Grab some containers and pour the oobleck. This can get pretty messy but just prep the area and prepare for the fun!
5. Pom-Poms
We use these pom-poms because their larger so I feel like its less tempting to put in his mouth, they come in a reusable bag and there are plenty for any activity.
How We Play:
Cut a few holes in the top of a yogurt container and have your toddler push them through the holes.
This is a great little game, the prompts are fun, game play and duration is quick, and the parts of the game included are durable, cute and easy to clean up!
After reading this book, my little guy was all about getting outside and collecting bugs! Even in the rain.
My toddler loves pouring beans, water, pretty much anything into other containers. This helps with fine motor skills and keeps them entertained for a while!
We love this pretend sink. My toddler loves to help with the dishes in the regular sink so when we don’t have dishes he can always play with this sink. He really enjoys cutting the veggies and cleaning the plates with the running water. Its easy clean up too after play is done.
11. Melting Ice Cubes
Mix food coloring in the ice cube tray and put multiple colors together into a zip lock baggie. We use silicone dinosaurs and star ice cube trays.
This is entertaining for them to see the colors blend together and we also work on naming the colors that we put in the bag.
12. Shape Sorter
Take a box and cut out shapes with an exacto knife. You can either use the cut out pieces from the cardboard, cut other shapes out of colored paper or use wooden blocks if you have them in those shapes. This helps your tot learn their shapes, colors and they have fun putting things into one other things.
13. Sheet Forts
Sounds simple enough, take some sheets and drape them over your furniture. I threw some books in there and a flash light and he thought it was the most fun!
14. Container Fun (practice opening containers)
Put random objects into tuber ware, old tins and different bins we can find laying around.
15. Masking Tape Roads (Strength/agility skill)
We created roadways for his car and decorated the surrounding areas with his plastic animals, and toy people.
Remember that these indoor activities are not just about keeping your toddler busy; but moments of growth, laughter and bonding.
Embrace the mess, cherish the giggles and savor the joy of discovery as you explore the wonderful world of toddlerhood indoors.
This article may contain links from my partners. I may receive a small commission if you make a purchase through a link. Please read my disclosure and how I make money here.
Since you are here you’ve probably been searching how to start a blog and make money. I’m here to share tips from a lens of a complete beginner and am proof you can have a successful online business!
Skip the struggle bus I rode on as a beginner blogger and follow my guide to ensure you start your blog correctly and with confidence.
Be sure to subscribe and pin this post for later reading. There is a lot that I cover in starting your blog and learning how to earn money online.
In this my step-by-step guide, I will demonstrate exactly how to get set up your blog, generate income passively andhow blogging has changed my life!
When I started Hike Cook Share I had no idea the ways I could potentially make money. Some would say it is pretty passive to make income blogging however, a lot of work goes into researching, writing and creating the content.
That’s one of the reasons this blog has been so successful; it has become truly a labor of love.
What also attracted me to blogging was I wasn’t selling a product, working for someone, or stressed about making money right away.
So. if you’re thinking blogging is a get rich quick sort of deal, you may be quite disappointed to find out how much work blogging entails.
When I started out on this blogging journey, I had the mindset that if I were consistent and put the work in, I would be successful.
There is so much free information (including my guide) on the internet but after 2 years of blogging, I decided it was time to invest in myself and in order to learn how to earn money from home, I would have to obtain the skills through education.
I recommend the Beginner’s Blogging Bundle by Sophia Lee blogging course; it helped me a lot and is one of the best blogging courses for beginners!
In the bundle of dreams, Perfecting Blogging and Perfecting Pinterest will teach you the strategies you need to know to hit the ground running. Perfecting Blogging covered tried and true SEO strategies. Sophia’s secrets to (quickly) creating professional blogs, and her fail safe formula for crafting blog posts that are guaranteed to captivate your audience.
Perfecting Pinterest provides in-depth insights into her proven strategies for driving website traffic from Pinterest, optimizing blog posts for Pinterest traffic, and her secret techniques for time-saving content uploads to Pinterst and more!
These courses are perfect for bloggers just starting out or any blogger who hasn’t been seeing the results they want and is ready to take off!
Tip: There is a lot to learn and digest in my post. Don’t feel like you need to read all of this today.
Pin my post and come back for guidance whenever you’re feeling ready or overwhelmed.
I’m not going to lie, If you want to find out how to start a blog that makes you money, there is a lot of work that goes into it.
Starting a blog may take you less than an hour to set up, but building a successful blog that will earn you money can sometimes take months or even years.
Chapter 1: Selecting A Niche
What is a blog and how do you select a profitable niche?
Chapter 2: Setting Up Your Blog
Step-by-step how to set up your blog
Chapter 3: Creating Content
Tips on creating content your readers are searching for.
Chapter 4: Pinterest
Why Pinterest is the best marketing tool, how to use it and create pins.
Chapter 5: Mastering Google
How to get your site recognized by Google by SEO.
Chapter 6: Monetizing
Ways to make your blogging profitable.
Chapter 1: Selecting Your Niche
What is a niche?
It’s the topic that is your primary focus. You want a niche that your confident in talking about, something you have experience in and can offer solutions to your readers.
Who is your target audience?
Is your niche about home decor, automotive, raising babies? Know your audience and what questions you use to google before becoming the Pro that you are now!
How can you make money blogging?
There are a few options here.
Apply for affiliate programs. There are so many, make sure you keep a list to stay organized.
Apply for an ad company.
Offer a course in your niche.
Sell E-books, Recipes, Photography, Clothing
Become a virtual assistant
What is affiliate marketing?
It is a program that you apply to in order to promote a company’s product that you are endorsing.
Most major stores have them, you have to look on the company’s page.
You will receive a unique link and you just plug it into your product that you’re endorsing.
Don’t get discouraged if you get rejected; most times the company is looking for improvements that can be made. You can always email the company and ask or reapply when you have more content or traffic.
Bigger stores are a part of an affiliate program such as Impact or ShareaSale.
I suggest keeping a notepad with all the programs and networks you are in to keep them organized.
Also, I only promote products that I love and have purchased myself. Honestly is the best policy when promoting.
Why apply to an ad company? What are the requirements?
There are some requirements such as content and sessions but definitely something to look into if your wanting to create passive income.
I like to think of adding an ad company to my blog as a little bonus.
Start with applying to Google AdSense – you can generate a lot of income if you have the page views.
How are you driving traffic to your site?
There are a few ways of doing this –
Your social medias – put your linktr.ee in the bio and be done or self-promote with your own posts.
Pinterest – creating pins that are eye catching and driving that audience to your posts.
Are you willing to invest?
Owning your own website comes at a cost. The initial set up fees, the courses you can take, the ingredients or products you want to endorse.
As an affiliate with Bluehost, using my link means I may earn a commission from them. This helps support the maintenance of this guide, keeping it free and up-to-date for you. Please be assured that I only recommend products, tools, or services that I have personally used and genuinely love!
What is a blog?
A blog is a type of website ranging from specific topics of personal experience to professional insights, news, tutorials.
Blogs are a great way to express knowledge, build a community, promote products, services and generating income through advertising or affiliate marketing.
Should you start a blog?
Yes! Blogging has changed every aspect of my life – it has challenged me in more ways than just learning to write. Starting a blog today is the easiest ways to make money online- it does take time and consistency but, in the end, when you see results – it is worth it!
I found so many interesting ways to make money online but was seeking something that would fulfil me and my creative side and generate income.
I ran across so many women, who were making this a reality for their family.
Some women could stay home and homeschool, some travel every day, and some were paying off debt.
I thought this just seemed too good to be true, what are they selling?! Hair products…a water filter…. No (thank goodness) … but they were self-promoting and I’m all about that!
I’ve always dreamed of being my own boss.
What did these women have in common?
That’s right, a blog! Sounded easy enough. Before I jumped in, I knew I had a lot of self-reflection and research to do.
I found that I could generate some money with no experience. If I could do it, so can you!
TIME. Where would I find it?
I consider myself a pretty busy bee- with two littles under the age of 3, working full time, trying to be present and enjoy all the moments. Another obstacle I was trying to overcome was how in the world would I find the time to blog? It all sounded very challenging.
I was determined. I knew I had to show up for myself.
I wrote late at night, during nap times, adding an hour to my work time during the day. I made it work and so can you!
Establishing goals.
What are you wanting out of your blog?
What is your niche?
Who is your target audience?
A way to make money passively?
Are you willing to invest?
Do you have the determination?
Steps on setting up your blog?
Setting up your blog for success.
To generate money, you will need to sign up for a self-hosting site – I 100% recommend BlueHost. Their customer service is hands down the best out there.
They have a chat service that can help you through a lot of obstacles you may encounter as a newbie.
WordPress wanted to create some confusion and have a WordPress.ORG and WordPress.COM – two very different websites.
In order to monetize – a fancy word for generating income – you need a self-hosted web server. Which is why you want to go with BlueHost, the server for WordPress.ORG
When you purchase BlueHost you actually own your own website! The earning potential and the freedom to customize is unlimited.
1. Pick your domain name
Picking out your website name can be the most tricky – you definitely want it be catchy, on topic with your niche, easy to remember and memorable.
You’ll also want to make sure your domain is available and not already registered.
Check to see if your domain is available by clicking here ^
[mailpoet_form id=”4″]
If you’re having trouble deciding, you can change your domain down the road, which is what I choose to do to niche down into the food blog I am today! I also share lifestyle posts such as tips on blogging, local hikes and anything that I feel will help my audience.
Why Choose WordPress.org?
WordPress.org is the most popular website platform in the world. It powers around 30% of all websites in the world, offering flexibility for design and monetization.
There is a bit of a learning curve to WordPress.org vs the other blogging platforms such as Wix, Squarespace or Weebly.
WordPress.org is free, so next you will need a host to keep your files on a server.
What is a webhost?
Hosting is where your data will be stored.
This option does come at a cost, but you won’t be able to monetize unless you own your own website.
Reasons why you should use Bluehost
It’s the #1 recommended web hosting company by WordPress.org
You get a free domain name when you buy a 12 month plan.
It is the best affordable hosting for beginners if you are just starting out and have limited resources to invest into your blog.
With Bluehost, you get a year free of SSL “”Secure Sockets Layer,” is a cryptographic protocol designed to secure the transmission of data over the internet. It provides a secure and encrypted connection between a user’s web browser and a website’s server.
If you don’t pay for it, your personal contact information could be used by marketers and spammers to send you unwanted emails. Ugh!
Next, you will want to choose your domain name.
The choice of a domain extension depends on the nature and purpose of your website, as well as your target audience. Here’s a general guide for when to use different domain extensions:
1. .Online, .Site, .Space:
These are versatile and can be used for a variety of websites. They are suitable for businesses, personal projects, or any website looking for a modern and generic extension.
2. .Tech:
Ideal for websites related to technology, startups, or any business with a focus on innovation and tech-related products or services.
3. .Store:
Specifically designed for e-commerce websites. This extension is suitable for online stores and businesses that sell products.
4. .Blog:
Perfect for bloggers or websites primarily focused on publishing content. It’s a clear indicator of a blog-style website.
5. .Net, .Org:
These are generic extensions suitable for various types of websites. Historically, “.net” was associated with network-related sites, while “.org” was often used by non-profit organizations. However, both are widely used for any website.
6. .Info:
Suitable for informational websites. If your site is primarily focused on providing information or resources, the “.info” extension can be a good fit.
7. .Co:
Originally intended for companies, this extension has become popular for startups and businesses as an alternative to “.com.”
8. .US, .Biz:
“.us” is the country code top-level domain (ccTLD) for the United States. It’s typically used by entities based in the U.S. “.biz” is a generic extension often associated with business-related websites.
9. .Club:
Suitable for social clubs, community groups, or any website focused on bringing people together around a common interest.
10. .CA.UK
The country code top-level domain (ccTLD) for the United Kingdom. It’s ideal for businesses or entities operating within the UK.
11. .NYC:
Specifically for websites associated with New York City. It’s a city-specific extension suitable for businesses, organizations, or individuals based in NYC.
12. .Eu, .Ca, .In:
These are country code top-level domains for the European Union, Canada, and India, respectively. They are suitable for websites targeting audiences within these specific regions.
Install WordPress
Bluehost makes it easy to create a WordPress blog and will automatically install WordPress for you.
Next you will be able to pick your website theme and start creating content.
Yay! You’ve made it this far, you are determined to make this work!
So you want to know the secret to making viral content?
Write useful, in depth, content that people will save and come back to – it’s all about quality over quantity.
Like in Chapter 1, narrowing down your niche is important so that you know who your audience is and is easier for your to provide them with helpful content so they return for your content.
Let’s recap on where we’re at here.
By this point, you have a domain name, hosting and you’ve set up your wordpress blog with a simple and easy to navigate theme. You might have written your first post- if you have thats a great start!
But guess what, no one will discover your posts until you promote them.
When I was starting out, I read that you need 20% of your time creating your posts and the 80% needs to be promoting.
Why you need people to read your blog
The equation is simple:
TRAFFIC = MONEY
No matter what type of monetization you pick, you still need a good number of people to care about what you have to say to make money.
How much is a good number?
No matter what way you choose to make money online, the key is having a bunch of people genuinely interested in what you’re sharing.
Now, you might be wondering, how many is a bunch? Well, there are different opinions on that. Some say you only need a small group, while others swear by aiming for millions.
Here’s my take: Making a decent living could be doable with just 1,000 loyal fans. But imagine the possibilities if you had 10,000 or even 100,000 fans cheering you on.
Let’s break it down a bit. Picture this: Your blog gets around 5,000 visitors every month, and these folks are really into what you’re saying. You create a product that solves one of their problems, and every month, you manage to convince just 1% of them to buy a $100 product. How much could you make?
Well, that’s $5,000 a month right there.
So, the point is, you don’t necessarily need millions of people to bring in a decent income. But what if you had 50,000 people tuning in? Suddenly, that $5,000 a month could turn into $50,000.
And that’s what’s so great about blogging: Once your blog is up and running, the more people you get on it, the more money you can make.
I’ve got blog posts from two years ago that are still making me thousands of dollars every month. It’s like the magic of passive blogging income!
And with things like ads and affiliate marketing, the more eyes on your blog, the more money you can rake in.
So, bottom line, we need people.
There are tons of ways to promote your blog, but one of the quickest and easiest ways, especially when you’re starting out, is to hop on the Pinterest train.
Pinterest worked wonders for me, bringing over 180,000 page views to my blog in just three months, and now it consistently delivers between 150,000 to 200,000 page views every month.
What is Pinterest?
It’s not just a social media platform; think of it more like a visual search engine. You search for and save cool ideas there.
The images you save are called pins. A pin is like a visual poster that grabs people’s attention on Pinterest and makes them want to check out your post when they click on it.
You can organize your pins into different boards, kind of like folders for different topics. And the cool thing is, every pin you save on your boards links back to the original website, so people can easily find the source for more info or to buy stuff.
If you’re a creative type, like a blogger or a business owner, you can open a business account on Pinterest and start promoting your blog posts for free.
All you gotta do is make eye-catching pins that link to your blog posts.
So, if you want to get traffic to your blog fast, and Pinterest is new territory for you, I’d say dive in and become a Pinterest pro right away.
Now, you might have heard people saying Pinterest isn’t what it used to be a couple of years ago. And yeah, it’s a bit tougher to get traffic from Pinterest nowadays compared to just a year ago.
Pinterest is trying to keep people on their platform, so things like videos and Pinterest stories don’t make it as easy for users to click through to our blogs.
But don’t get me wrong, Pinterest is still alive and kicking!
It can still bring in enough traffic to help you qualify for advertising with Mediavine or other ad agencies. There are plenty of bloggers who started just six months ago and are making money through advertising, all thanks to Pinterest.
Sure, it might take a bit longer, but if you follow the steps below, you can still get that traffic flowing.
Setting up a business account is a piece of cake. Just follow the instructions on Pinterest.
Oh, and can you turn your personal Pinterest account into a business one? Totally! It’s a breeze.
Just log into your personal account on your laptop, click on the three dots at the top-right of the screen, and follow the steps.
But here’s a heads-up: Before you do that, make sure your personal Pinterest profile aligns with your blogging niche. If you’ve been pinning your kids’ birthday cake ideas for years and now your blog is all about fitness, maybe hold off on the conversion.
On the flip side, if you’ve been passionately pinning vegan recipes and you’re starting a vegan food blog, go for it.
But remember, in the grand scheme of things, there aren’t many perks to converting a personal account into a business one. Followers don’t matter much on Pinterest, and starting fresh helps you build a more relevant account.
Now, let me tell you, not many people will actually check out your Pinterest profile. Pinterest is more of a visual search engine; people usually stumble upon your pins while searching for something. They might never even see your profile.
Still, it’s a good idea to make your profile look pro. To edit it, just log in and click on “edit info.”
Choose a relevant photo, add your blog’s name as your display name, and write a short, sweet 160-character description about your blog. Remember, it’s all about how you can help others solve their problems. Your Pinterest profile is no different.
Ever heard of Rich Pins?
They’re like an upgraded version of regular pins, loaded with more info. There are four types: app, article, product, and recipe pins. Rich Pins provide extra details about your post, making them more attractive to pinners.
Setting up Rich Pins for your blog is a smart move. If you’re tech-savvy, check out Pinterest’s page on it. If not, no worries—there’s a handy blog post with a simpler explanation.
Pinterest boards are crucial.
They are a collection of your pins, letting you organize your content into different ideas and topics. Think of them as distribution points for your content and destinations for people to find useful stuff about your main topics.
Creating your first board is easy. Click on your Pinterest profile, select “Boards,” hit the big Plus button, write a name for your board, and add a description full of keywords related to your board’s theme. Pick a category, hit save, and voila!
You’ve got your first Pinterest board.
How many boards should you start with?
Well, as soon as you have a few blog categories in mind, you can start creating your Pinterest boards. You don’t even need to have blog posts written yet. Starting early helps you figure out what topics are popular on Pinterest in your blog’s niche.
Here’s a quick breakdown of the number of boards you should aim for:
1. Create a main Pinterest board for each of your blog categories. For instance, if your blog covers food, travel, and money, have a board for each. These should only contain your own content.
2. Add as many boards about relevant subcategories as possible. Start with a minimum of 20-30 boards for your blog. For example, if your money category has subtopics like saving money, making money from home, financial freedom, etc., create boards for each.
Fill them with at least 20-30 relevant pins from other bloggers to start. This helps Pinterest understand your boards and makes your profile more relevant to those topics, even before you start creating your own content.
Now, about group boards.
These are boards owned by others who invite you to pin on them. It used to be a fantastic way to get your pins in front of more people when you were just starting out.
A few years ago, Pinterest gave a lot of weight to pins on group boards. If you got onto a board with lots of followers, your pins had a better chance of taking off and reaching thousands of people quickly.
But times have changed. Pinterest now values your own boards and profile more. That’s good news because if you set up your boards correctly and use the right keywords, you won’t need to stress about joining group boards as much as you once did.
I’ve personally stopped pinning to group boards altogether, and I’d suggest you do the same. Focus more on creating and optimizing your own boards.
Alright, let’s talk pin design.
Your pin’s design can make or break your success on Pinterest.
But here’s the big question: How do you create pins that people actually want to click on?
Now, I’ll admit something I don’t usually shout from the rooftops: My first pins were pretty terrible. If you saw them, you might think I was a graphic designer in a past life, but that’s far from the truth.
Don’t believe me? Take a look at these pins. Brace yourself—they’re not pretty!
Would you click on those? Yeah, not many people did.
I made a few mistakes:
The font was too small and hard to read.
The image on the first pin didn’t match the topic. Your image has to be on point, or you’ll just confuse people. Yes, being provocative can work, but pinners scroll through their feed pretty fast, and if they see something irrelevant, they’ll keep scrolling.
For recipe pins, you want your food to be the star. Zoom in, show exactly what the final dish looks like. I kept my photos too wide and not detailed enough.
Like anything in blogging, you learn from your mistakes.
What really helped me was:
Spending time checking out successful Pinterest accounts to see what worked.
Scrolling through my Pinterest feed for hours, saving pins that caught my eye. Why did I stop? What made me click? Was it the font color, the wording, the image? Learn from your own experience and replicate what works.
A few trips to bookstores. Think about it—book covers and magazines are like pins. They need to stand out among a sea of others. Publishers spend big bucks on design, and you can get inspiration for free. Just go to your local bookstore, look around, and use those designs as inspiration.
If you see someone snapping pics of book covers, it might be me, haha.
After a few weeks of doing that, my pin design drastically improved.
Now, the perfect pin has a certain anatomy.
It should be at least 1000×1500 pixels in size, with relevant images, easy-to-read fonts, bright colors, and a simple background.
Intriguing titles, your website logo on every pin, and helpful descriptions are also key. And remember, check how your pins look on mobile—over 80% of Pinterest traffic comes from mobile users.
For my pins, I use a combo of Canva and Adobe Spark. They’re a bit pricey, but I love them. If you’re not ready to invest, lots of bloggers recommend using Tailwind Create, a free tool with templates to get you started.
Pinterest is a goldmine if you’re willing to put in the time and effort to understand it.
When I started my blog, I knew mastering Pinterest was the first step.
Starting my journey as a new blogger, I found myself grappling with a daunting challenge – the sheer volume of things to learn felt like a daily brain explosion.
From keeping up with Pinterest to wrapping my head around the enigma that is SEO, it all seemed overwhelmingly technical and out of my league.
SEO, in particular, was this mysterious concept I wasn’t even aware of initially.
However, the realization hit that relying solely on one traffic source for my blog was a risky game. If Pinterest decided to change its algorithm or, worse, close my account (which can happen), I stood to lose everything overnight.
But let’s back up a bit. What exactly is SEO?
SEO stands for search engine optimization, and it’s all about getting traffic from search engines like Google, Yahoo, and Bing.
Now, Google is the big player here, claiming over 79% of all organic traffic and processing a mind-boggling 5 billion searches every day.
Just think about the transformative power that even a tiny slice of that traffic could bring to your blog’s earning potential.
Recognizing the potential traffic, I could be missing out on, I decided to dive headfirst into the world of SEO.
Fast forward, and now over half of my blog’s traffic comes from Google.
How did I pull off this traffic magic trick?
Unlike the instant gratification of Pinterest traffic, Google’s organic traffic is more like a slow-cooked dish – it takes time to build.
Google needs to trust your website, and that trust-building journey demands patience. It could take anywhere from six months to a year before you start seeing a significant uptick in organic traffic.
But when done right, the payoff is worth it – free, focused traffic that comes with several perks:
1. Targeted Audience: Google traffic is like a laser beam. Unlike Pinterest visitors casually scrolling without a clear purpose, Google users are on the hunt for information or solutions. This makes them much easier to convert into affiliate product customers or email subscribers.
2. Passive Nature: Once you’re on Google’s good side, you don’t have to constantly jump through hoops to maintain that traffic. No need for a constant stream of new pins and boards like on Pinterest – it’s a more set-it-and-forget-it scenario.
3. Consistency: Google traffic is the reliable friend who doesn’t change plans every five minutes. Yes, Google algorithms do change, but not with the frequency of Pinterest. It’s a more consistent and steady flow of traffic.
Now, let’s get into the nitty-gritty of how to tap into this magical world of SEO traffic:
1. Mastering Keyword Research:
When you’re just starting, it’s crucial to decide what your blog should be known for in Google’s eyes. While Pinterest allows for success in diverse topics, Google prefers a more focused approach. Niche down, and Google sees you as an authority, boosting your chances of ranking.
For example, if your blog is all about quick and easy family recipes, target keywords like: – Easy dinner recipes – Quick recipes – Family meals – 10-minute meals
Create content around these specific keywords to establish your niche authority.
Tools like RankIQ is a one-of-a-kind SEO toolset build just for bloggers.
Their 1-year study showing that Mediavine blogs using RankIQ increased their Google traffic 468% more than the Mediavine blogs not using RankIQ.
2. Embrace Long-Tail Keywords:
Long-tail keywords (four or more words) are your best friend as a beginner.
They let you create more specific content, making it easier to rank quickly. For instance, it’s much easier to rank for “Gluten-Free Pasta Recipes” than the generic “Pasta Recipes.”
Make sure to choose keywords with an SEO difficulty below 30-40 when starting. This ensures a realistic shot at reaching page 1 of Google, where the bulk of the traffic hangs out.
3. Understanding User Intent:
User intent is the secret sauce in keyword selection. Check the first 10 results on Google for your chosen keyword to understand what users are looking for. Tailor your content to match the preferred type – whether it’s a list of recipes or a detailed recipe guide.
Consider checking the Domain Authority (DA) of competitors on page 1. As a new blogger with a starting DA of 1, aim to outshine competitors with similar or slightly higher DAs by delivering exceptional content.
4. Crafting Comprehensive, Optimized Content:
Creating epic, optimized content is the key to Google’s heart.
Research the first 10 Google results for your keyword. Develop an outline covering every possible user question related to the keyword, ensuring your content stands as the most comprehensive guide available.
Optimize your content with related long-tail keywords, incorporate internal links, and provide external links to relevant sources. This not only appeals to readers but also makes your content irresistible to search engines.
5. Generating Backlinks:
Backlinks are the golden ticket in Google’s ranking world. They signal trustworthiness and authority. Actively promote your content to create backlinks through strategies like social media sharing, guest posting, and outreach to other bloggers.
In a nutshell, the SEO game plan is as follows:
1. Find high-volume, low-difficulty keywords.
2. Align with user intent to keep Google smiling.
3. Create top-notch, comprehensive content.
4. Shout your content from the rooftops to generate backlinks.
Follow these steps, and you’ll pave the way for Google to recognize your blog’s relevance, rewarding you with a steady flow of organic traffic.
It’s like having a friendly stream of visitors knocking on your digital door – and who doesn’t want that?
A few great ways of marketing your content would be through TailwindCommunities, Facebook groups and Pinterest of course! I have other social media platforms such as Instagram and Twitter but find my audience hangs out in those 3 platforms and I put my time and effort into those instead of the others.
This article may contain links from my partners. I may receive a small commission if you make a purchase through a link. Please read my disclosure and how I make money here.
If you are craving a zesty, Thai chili mayo cookedshrimp poke bowl you have found it!
The textures and tastes of the juicy shrimp, vibrant vegetables, and a crave worthy sauce create the perfect dish.
With this easy shrimp poke bowl recipe, you will be able to create the most flavorful, homemade poke bowl with the best creamy homemade poke sauce making it an easy meal prep throughout the week or a refreshing lunch meal.
Homemade Poke Sauce:
Making Sriracha mayonnaise sauce is simple and requires just a few ingredients. Here’s a basic recipe:
Ingredients:
1/2 cup mayonnaise
2 tablespoons Sriracha sauce (adjust to taste)
1 tablespoon lime juice (optional)
1 teaspoon honey or sugar (optional, for sweetness)
In a small bowl, combine the mayonnaise and Sriracha sauce. Start with 2 tablespoons of Sriracha and adjust according to your desired level of spiciness.
If using, add lime juice for a tangy flavor and honey or sugar for sweetness. Mix well to combine.
Taste the sauce and adjust the seasoning with salt and pepper as needed.
If the sauce is too thick, you can thin it out with a little water or lime juice until you reach your desired consistency.
Serve the Sriracha mayonnaise sauce immediately or store it in an airtight container in the refrigerator for up to a week.
This Sriracha mayonnaise sauce is perfect for adding a spicy kick to your homemade shrimp poke bowl.
Shrimp Poke Bowl Instructions:
1.Prepare the Thai Chili Mayo Sauce: In a small bowl, whisk together mayonnaise and Thai chili paste. Adjust the spice level according to your preference.
2. Cook the Shrimp: – Heat a skillet over medium-high heat. Add a bit of oil.
3. Prepare your ingredients – Cook Edamame, Rice & Cut: Cut cucumber, avocado and carrots, cook sushi rice and steam your edamame.
4. Drizzle with Thai Chili Mayo Sauce: – Generously drizzle the Thai Chili Mayo Sauce over the ingredients.
5. Garnish and Serve – Add your rice to a bowl, and top with ingredients, garnish with cilantro and chopped green onions for added flavor & Enjoy!
This article may contain links from my partners. I may receive a small commission if you make a purchase through a link. Please read my disclosure and how I make money here.
Hey there, foodie friends! So, after a solid decade of swimming in the pescatarian pond, I’ve got a story to spill – and it’s all about how I broke free from my seafood shackles.
Spoiler alert: it involves the sirloin steak recipe that’s about to become your new obsession.
I get it – the idea of going from sea vibes to a land of carnivorous cravings might seem like a stretch. But trust me, this sirloin steak recipe is worth it.
Why eat steak?
Steak is the most nutrient dense food out there.
Get your B Vitamins
Vitamin B helps keep your red blood cells healthy, protecting brain cells and boosting your metabolism.
It can prevent iron deficiency
Iron is one of the most important nutrients for our bodies as it plays a key role in delivering oxygen from lungs to tissues and organs throughout the body.
Iron plays an important role in hormone production and cellular function.
Sirloin Steak Instructions:
Step 1: Making rice
Rinse the rice to ensure fluffy texture. Add water to medium size pan and bring to a boil then add your rice. Once rice is in pan the boil will lessen, let it come back to a gentle simmer. Cover the saucepan and reduce heat to low. Keep lid on for around 18 minutes.
Step 2: Making the Sauce
Pour remaining juice from steak in saucepan, add water, soy sauce, fish sauce, maple syrup and corn starch. Bring to simmer until slightly thickened.
Step 3: Cooking steak
Pan sear steak over high heat until brown crust forms, about 1-2 minutes per side. Then reduce heat to medium and cook to desire.
Step 4: Steam broccoli
Add broccoli to your steamer basket over water for about 6 minutes.
Step 5: Plate & serve
Top with scallions and sesame seeds and serve with rice and broccoli.
This article may contain links from my partners. I may receive a small commission if you make a purchase through a link. Please read my disclosure and how I make money here.
This smore milkshake will become your favorite for the rich, creamy consistency, graham cracker crumbs, chocolate chips, yogurt and mini marshmallow creating an explorer’s dream smore smoothie come true!
My little explorer has recently found an obsession with marshmallows.
As we await our fireside tales, camping snacks, leaf crunching hikes and sunrise seeking – I thought I would create a little camping inspired smoothie – filled with avocado, chocolate, graham cracker crumbs and of course, marshmallow.
As we created this smoothie, we spoke of witnessing the sunrise atop the mountains – a breathtaking sight of the sky in hues of warmth.
If only photos could capture the true beauty of this breathtaking sunrise… Now, back to the smoothie recipe!
HI THERE!
Welcome to Hike Cook Share!
Wife to a talented chef and mama to two little sous chefs, I’m passionate about food photography, exploring and sharing!
Finding inspiration in the beauty of the outdoors and the joy of a well-crafted dish, all while sharing moments together.
This article may contain links from my partners. I may receive a small commission if you make a purchase through a link. Please read my disclosure and how I make money here.
If you are looking for the best carrot cake recipe ever, you’ve come to the right place! This carrot infused cake is divine, covered with toasted walnuts, cinnamon, raisins, pineapple and cream cheese icing. It will be a hit at every Holiday get together!
Ingredients For The Best Carrot Cake:
Carrots (grated): Base of the cake. Tip: Use the larger part of grater
All purpose flour: Provides adequate structure for the frosting.
Sugar: Sweetener. You can use maple syrup or honey.
Cinnamon: Adds flavor.
Salt: To bring out the sweetness and provide balance.
Vegetable Oil: Adds moisture in.
Raisins: Chewy texture, sweetness that complements the warm spices in the cake
Pineapple (crushed): Adds moisture and sweetness.
Baking soda: To help rise flour.
Walnuts: Nutty flavor complements the warm spices of the cake
Instructions To Make The Best Carrot Cake:
Step 1: Preheat the oven to 350 degrees° F.
Grease and flour two 10 inch round cake pans.
Step 2: Combine grated carrots and sugar in a medium bowl. Stir in raisins.
Step 3: Beat eggs until light. Gradually beat in sugar, oil, vanilla extract and pineapple.
Step 4: Combine flour, cinnamon, baking soda and salt in a separate bowl then stir into egg mixture until absorbed.
Step 5: Pour into prepared pans.
Step 6: Bake in oven for 45 minutes.
Cool for about 10 minutes before removing cake from pan.
Carrot Cake Frosting
Although you can use whip cream I prefer using cream cheese for the frosting. I skipped using powered sugar like most recipes, and opted for granulated sugar. The grit of the sugar crystals helped fluff up the butter and cream cheese.
Ingredients:
1/2 cup unsalted butter, softened
1 package cream cheese, softened
1 teaspoon vanilla
1 cup granulated sugar
1/2 teaspoon salt
Frosting Instructions:
Mix the cream cheese with a electric mixer. Add in your butter, vanilla, sugar and salt. Mix until smooth. Since opting out of the powdered sugar there’s no need to worry about overbeating which causes your frosting to be runny.
Now, your delicious carrot cake is ready to be enjoyed with this heavenly cream cheese frosting.
For a special celebration or an everyday treat, this carrot cake, crowned with velvety cream cheese frosting, is a delightful treat that will have everyone coming back for more.
Hi! I’m Trisha, founder of CGM®. My husband is the creator of the recipes, we make a pretty great team and enjoy sharing what we’re eating, creating and some exploring along the way!
Please leave a comment & star rating!
If you tried this recipe, I would be so grateful if you leave a comment and a star rating when you post your feedback. star ratings are the best because they allow people to discover my recipes online. your support means the world, thank you!
This article may contain links from my partners. I may receive a small commission if you make a purchase through a link. Please read my disclosure and how I make money here.
Create this guilt free pizza chaffle crust made of the most cheesy and easy crust will easily replace regular crust. Topped with garlic tomato sauce, pepperoni, mushrooms, red bell peppers, and basil, it will be sure to be a crowd pleaser.
With just cheese and egg, this recipe offers an easy low carb meals that help maintain stable blood sugar levels and being satiated quicker!
Say goodbye to the post-pizza blood sugar spikes that often accompany traditional pizza. A delicious pizza can be more than just a treat—it can be a step towards a healthier, happier you!
What is a chaffle?
It’s a low carb, keto friendly waffle made with cheese- a cheese waffle, Yum!
Keto Pizza Crust Ingredients:
Cheese
5 Eggs
Butter
That’s it for the crust!
Pizza Chaffle
This cheesy keto friendly pizza chaffle will become a replacement for your regular crust - this cheesy egg crust is satisfying and so easy to make!
2. Whisk eggs in a small bowl; stir in mozzarella cheese and butter until batter is well combined.
3. Pour 1/2 of the batter onto the preheated waffle maker, spreading it out from the center with a spoon.
Close the waffle maker and cook until steaming stops and chaffle is well browned, about 3 minutes.
Don’t overcook, as that will make it chewy. Repeat with remaining batter.
Then spread the waffles onto a baking pan.
Your going to want this waffle maker – we use ours every single week!
Add Ons for Keto Pizza Chaffle Recipe:
Next, sauté mushrooms and peppers in a pan.
Then pour your pizza sauce on your chaffles, spread more mozzarella on, add your red peppers and mushrooms then pepperoni.
Place your pizza in the oven and bake at 400° for 15-20 minutes.
Top with fresh basil.
Serve pizza warm and enjoy!
Who said eating keto friendly foods had to be bland and boring?! This pepperoni chaffle makes ketosis as delicious as it is nutritious!
Unlike the quick energy spikes and crashes with high-carb meals, the Chaffle Keto Pizza provides sustainable energy, keeping you fueled and focused throughout the day.
Have you tried this Chaffle Pizza?
I’d love to hear about your experience!
Share your thoughts, variations, and feedback in the comments below.
This article may contain links from my partners. I may receive a small commission if you make a purchase through a link. Please read my disclosure and how I make money here.
Enjoy my Apple Pecan Smoothie, where the perfect blend of crisp apples, earthy pecans, warm cinnamon, creamy avocado, and the sweetness of maple syrup blend together to create one delicious smoothie!
Each ingredient in this apple pecan smoothie contributes to a delicious and nutritious blend.
Avocado: Can we all just agree that Avocado is the bees knees?! It creates this creamy texture and provides healthy fats. These fats help keep you satiated and provide that velvety smooth texture in the smoothie.
Maple Syrup: Adds Sweetener and brings a distinct warm sweetness to your blend.
Ice: helps achieve the consistency and gives the smoothie a refreshing chill.
Apple:Adds natural sweetness, a fruity flavor, and provides dietary fiber.
Cinnamon: Enhances the overall taste with warm and comforting notes and may have potential health benefits.
Pecans: Introduce a nutty flavor and provide a good source of healthy fats, protein, and essential nutrients.
Rolled Oats: Contribute to the smoothie’s texture, add fiber for satiety, and provide complex carbohydrates for sustained energy.


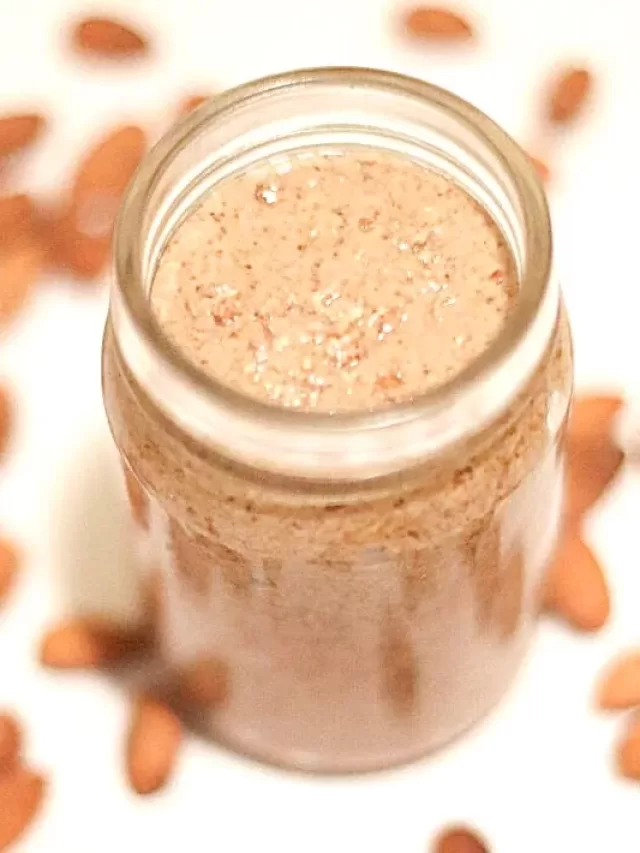


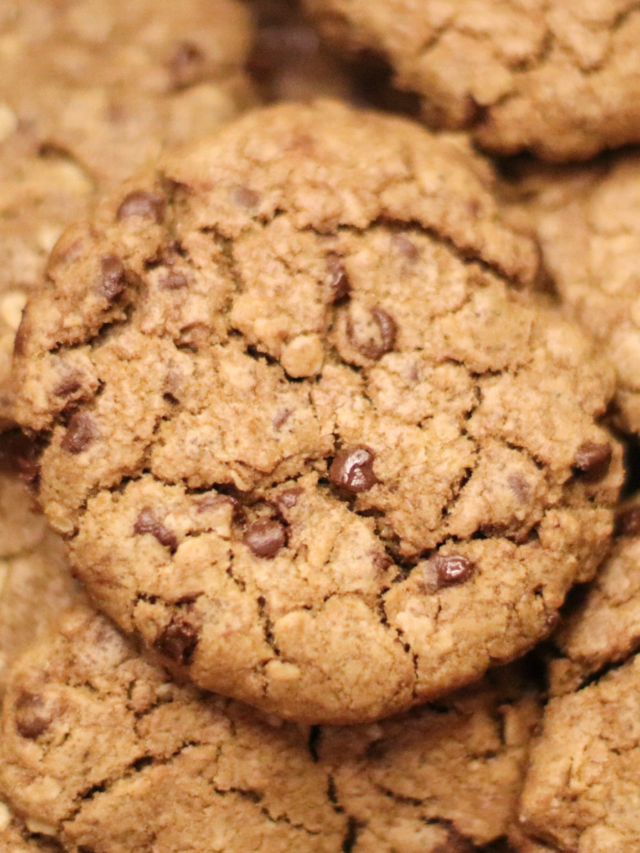


 6.
6. 7.
7.


